How to Set up RoomRaccoon with Tapkey: A Step-by-Step Guide
Integrating RoomRaccoon with Tapkey allows seamless management of smart lock permissions for your hotel. This guide will walk you through the installation and setup process, ensuring that your smart locks are properly configured to work with RoomRaccoon.
Here's an overview of this help center article:
- Overview of the integration workflow
- Requirements for the installation
- How to install the RoomRaccoon Add-On
- How to create associations between rooms and locks
1. Overview of the Integration Workflow
Once you install the RoomRaccoon Add-On, it seamlessly integrates with Tapkey to manage room access based on reservations. How it works? A check-in to a room in RoomRaccoon is going to create permissions for configured locks in Tapkey for booked guests. .These permissions are specific to the guest and the room they are staying in. The permissions are created only at the moment of check-in and removed immediately at check-out from the RoomRaccoon platform. The system ensures that access permissions are only valid during the guest’s stay, providing both security and convenience. Guests have access while they are checked in, but their permissions are revoked as soon as they check out.
2. Requirements for the Installation
- RoomRaccoon Subscription or Demo account.
- Tapkey Smart Locks are already installed in the facilities. [How to register locks]
- RoomRaccoon integration credentials (This is not needed to be created upfront, part of the guide will consist of requesting these credentials)
Note: If you want to evaluate our solution please contact sales@tapkey.com, our team will offer additional guidance.
3. How to install the RoomRaccoon Add-On and connect it with Tapkey

1. Login to Tapkey System
Login to Tapkey locking system as an Owner, navigate to Add-Ons, tap on “EXPLORE ADD-ONS MARKETPLACE”. In the RoomRaccoon Add-On tap “Continue with RoomRaccoon”.
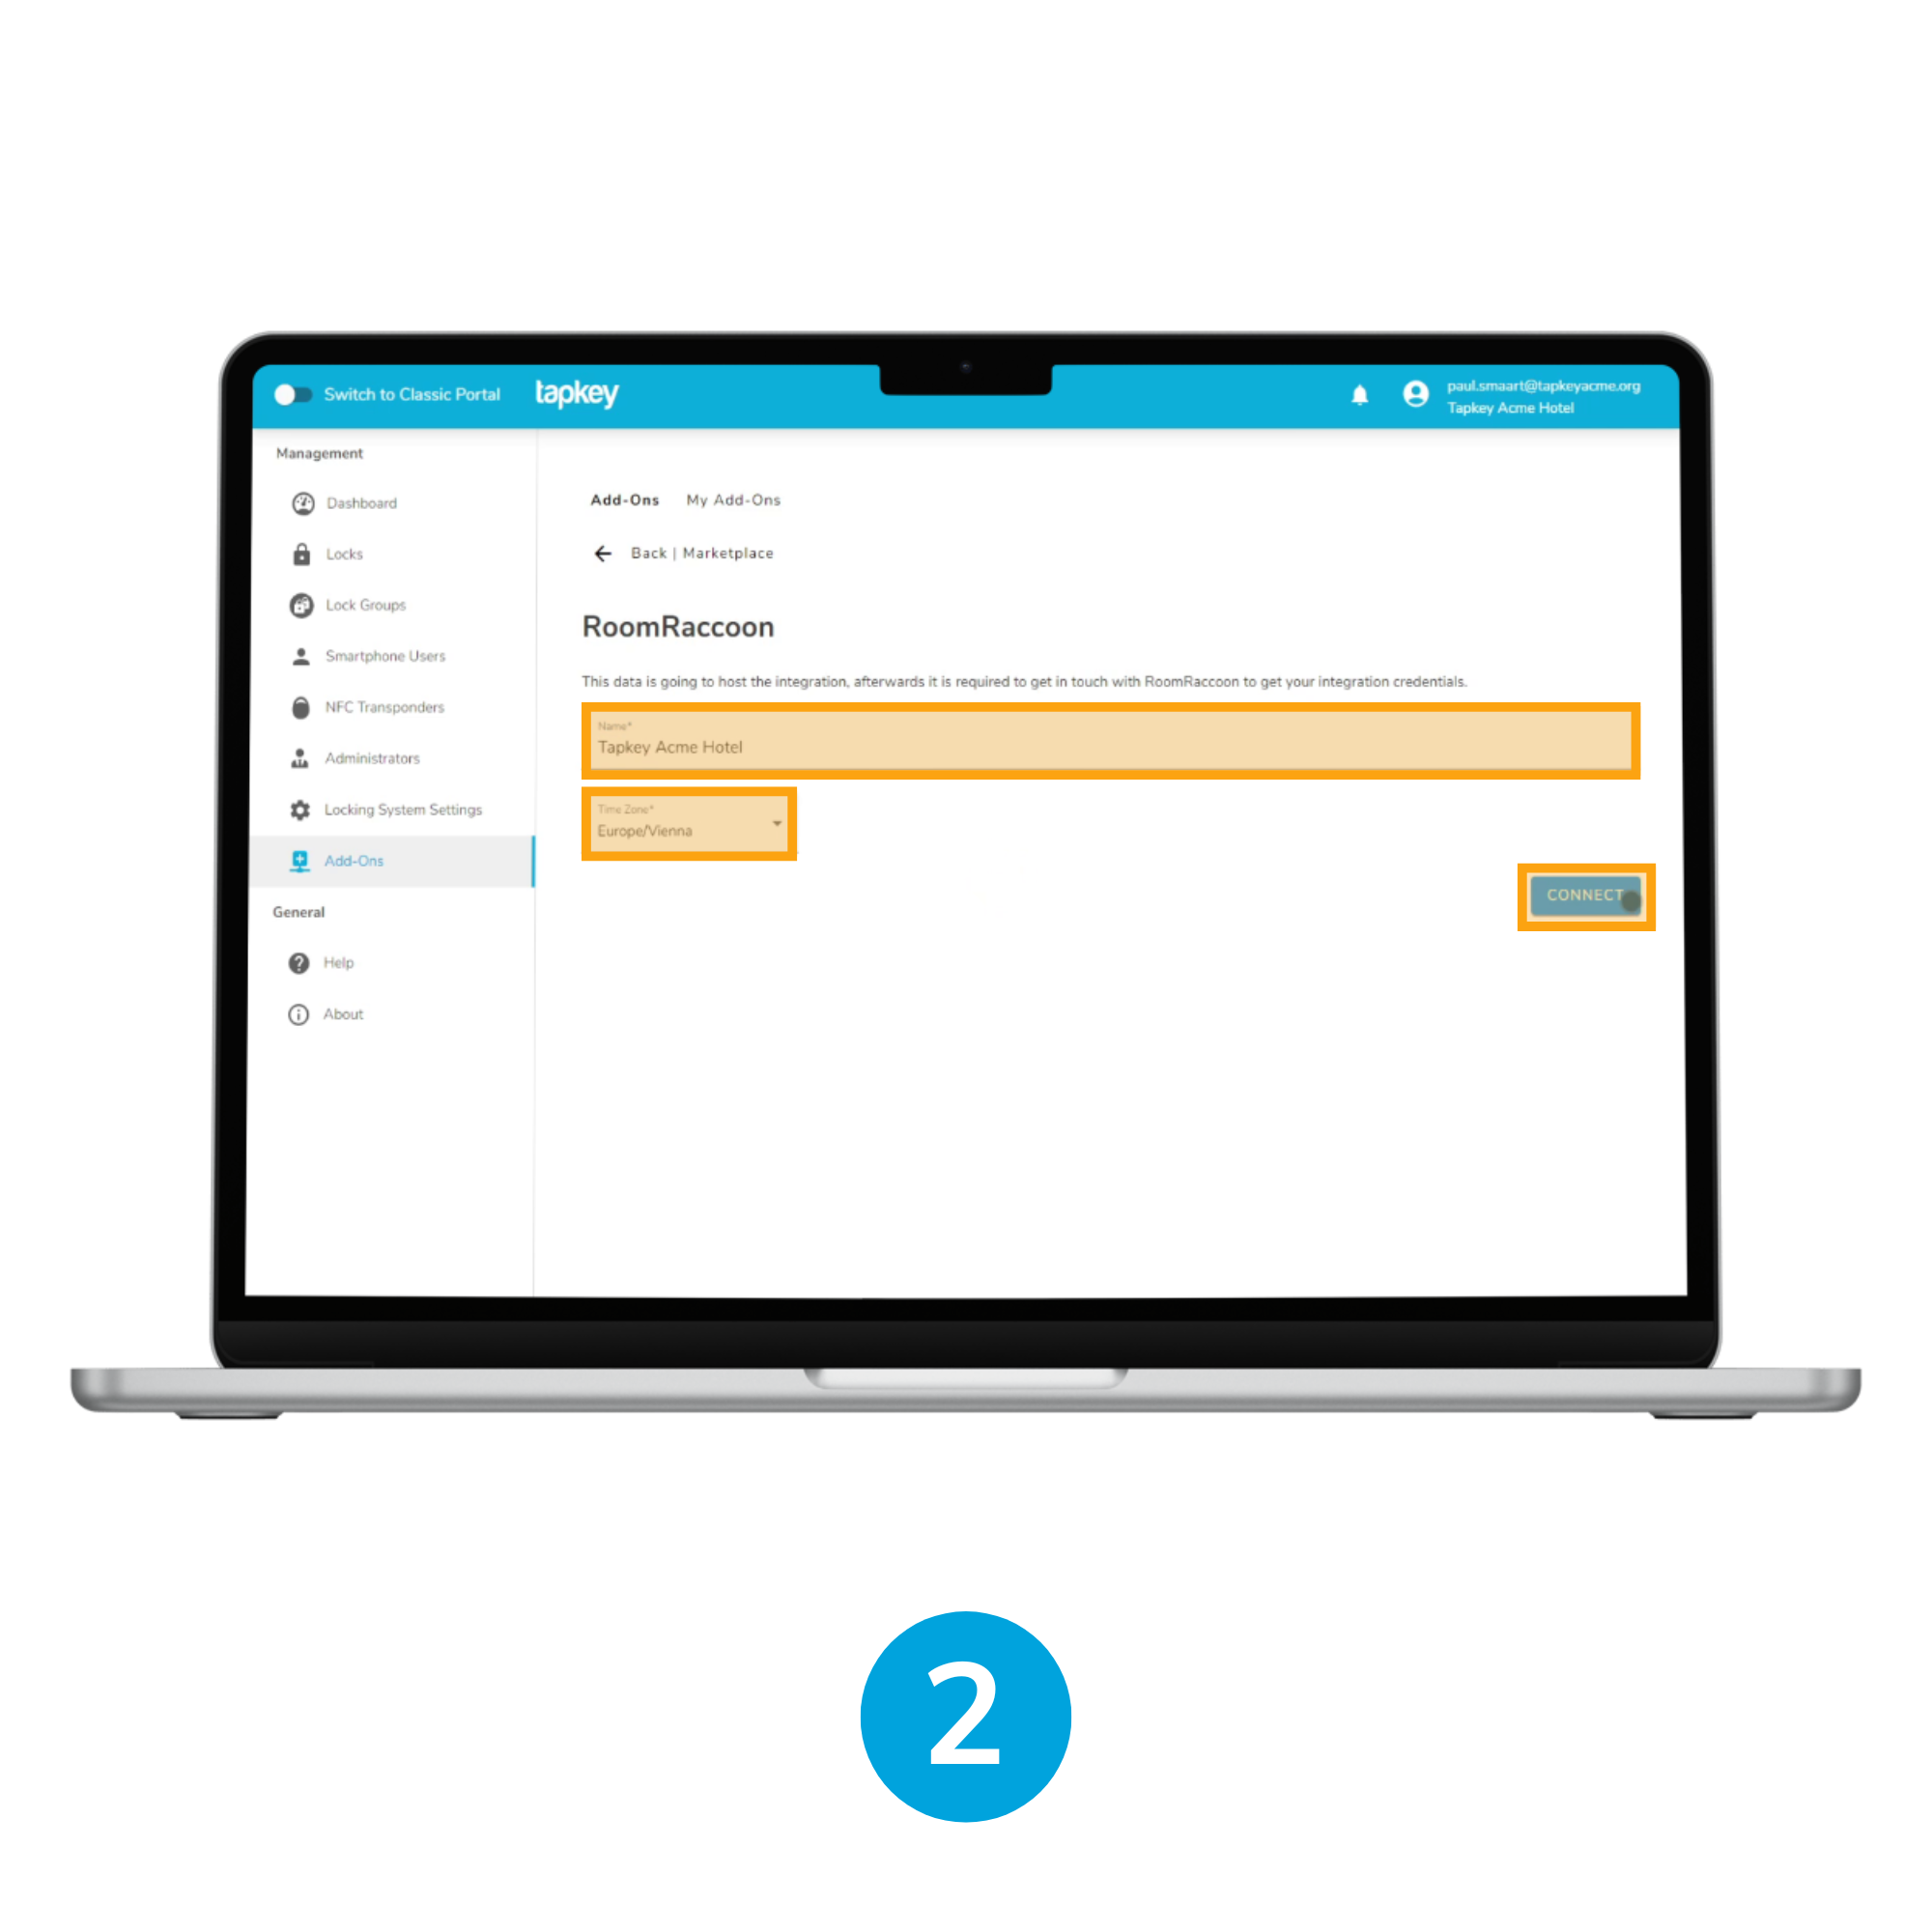
2. Enter Basic Information
Now enter the required information for RoomRaccoon, name of the hotel and time zone. Ensure the time zone matches your hotel's location for accurate permission management.
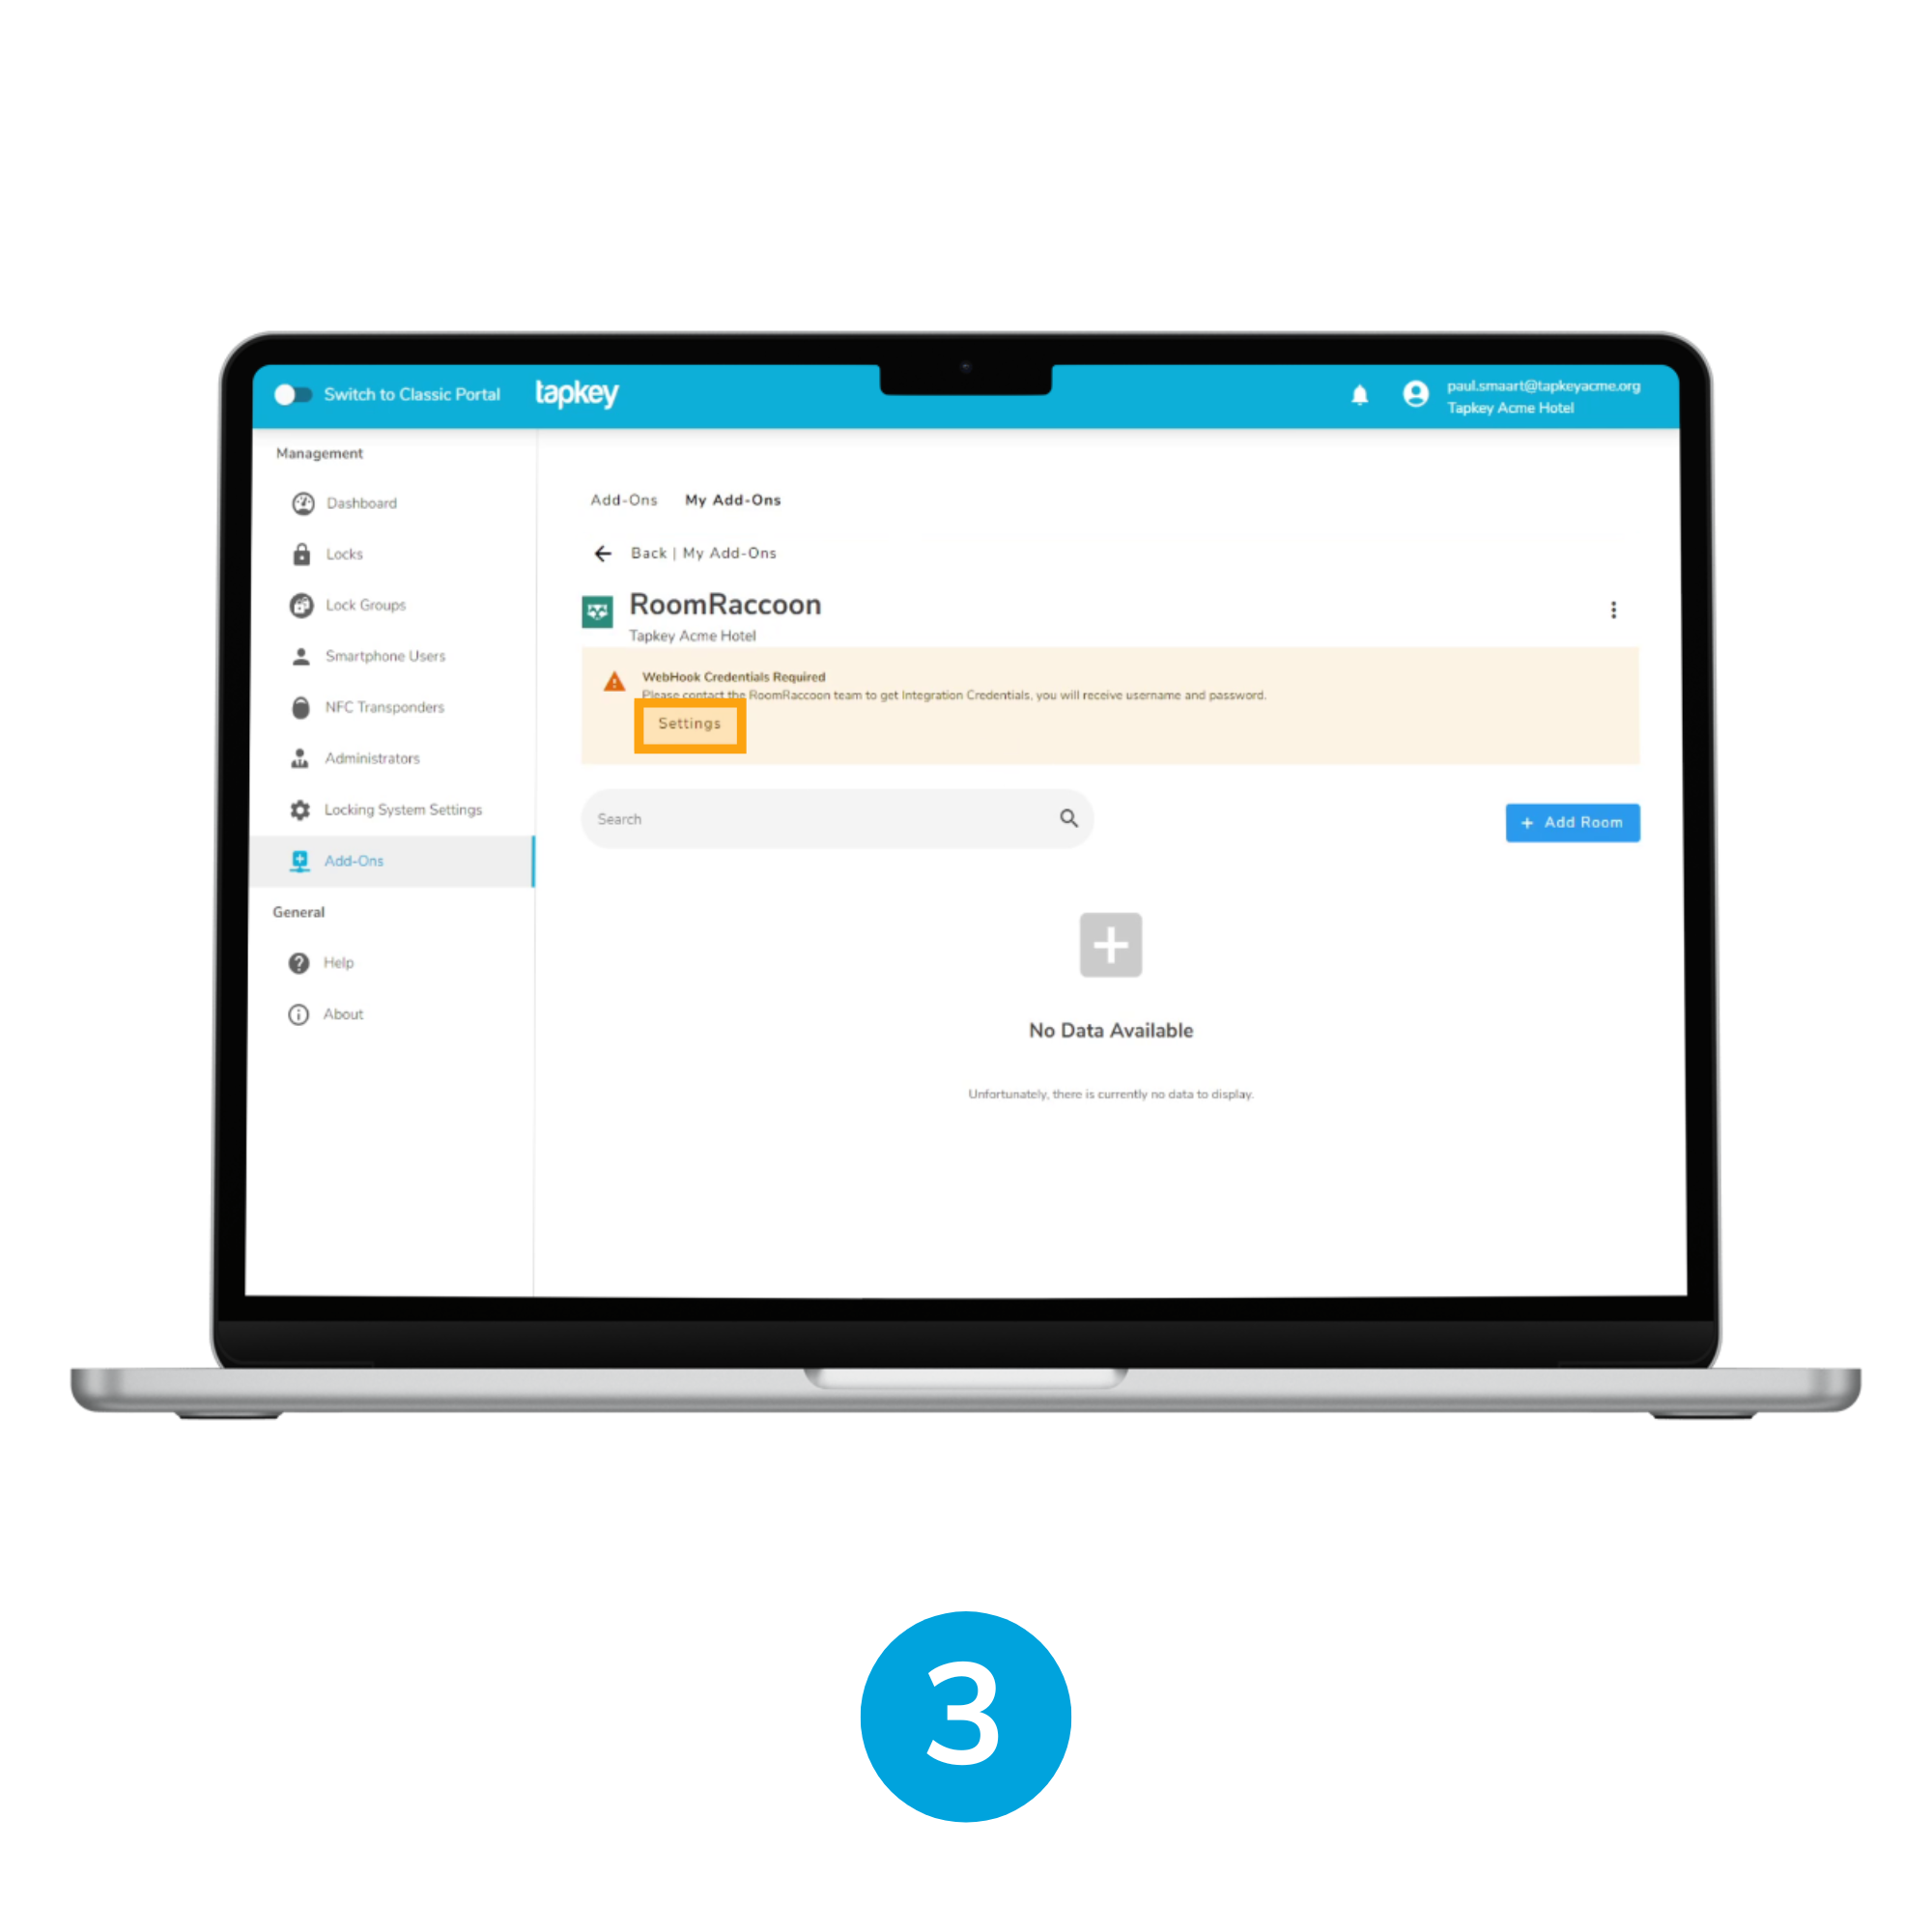
3. Set up Connectivity
Once installed, you will be redirected to the Initial installation screen. At this point it is important to set up the connectivity with RoomRaccoon. Navigate to "Settings" to continue with the setup process.
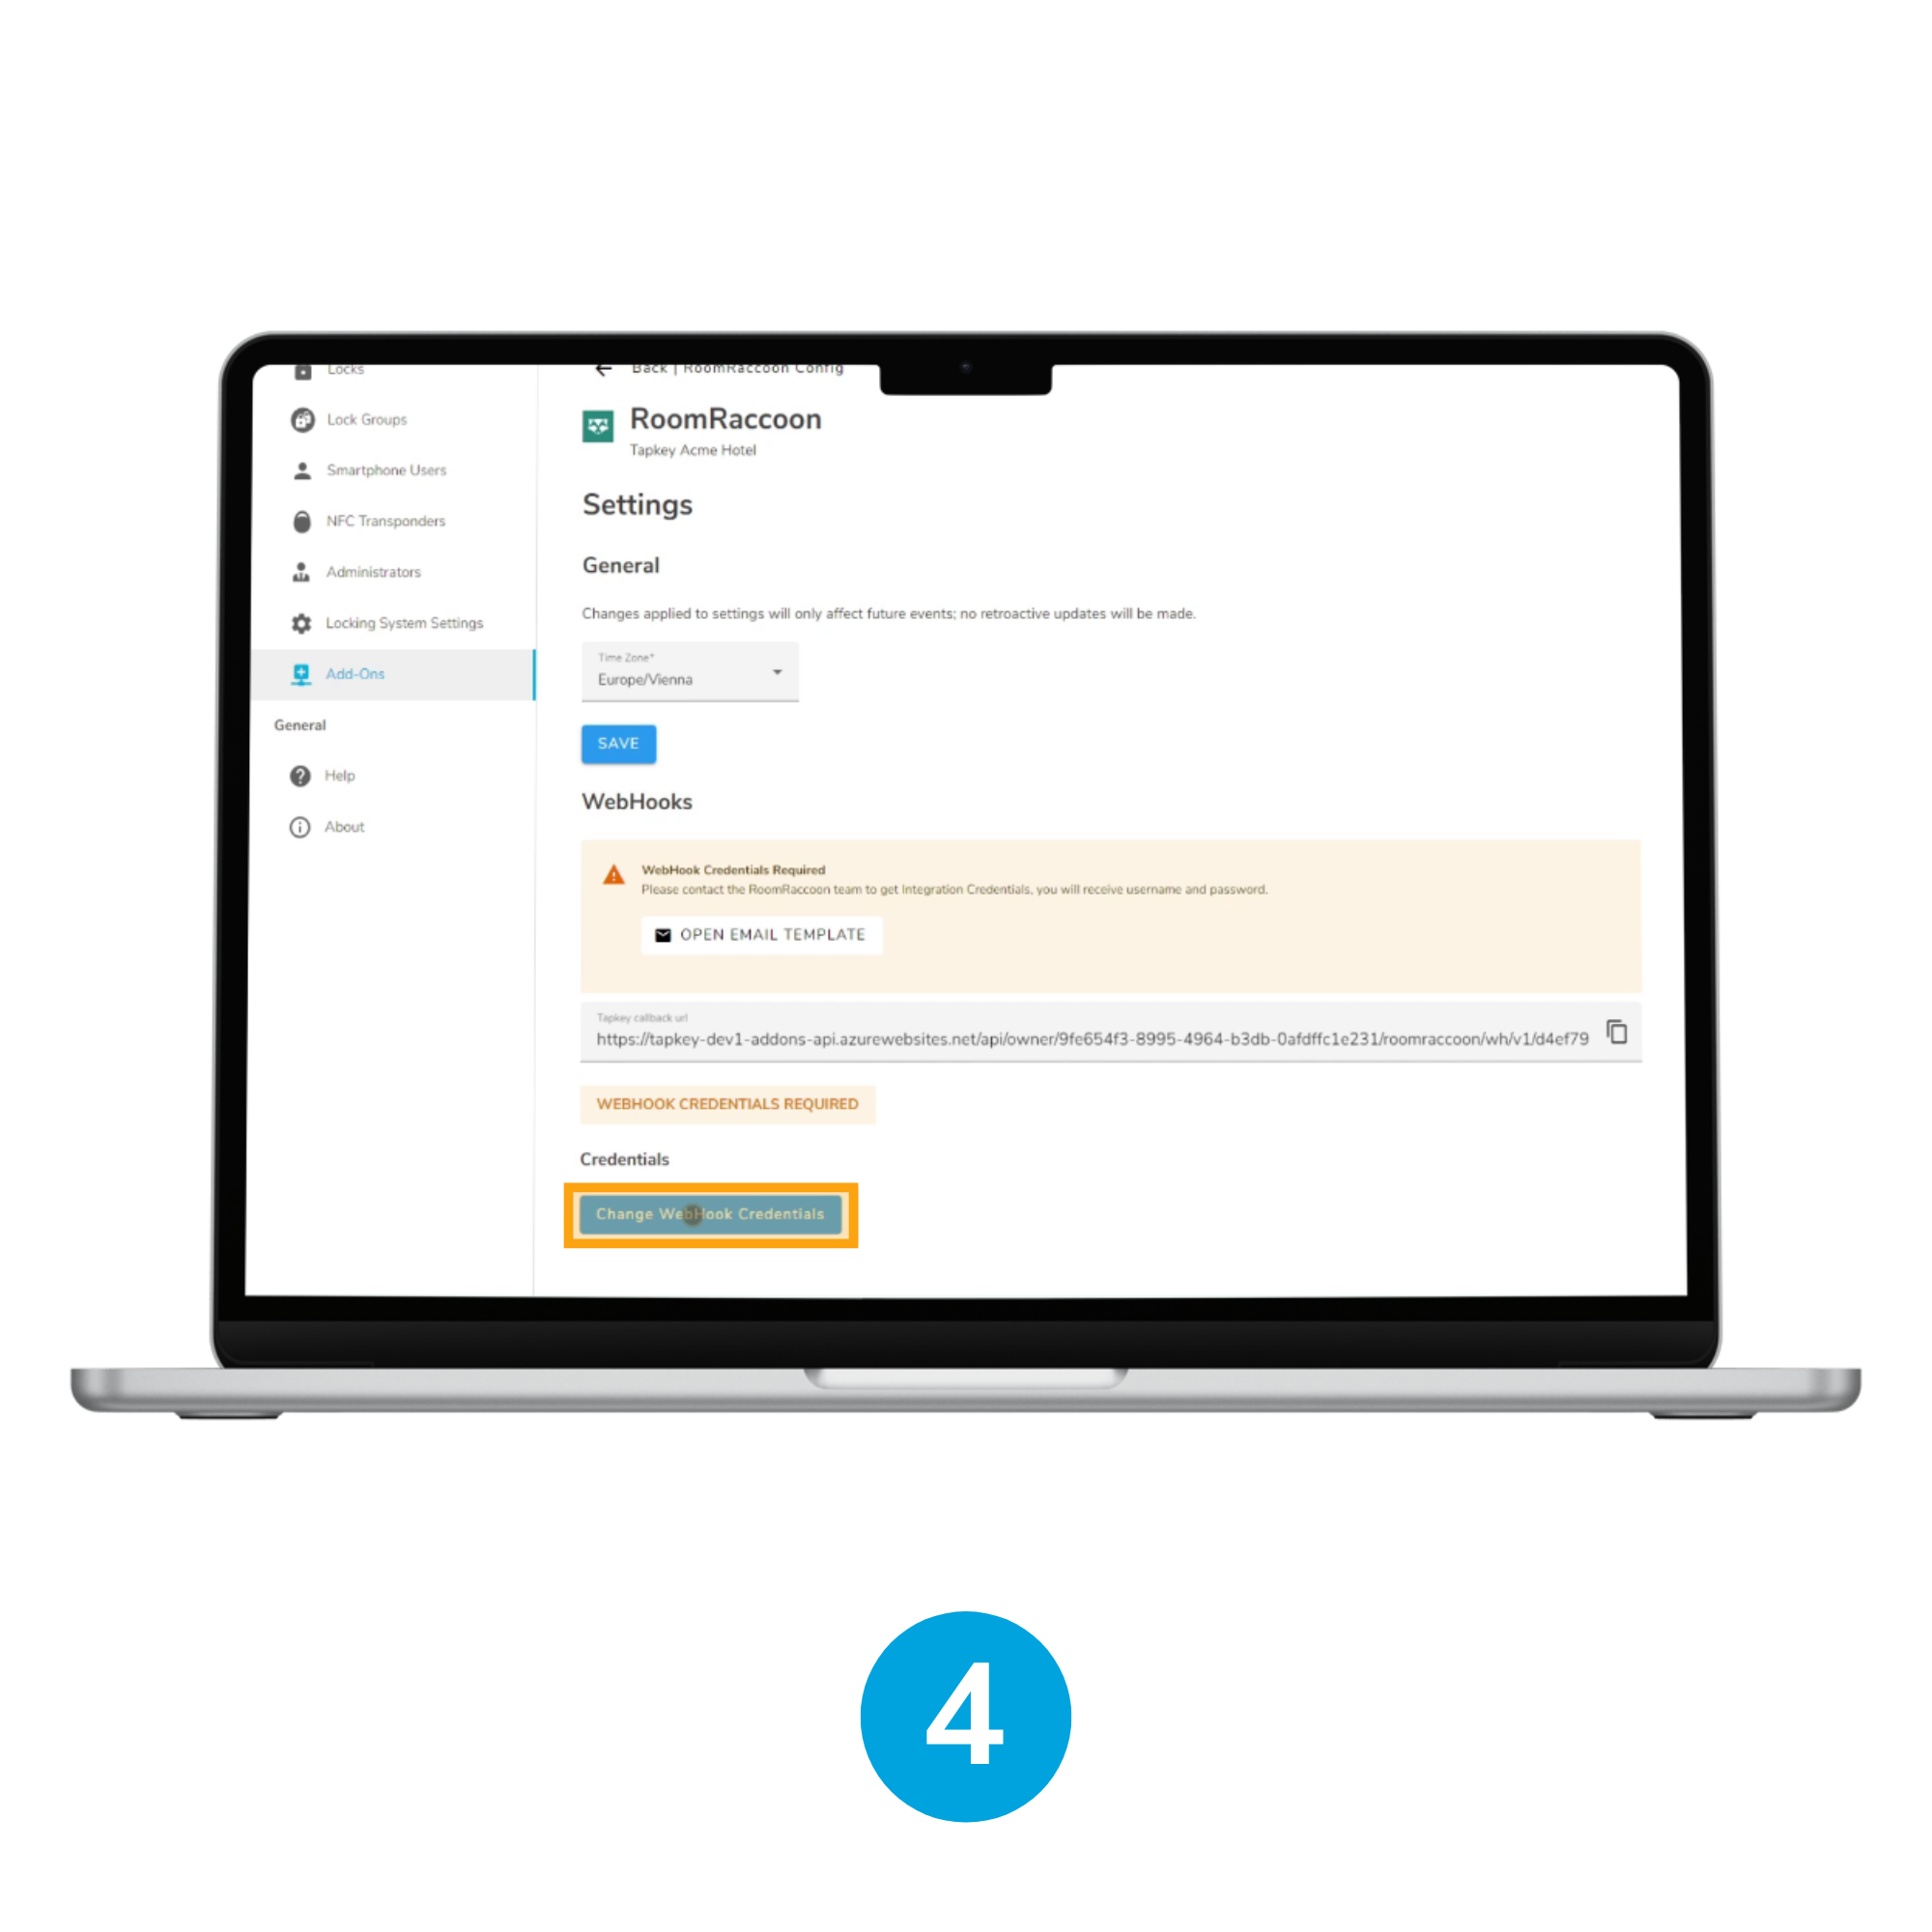
4. Configure WebHook Credentials
Set a username and password by Clicking Change WebHook Credentials, in the WebHooks section. This will allow you to create a secure username and password that would be used for integration purposes.
Note: This username and password is not intended to be used as login credentials in RoomRaccoon or Tapkey. It is only used by the integration to secure the connection between the two parts. Make sure your username and password is secure by using a combination between capital letters, numbers and special characters.
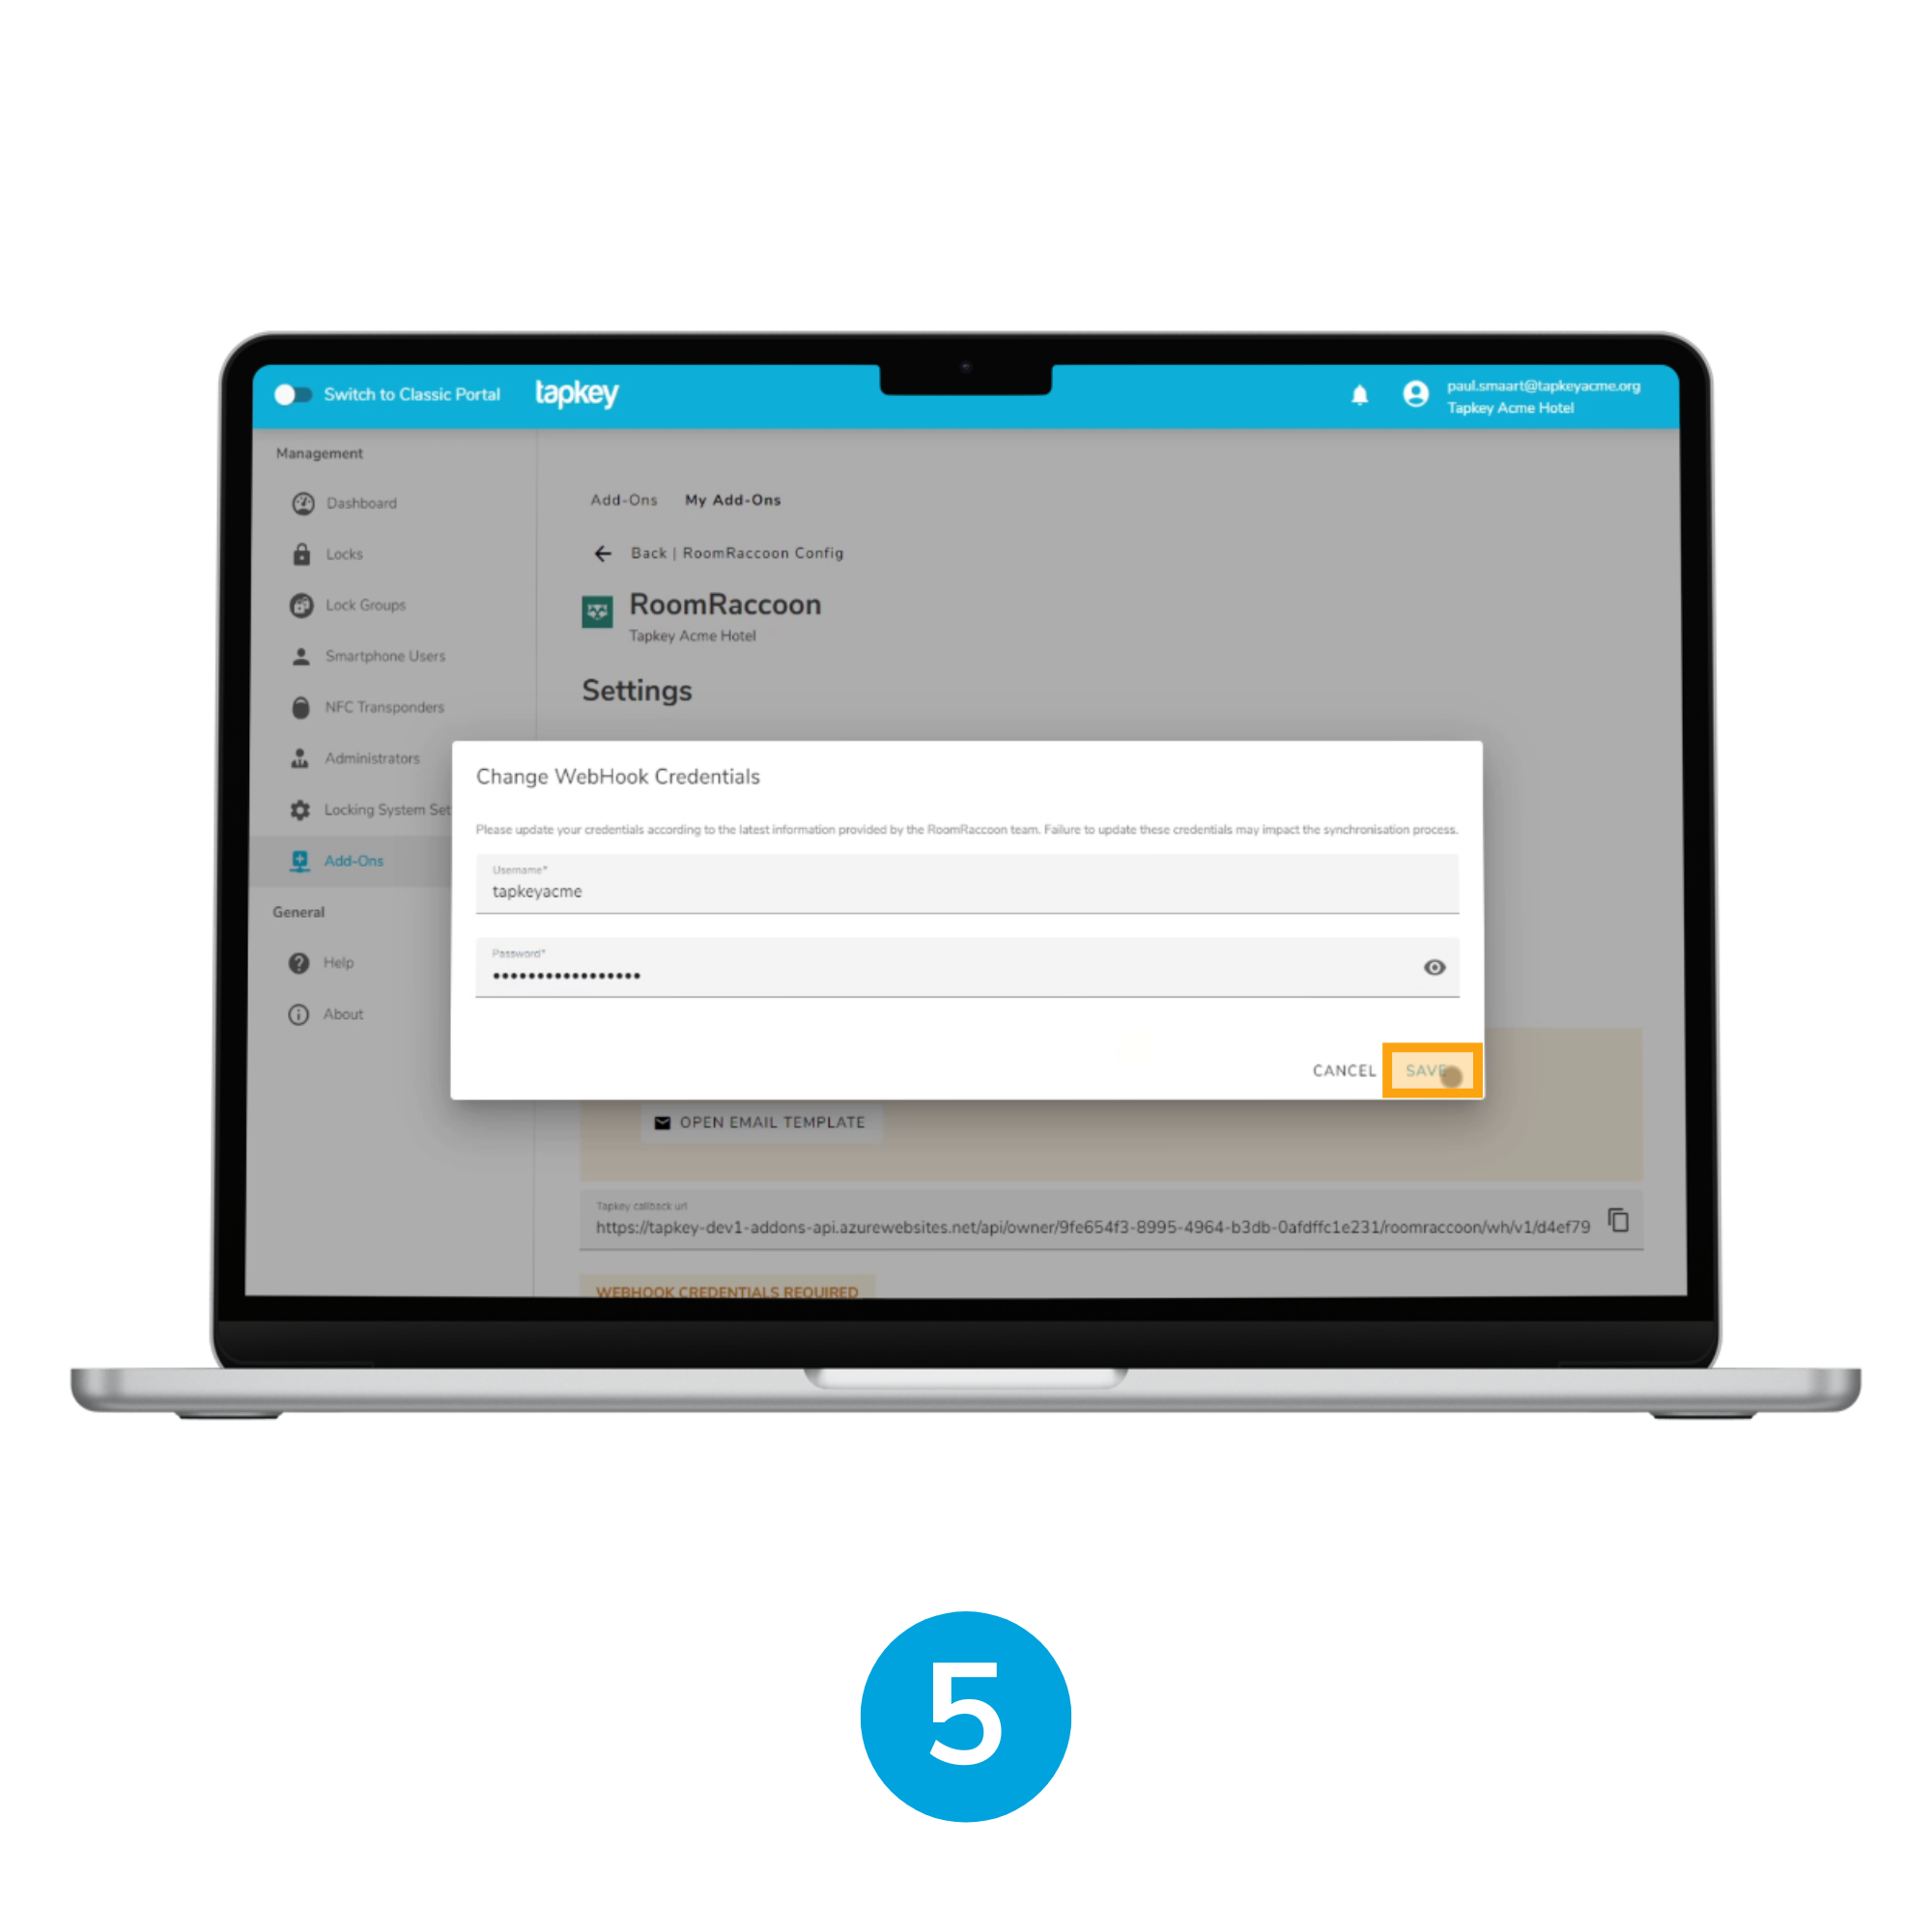 5. Save Your Credentials
Set your username and password and tap SAVE. Save these credentials in your end given that they would be use in the upcoming step.
6. Send an Email to RoomRaccoon
Send an email to steven.reffin@roomraccoon.com, indicating the data of your hotel and the intention to integrate with Tapkey, make sure you include in your email: username, password and Tapkey callback url displayed in the screen.
7. Verify Connection
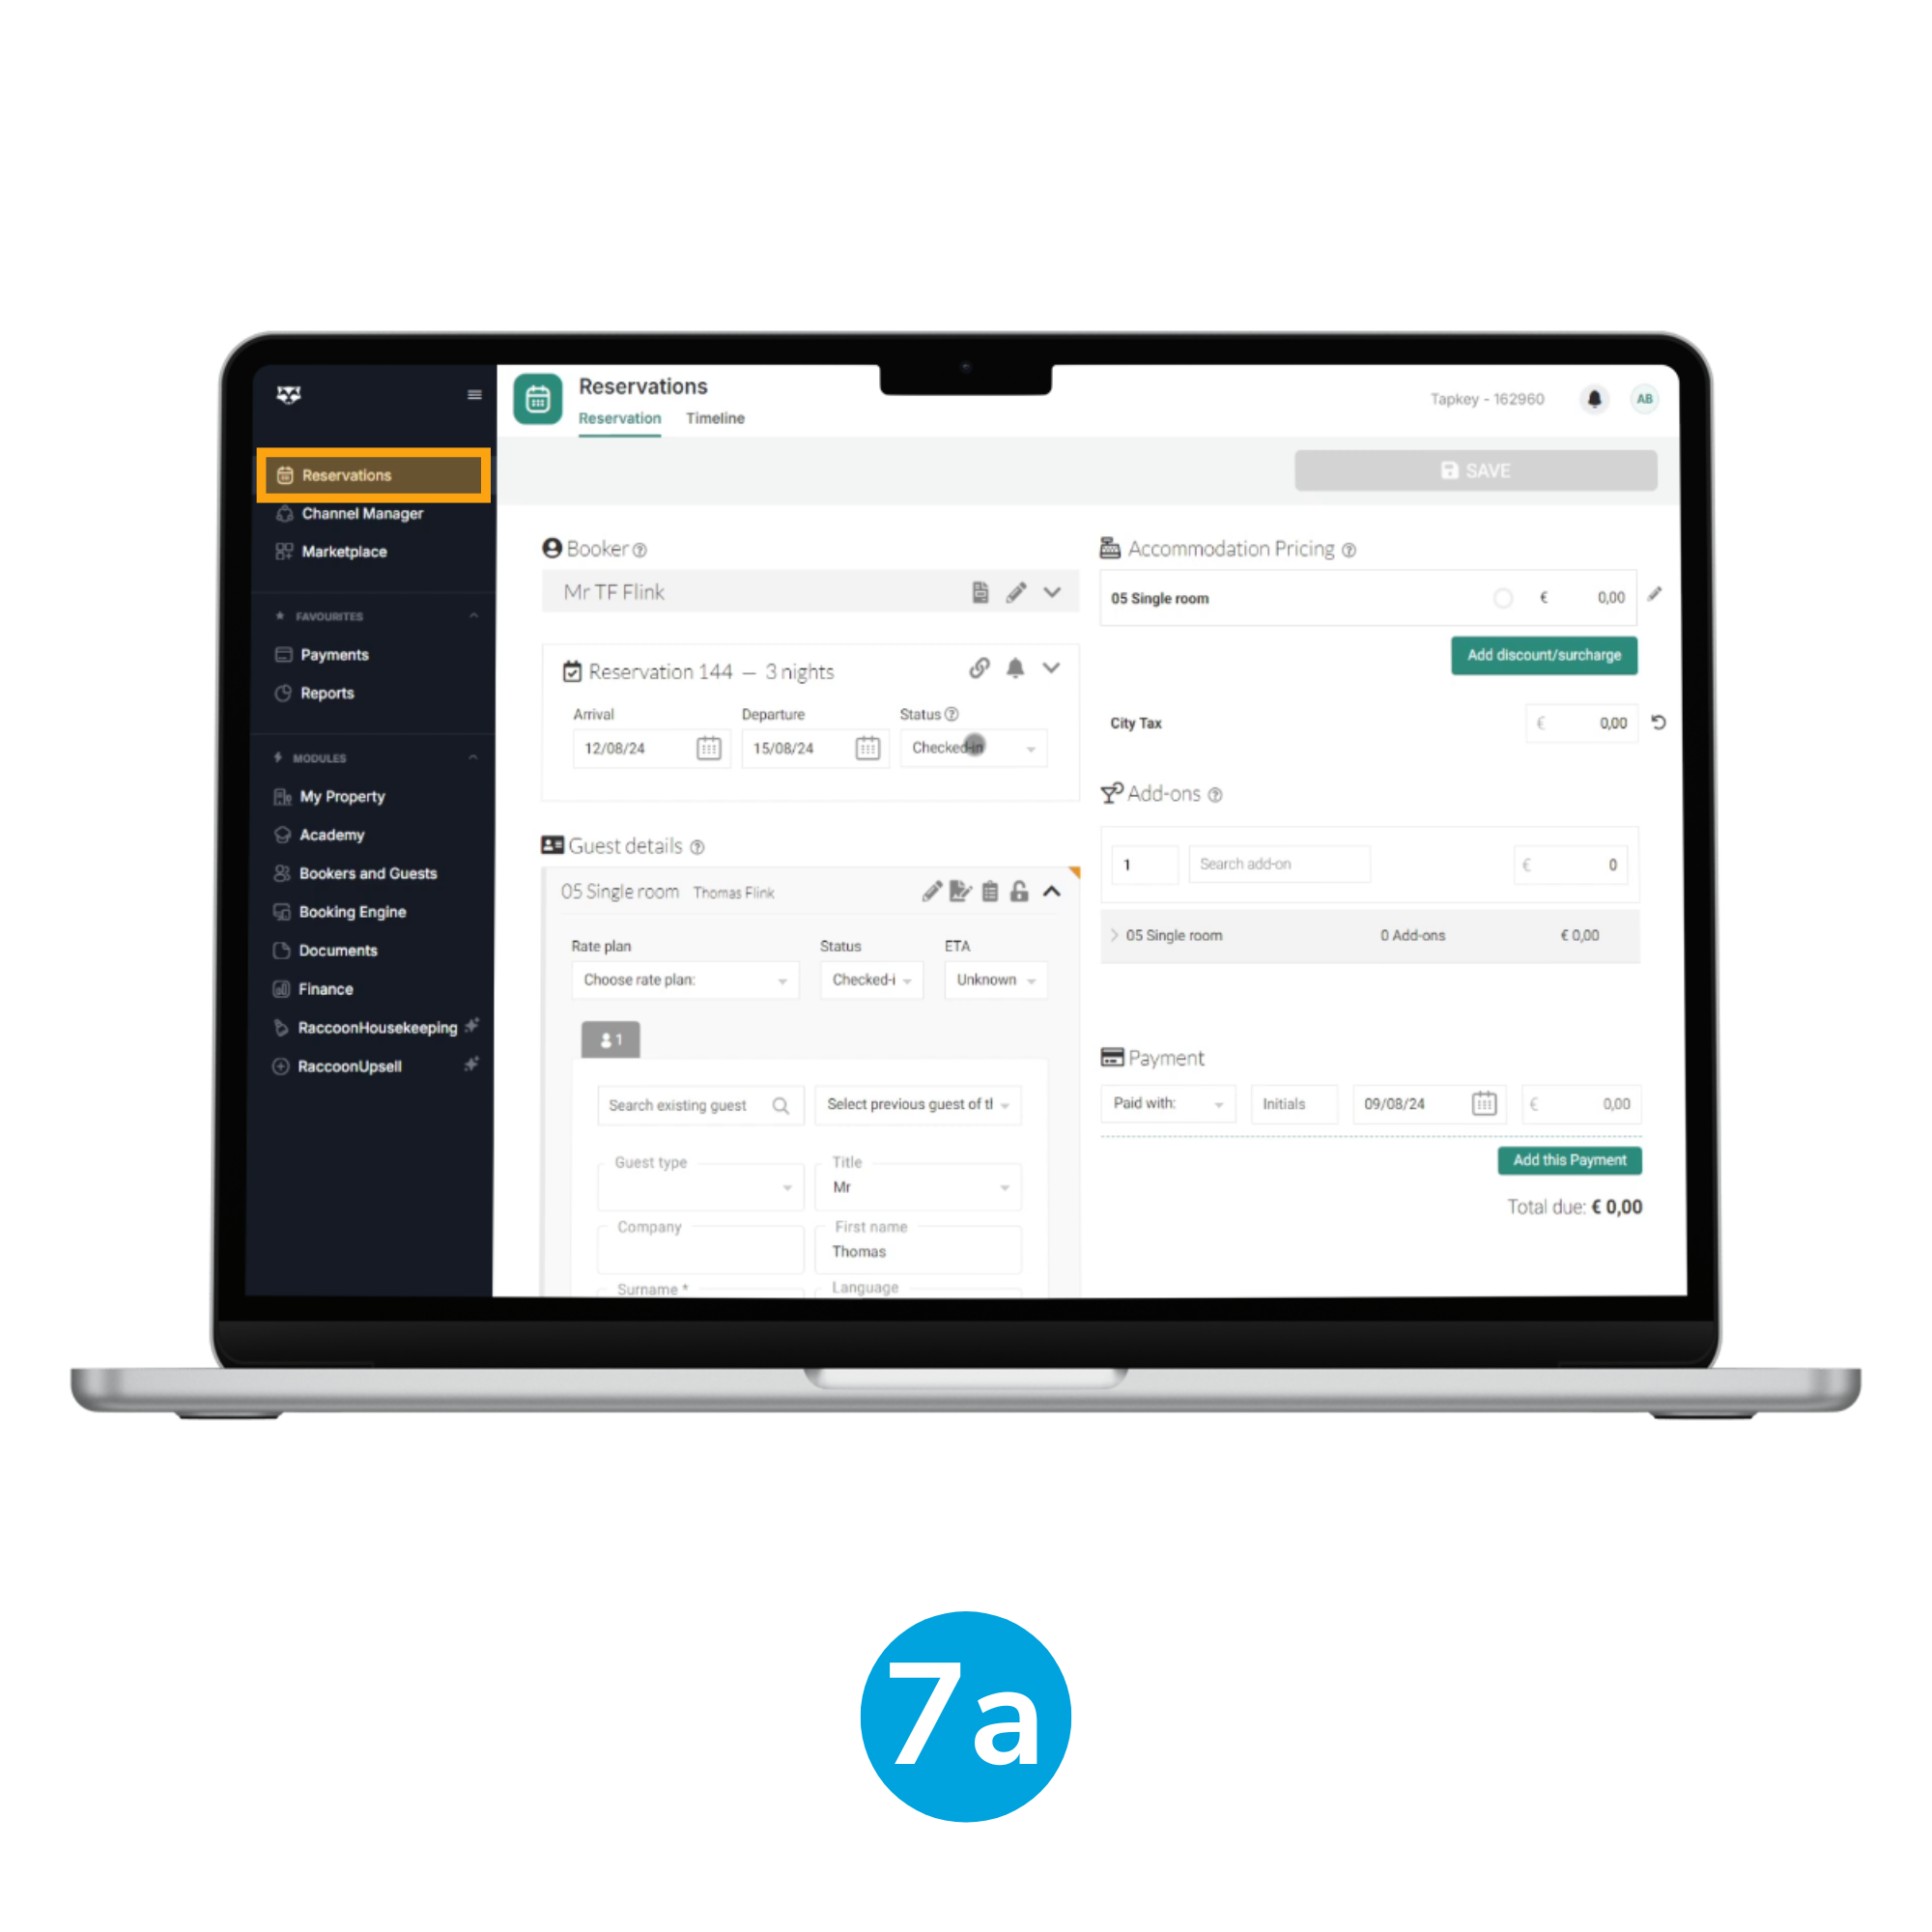
Once you have received an answer from the RoomRaccoon team, we will check the connection status by creating an event in RoomRaccoon. For this, navigate to the Reservations module (7a) it is not required to use any specific information.
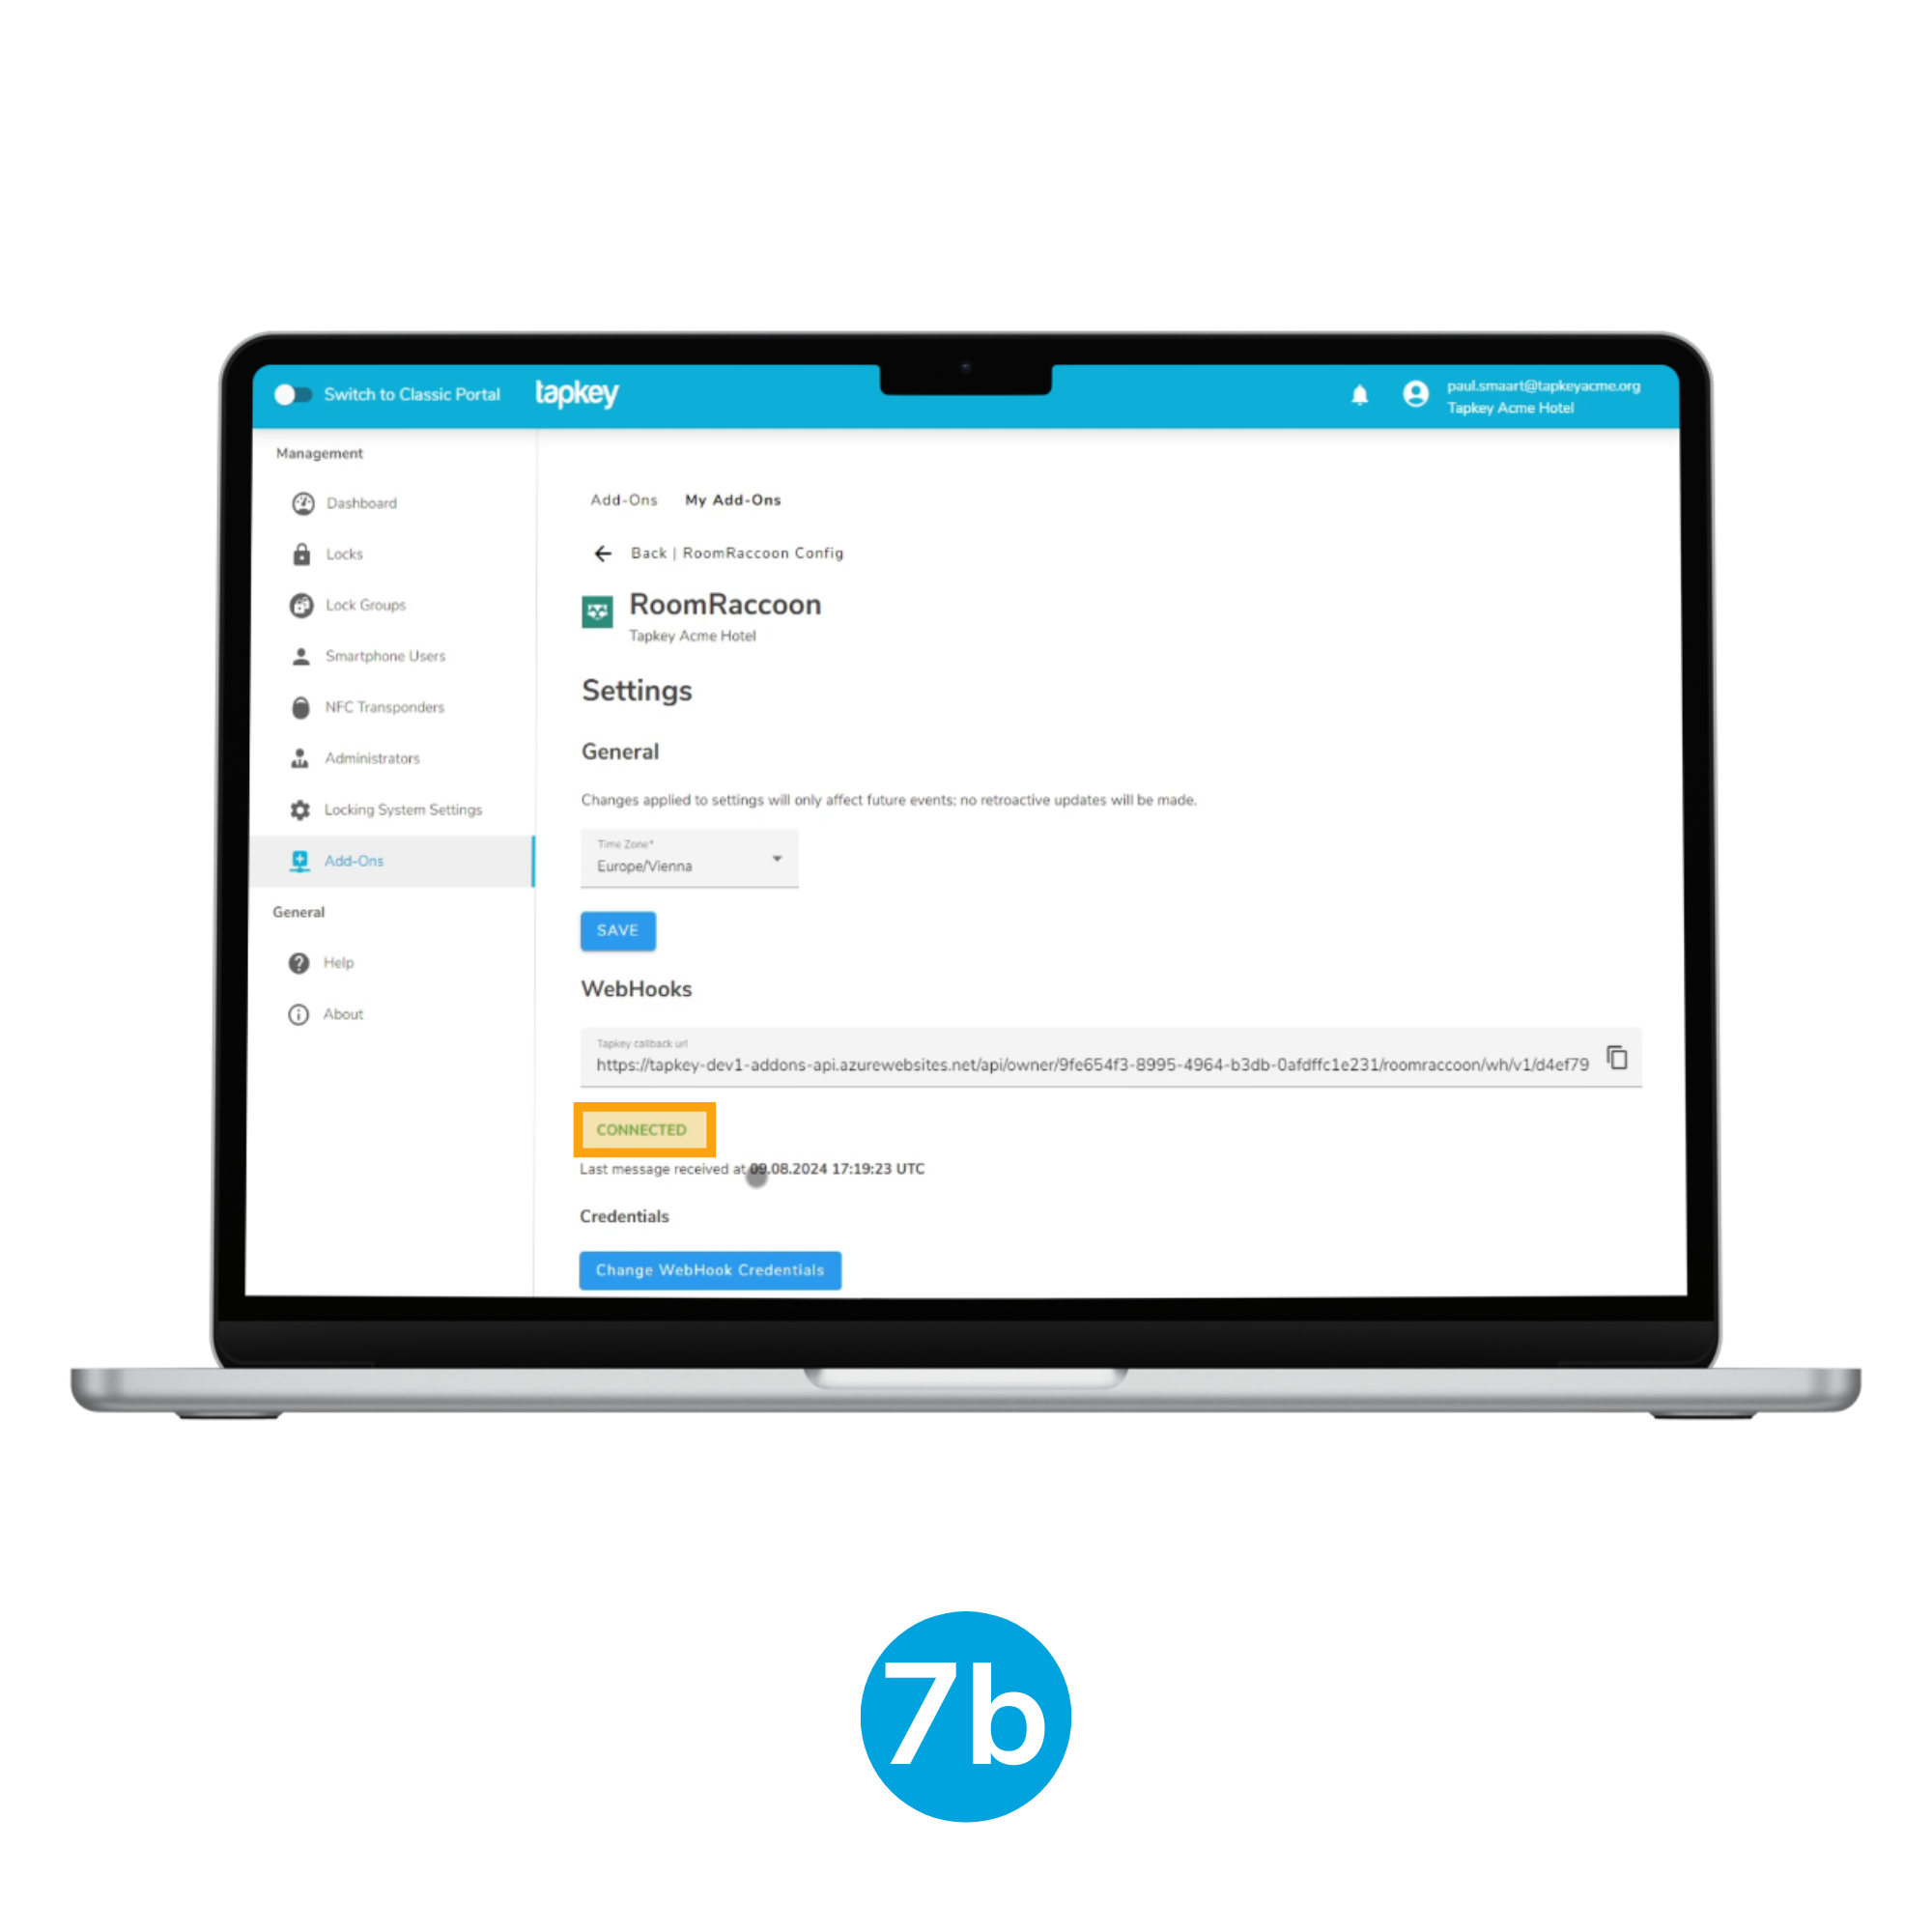
If the connection status shows “Connected” under RoomRaccoon > Installation > Edit > Settings, the setup is complete. (7b) For issues, contact support@tapkey.com.
4. Create Associations between Rooms and Locks
With the connection established you can start creating your hotel structure in Tapkey to associate the Locks to the Rooms.
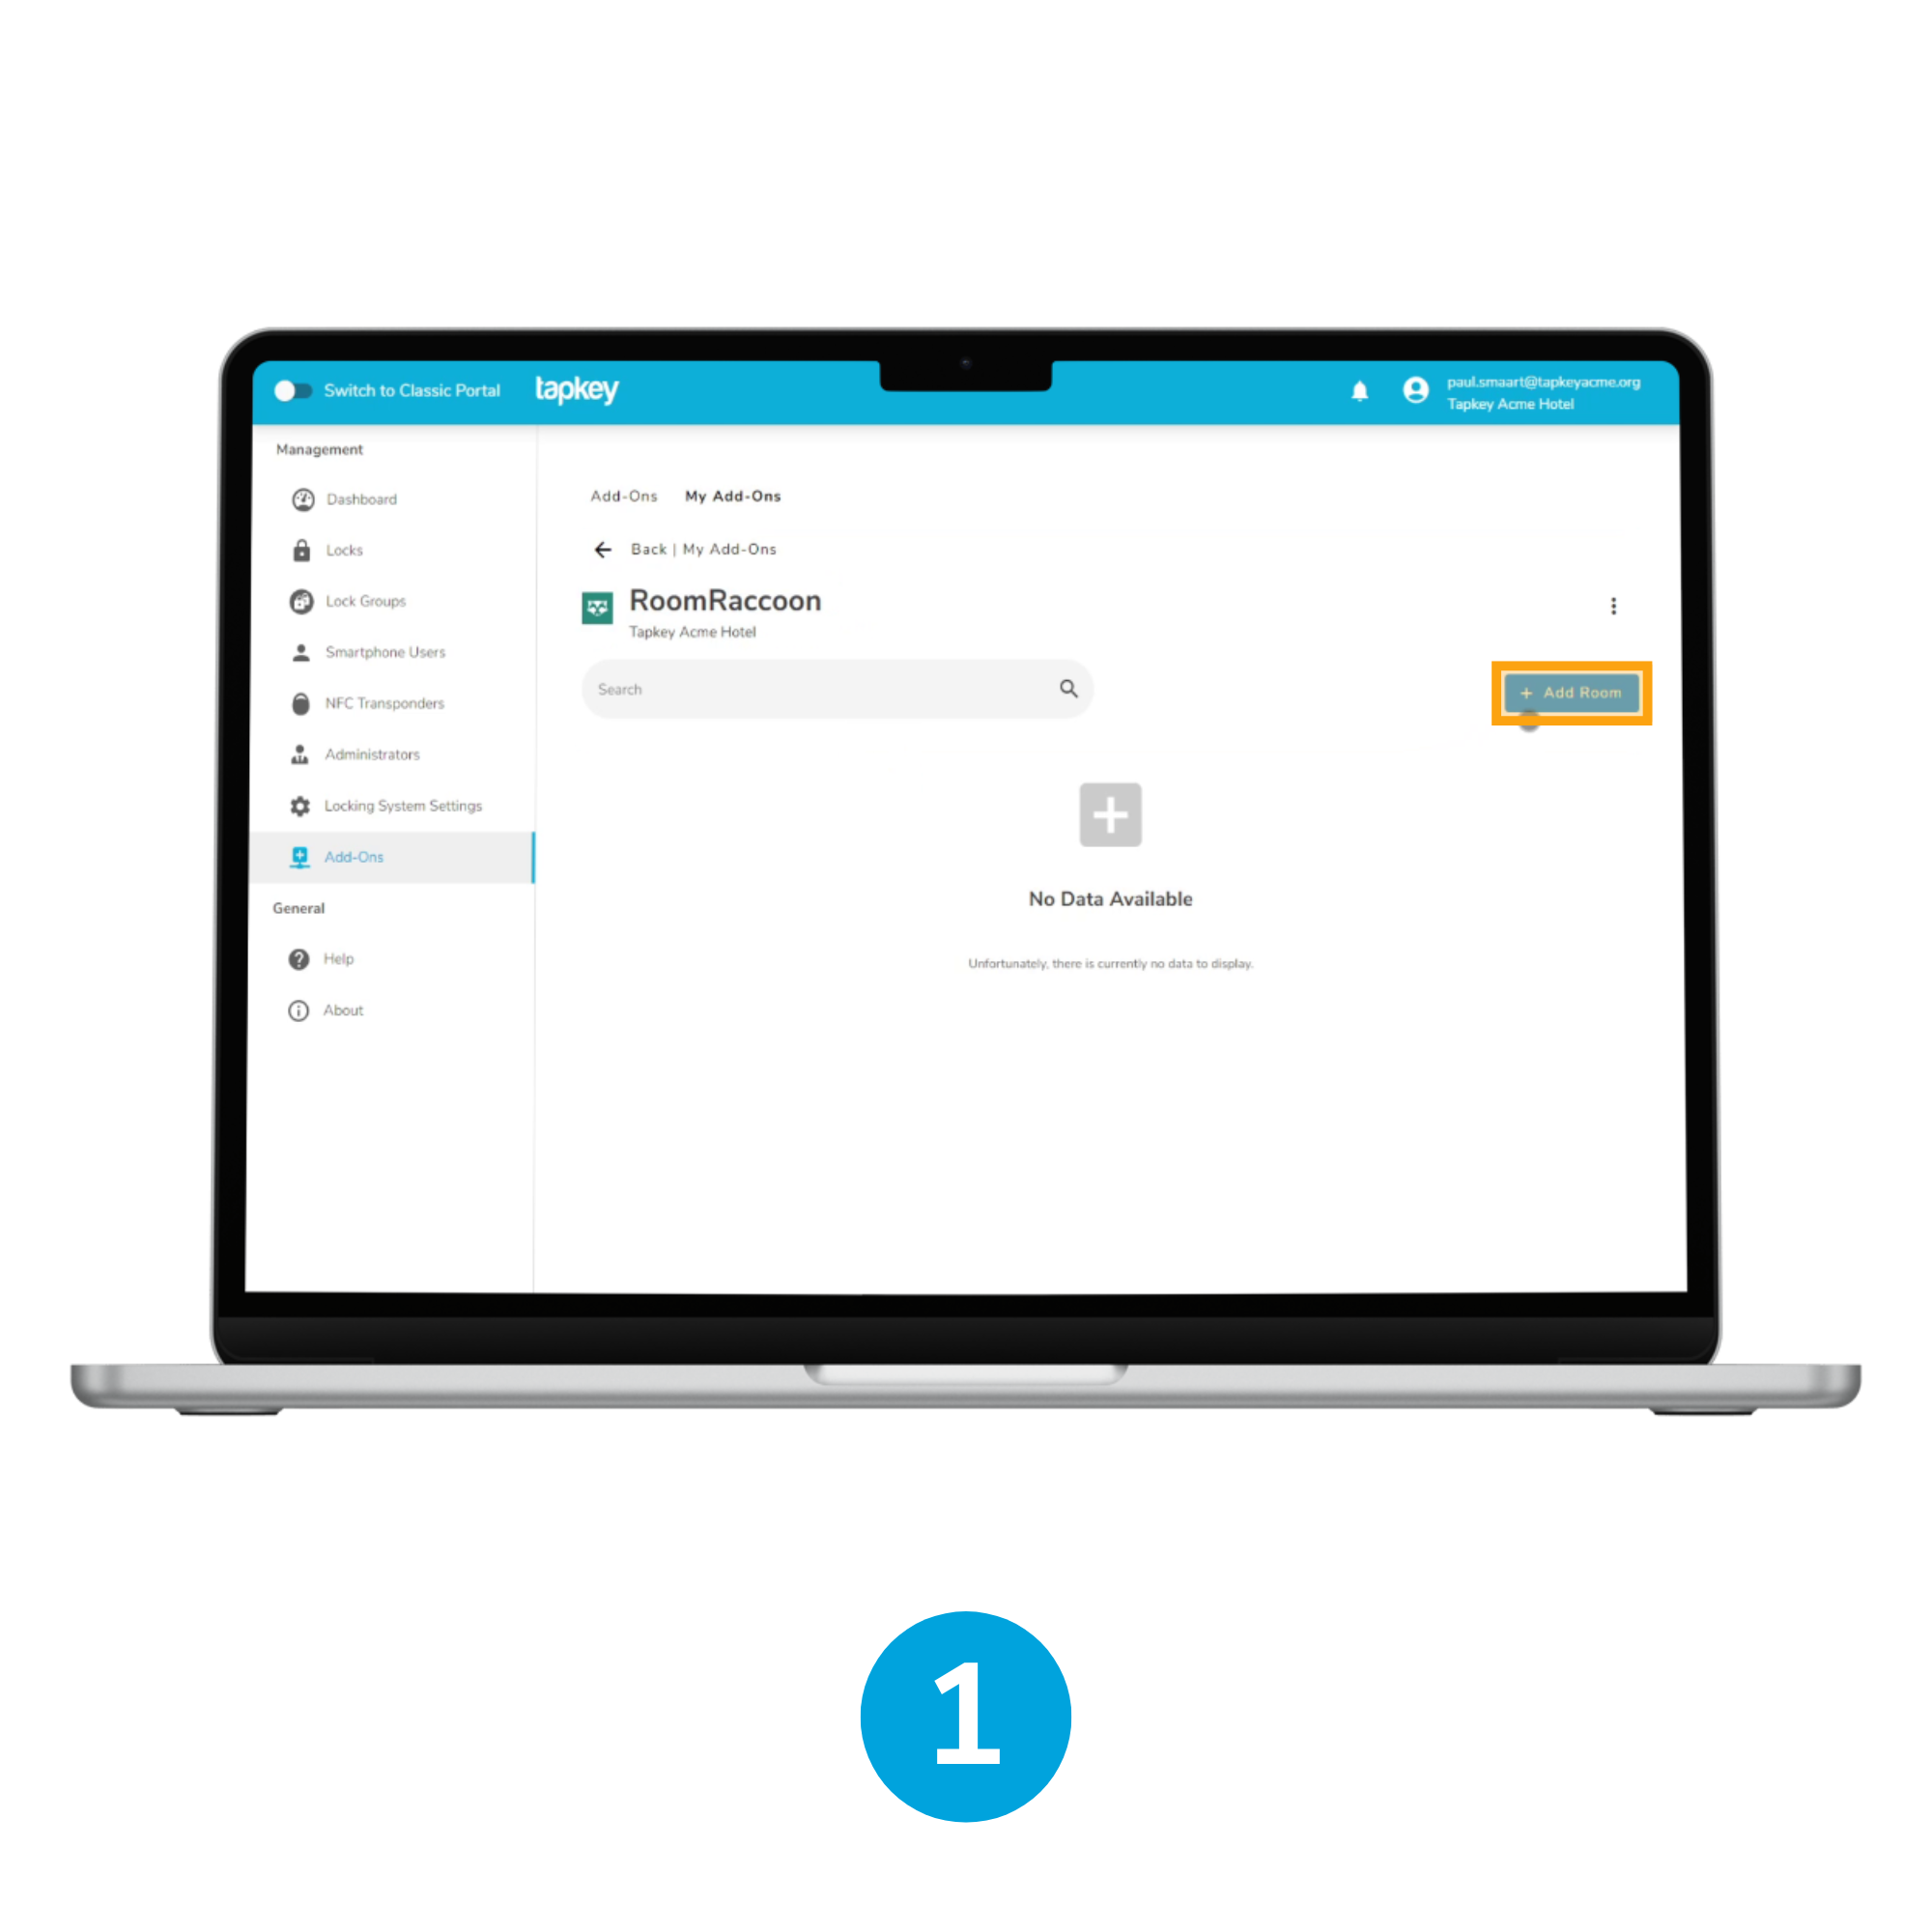
1. Add Rooms
In the initial page of the installed Add-On, you can tap the “Add Room” button. This will allow the creation of the Rooms.

2. Specify Room Details
Enter the number of the Room and an identifiable name as requested in the screen. Ensure that the room number matches the one used in RoomRaccoon for consistency.
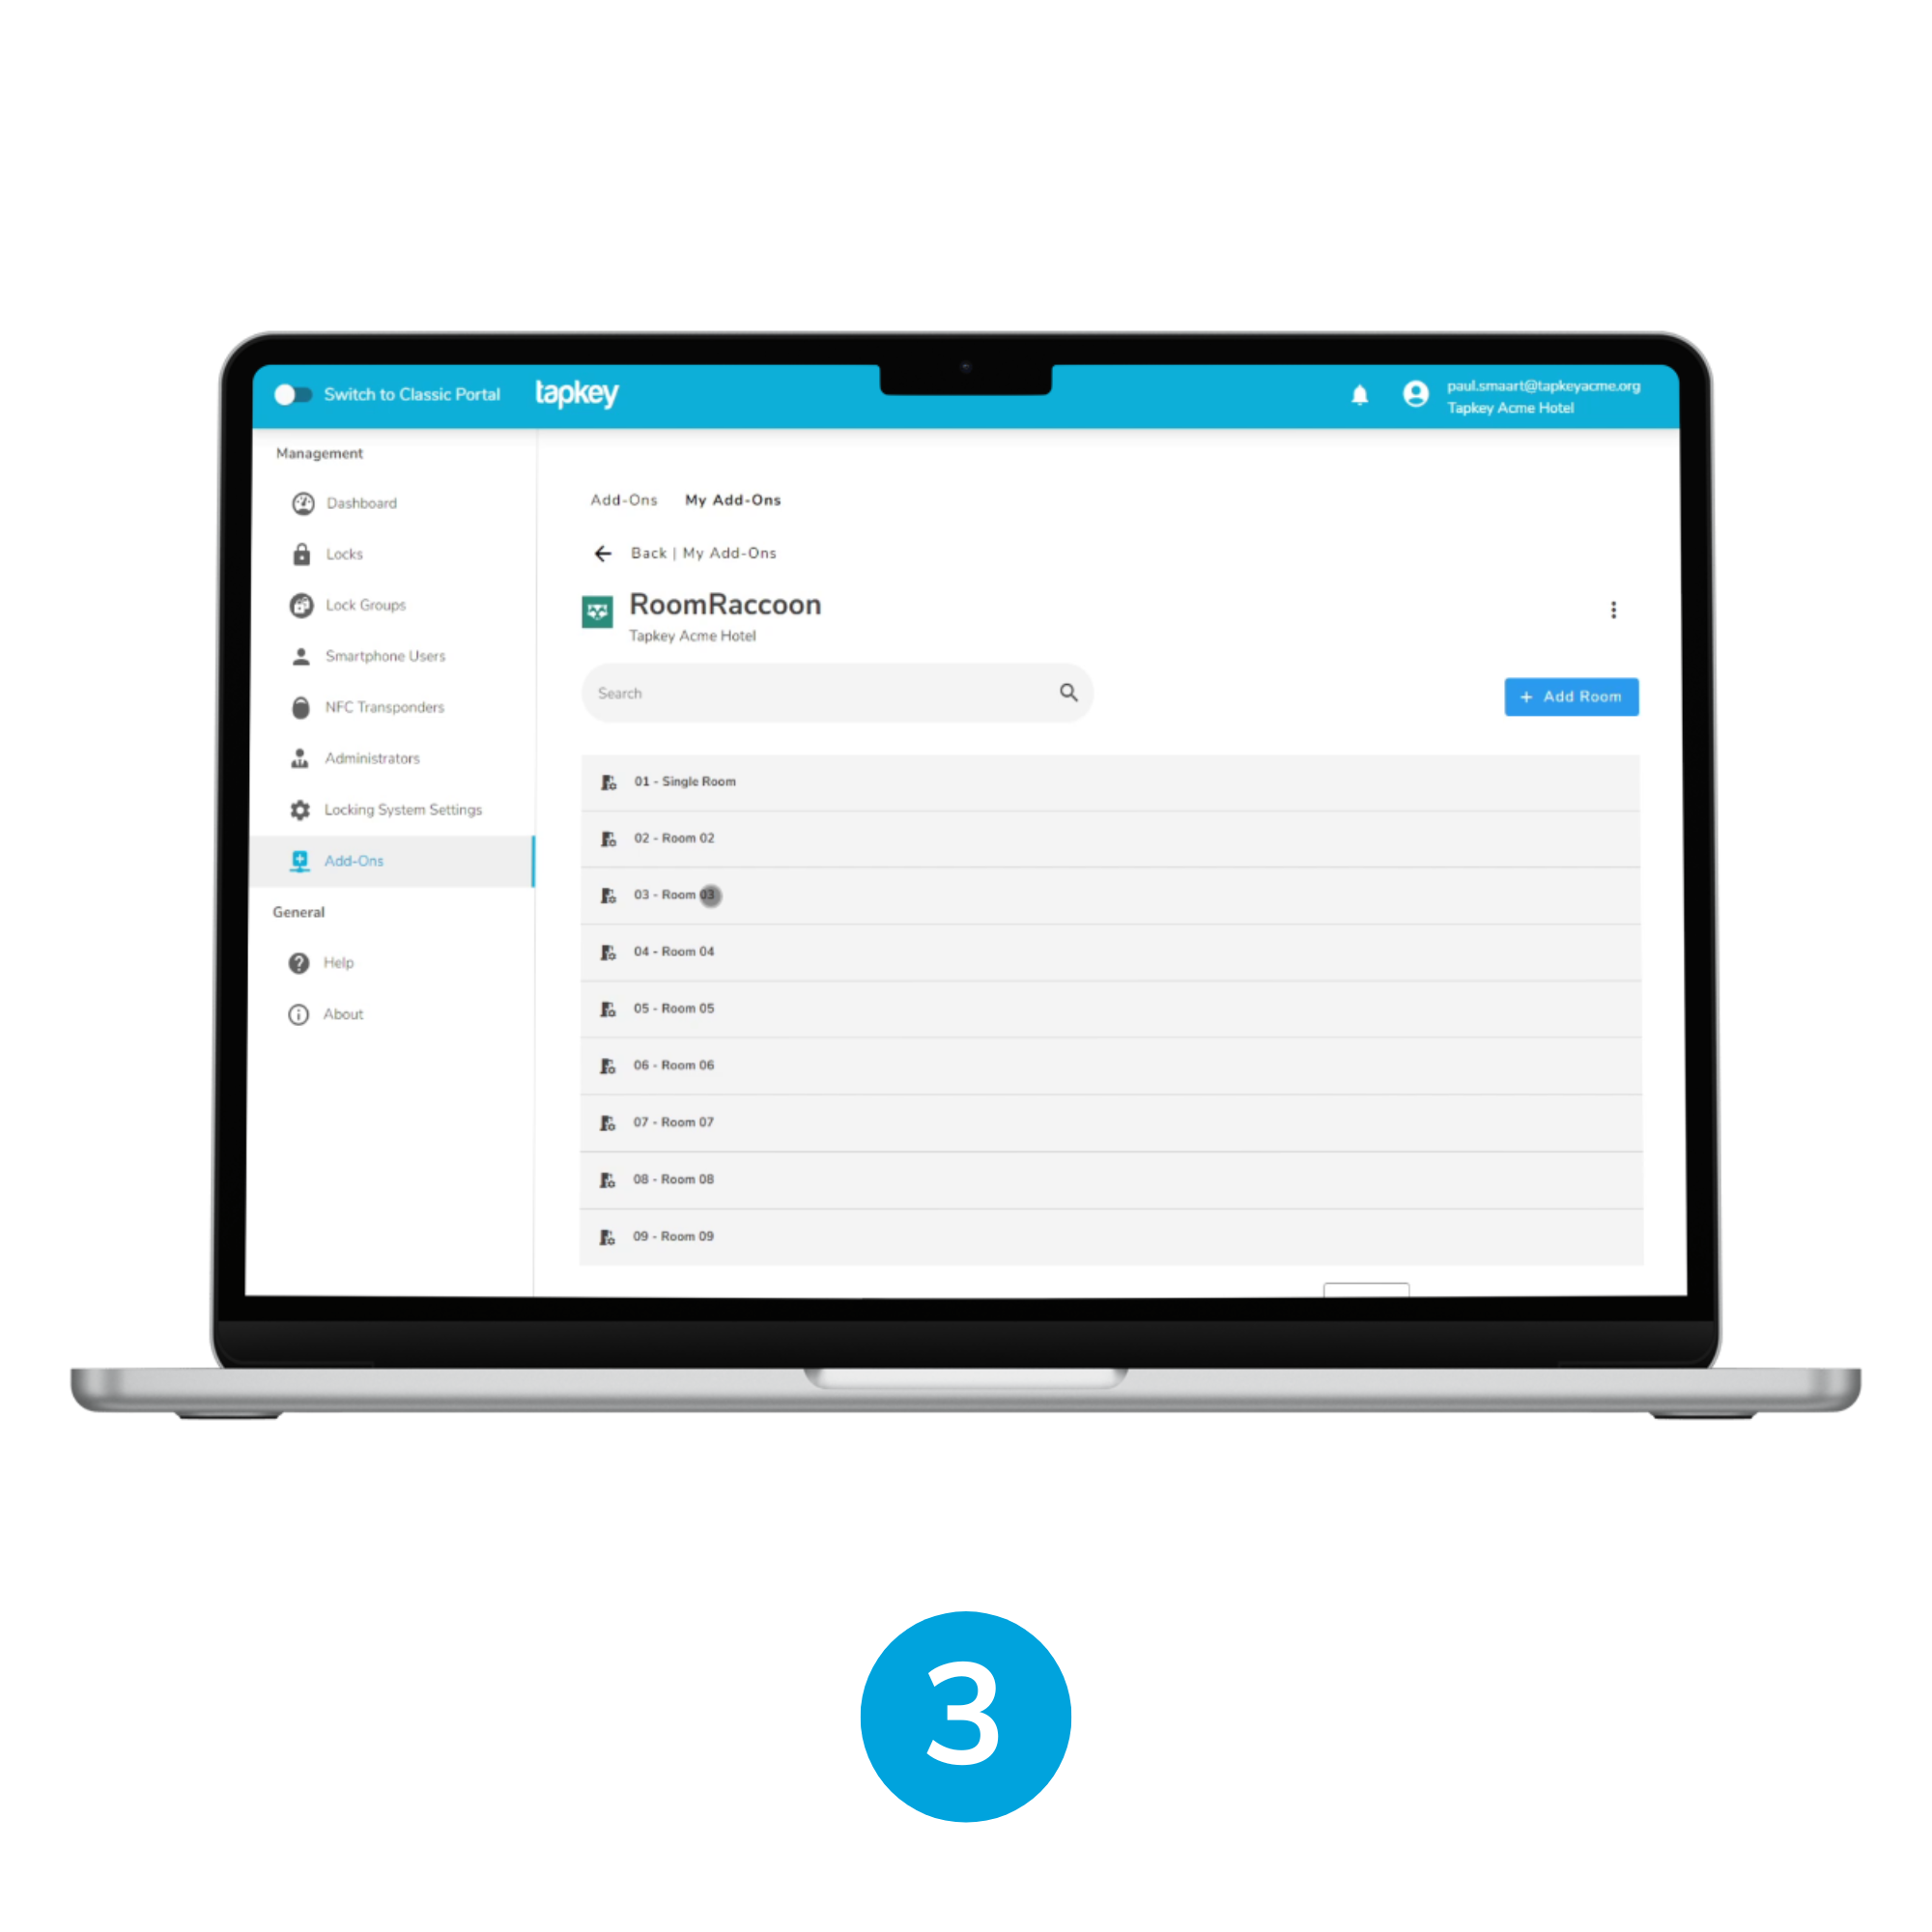
3. Repeat for All Rooms
Continue this process for each room you need to create, making sure all your rooms are added.
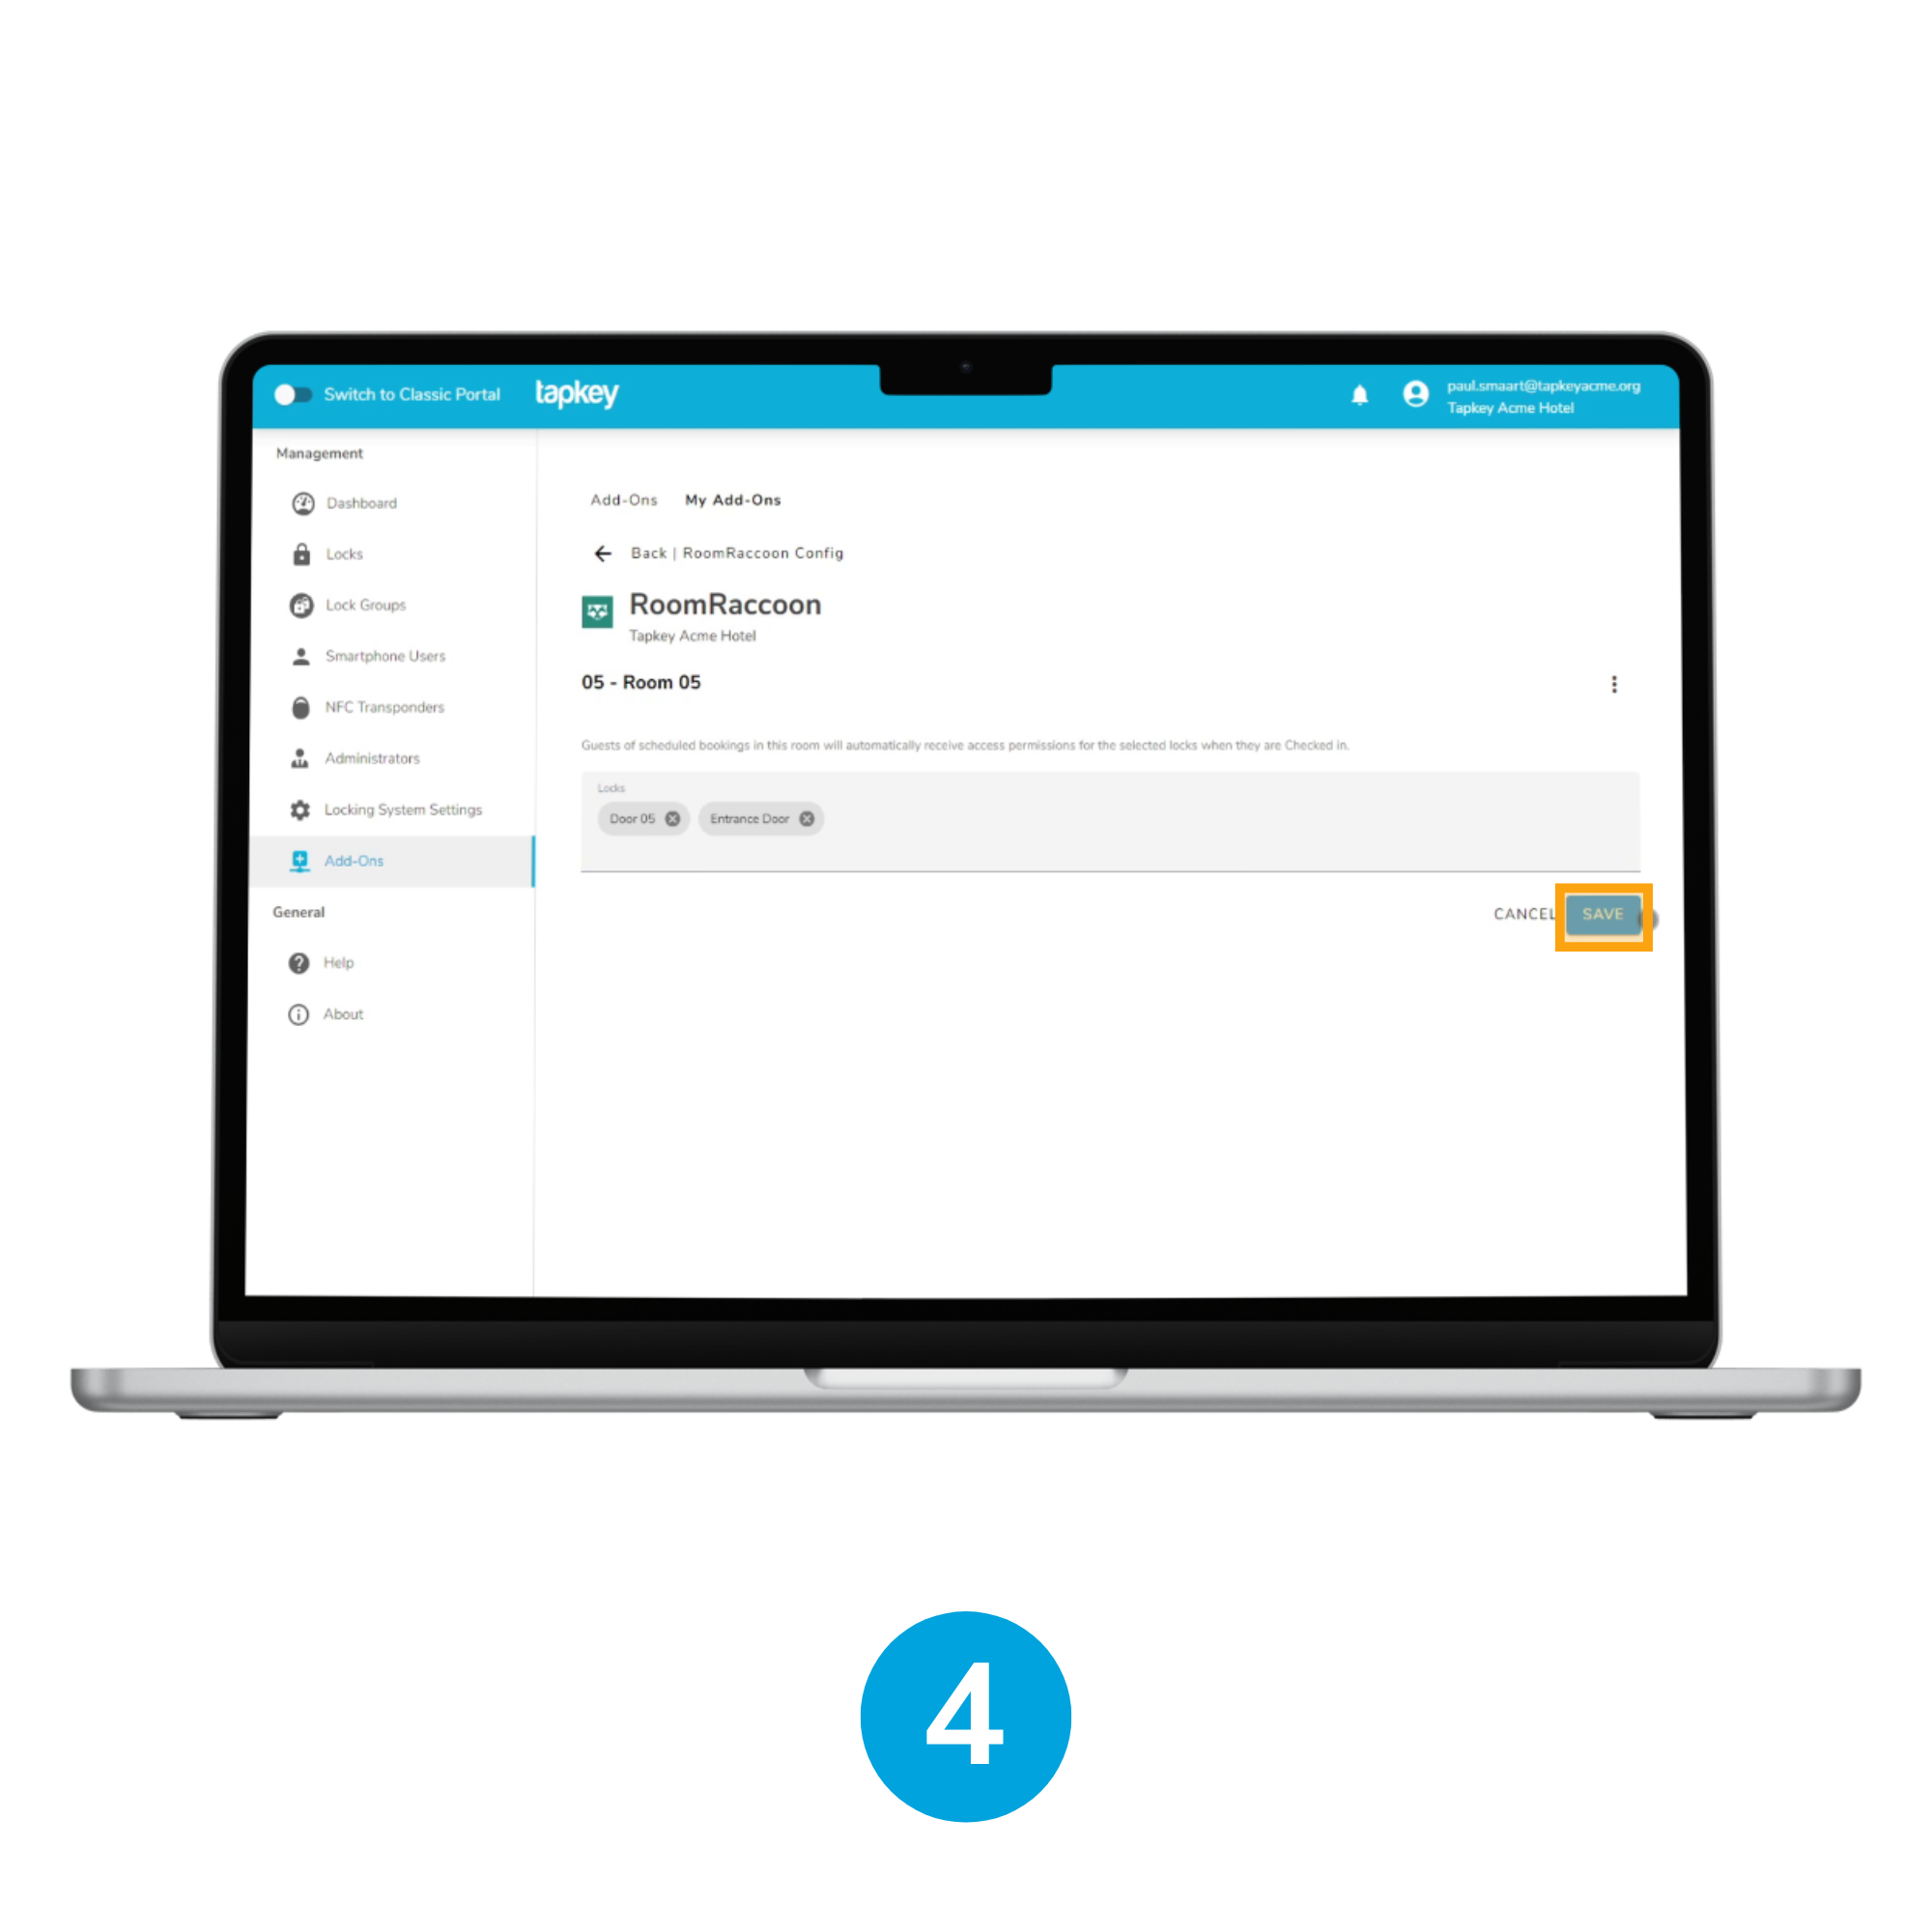
4. Associate Locks with Rooms
From this step we are going to associate Locks with Rooms, we are going to use the Room 05 as an example, please tap on Room 05 to link the locks to the Room. In this screen you will be prompted to select the locks and once you are done, tap “Save”.

5. Test the Integration
To Test the integration, navigate to the “Reservations” module in Room Raccoon, and attempt to create a reservation for Room 05.
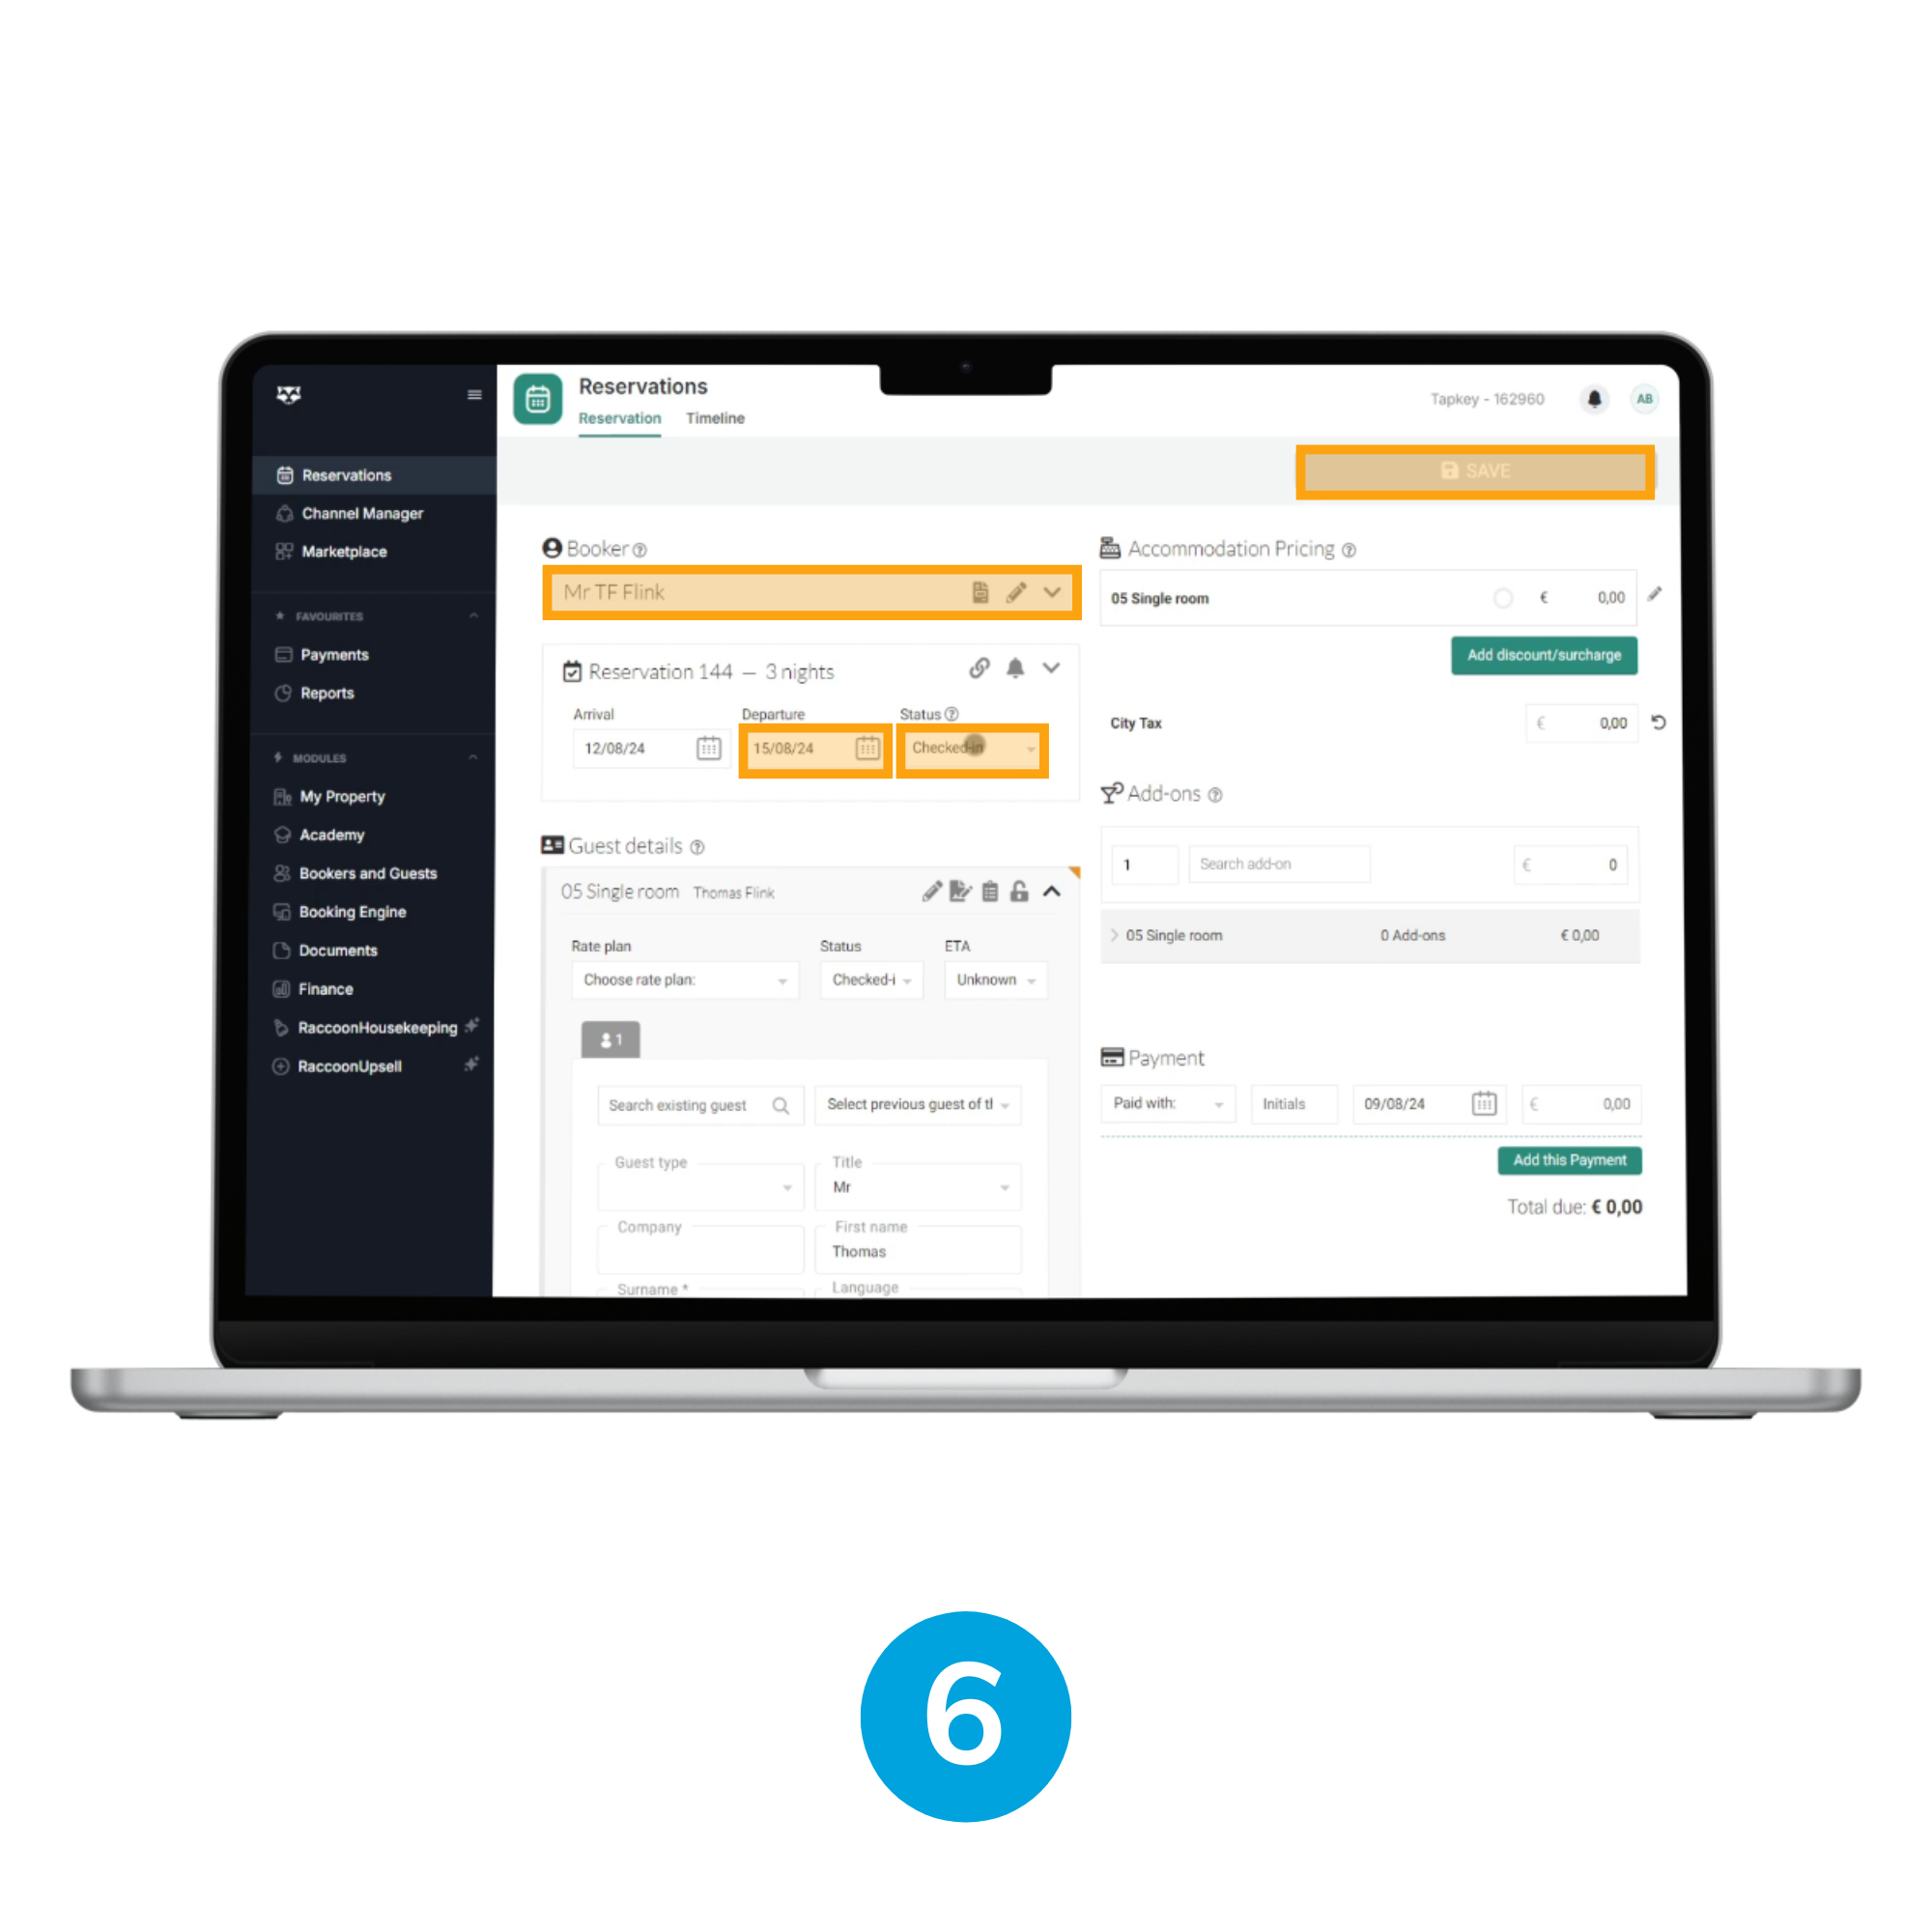
6. Create a Reservation
Create a reservation by setting a booker, choose a specific departure date, select the reservation status to “Checked-in” and then tap “SAVE” to complete the process.
Important: Only reservations marked as “Checked-in” will generate permissions in Tapkey. Ensure that the guest has an email address; otherwise, permissions in Tapkey will not be created.
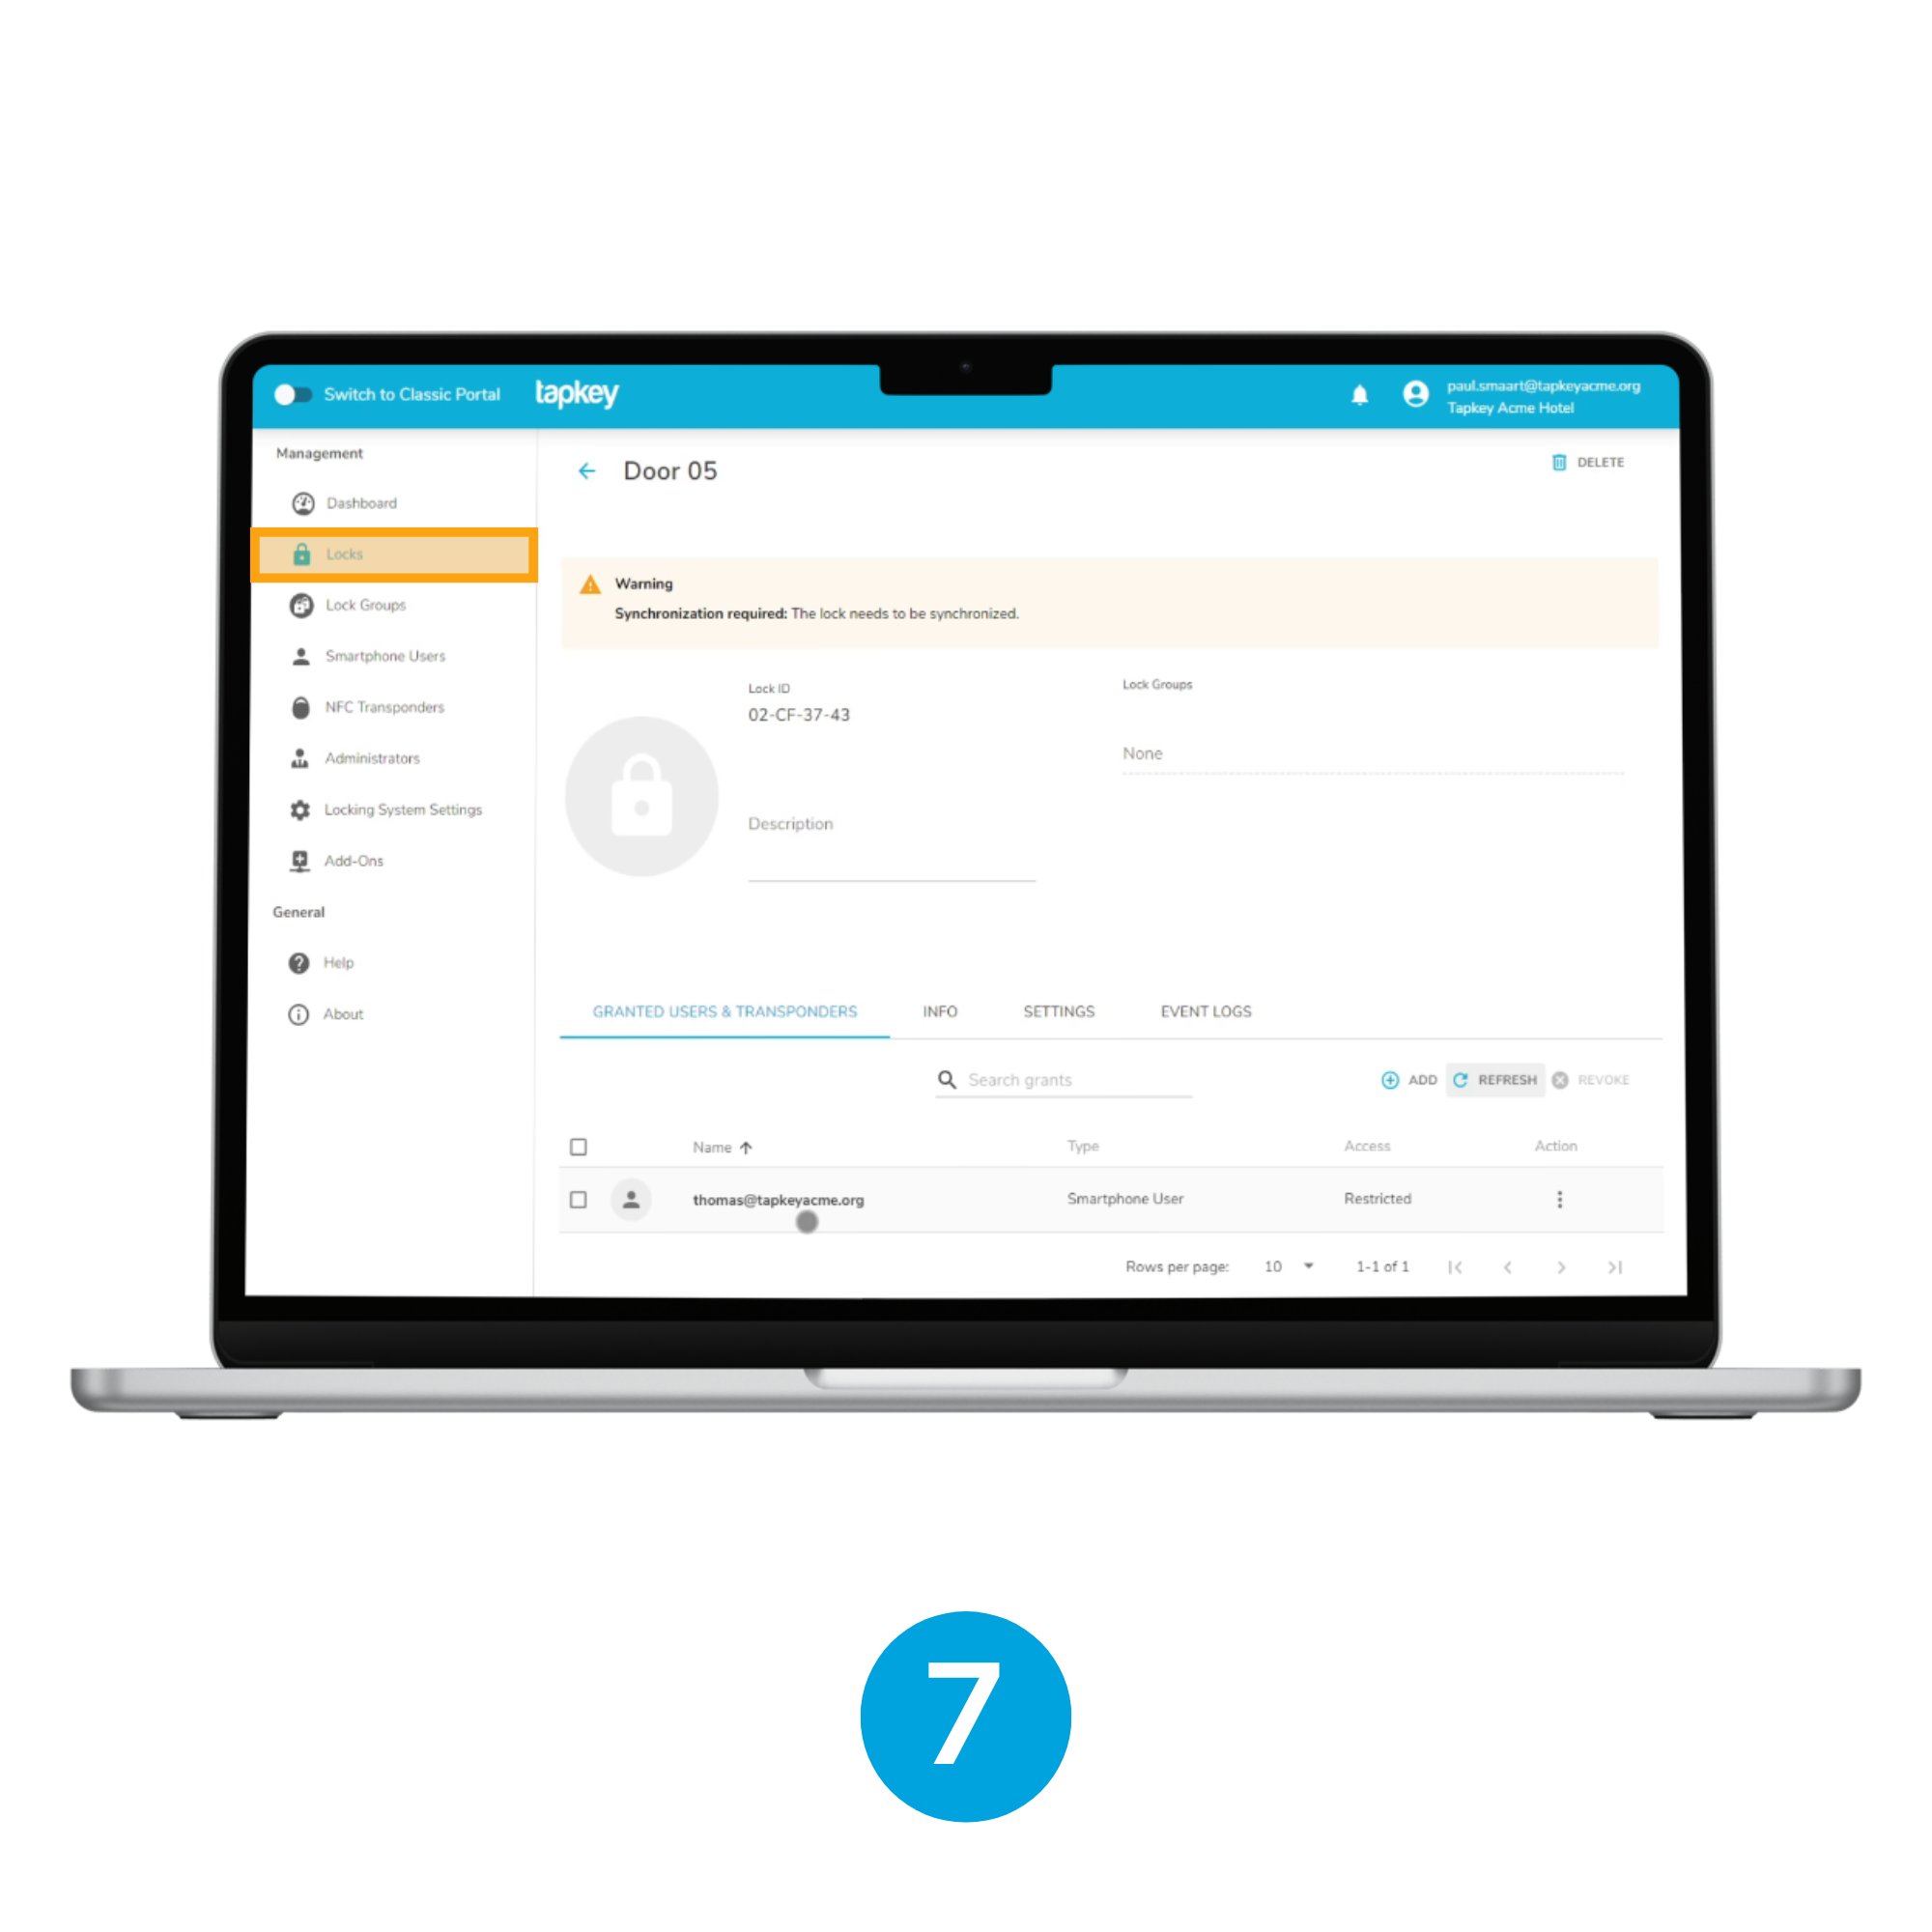
7. Verify Permissions in Tapkey
Check Tapkey to confirm that the permissions for the locks associated with Room 05 have been created correctly.
Was this article helpful?
That’s Great!
Thank you for your feedback
Sorry! We couldn't be helpful
Thank you for your feedback
Feedback sent
We appreciate your effort and will try to fix the article