Everything You Need to Know About the DOM Tapkey AccessManager Updater
The DOM Tapkey AccessManager Updater builds on the functionality of the standard AccessManager (ACM) – with one powerful upgrade: it connects directly to the internet.
That means NFC Transponder permissions are automatically updated in real time via the cloud – no need for on-site updates or manual synchronisation. Perfect for locations where transponders frequently change hands.
This article will guide you through the most relevant information about this product:
1. Functionality of the DOM Tapkey AccessManager Updater
2. Technical Details of the DOM Tapkey AccessManager Updater
3. How to install the DOM Tapkey AccessManager Updater
4. How to use the DOM Tapkey AccessManager Updater
4a. Add the DOM Tapkey AccessManager Updater to Your System
4b. Assign Permissions to NFC Transponders
5. How to Set Additional Networking Configuration
6. Adding Our Services to Your Firewall Whitelist
1. Functionality of the DOM Tapkey AccessManager Updater
- Automatically update transponders permissions on every interaction via the cloud
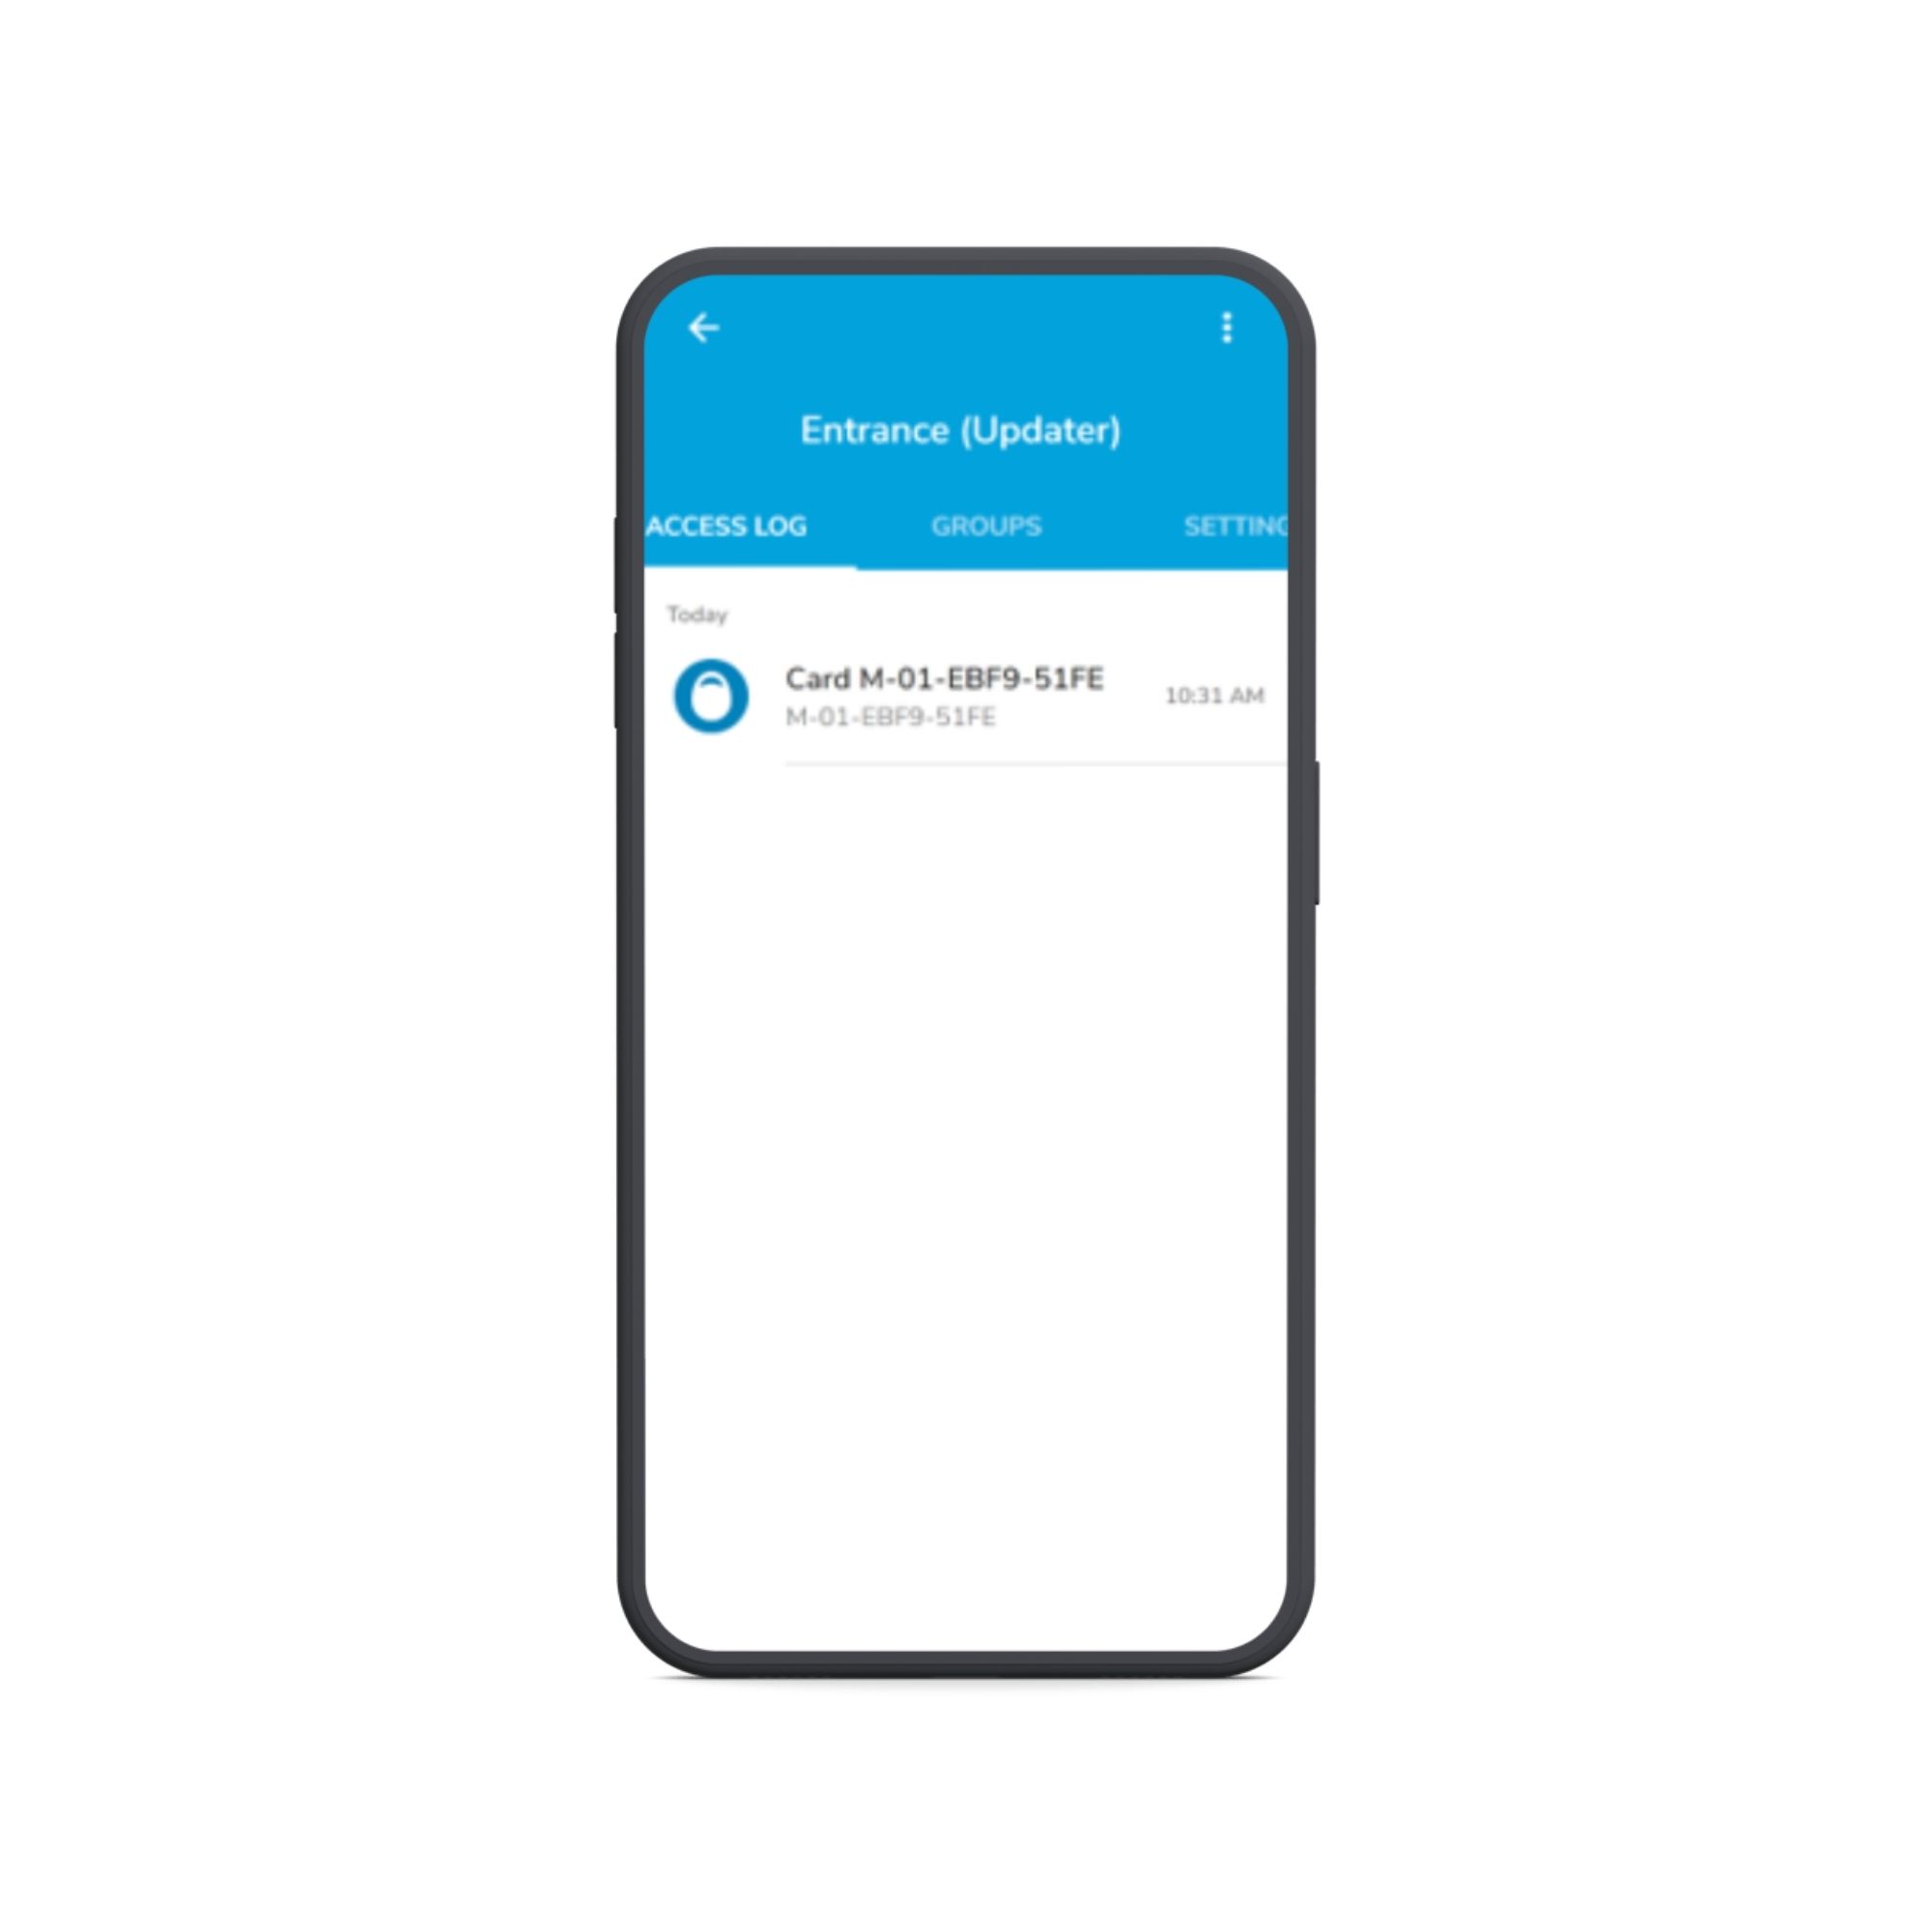
- Display real-time access logs when a lock is used with an NFC Transponder. The locks are going to be visible in the app.
- Revoke access to transponders without requiring to synchronize the lock or the affected transponders.
- Add Access to NFC transponders remotely. Permissions and keys would be downloaded to the NFC Transponder on interactions.
- If the Online Reader is not connected to the internet, it will continue to operate offline—just like the AccessManager (ACM). All standard functionalities remain available, using the keys stored on NFC transponders or through interactions with mobile devices.
2. Technical Details of the DOM Tapkey AccessManager Updater
Looking for technical specifications or detailed product information? Please visit the official DOM product page.
3. How to Install the DOM Tapkey AccessManager Updater
Want to get started with installation? You'll find step-by-step instructions and all necessary setup details directly here.
4. How to Use the DOM Tapkey AccessManager Updater
4a.) Add the AccessManager Updater to Your System
You can register the AccessManager Updater just like any other Tapkey-compatible lock. It comes with an Owner Card that includes a QR code. Follow the steps in this guide on how to register a new lock with owner card with QR code.
Once added, we recommend assigning a clear, descriptive name – for example, Main Entrance Updater or Storage Area Updater – to help you easily identify the device later on in the Tapkey App or Web Portal.
4b.) Assign Permissions to NFC Transponders
Assign NFC Transponder access as you normally would. The AccessManager Updater automatically syncs permissions via the internet—ensuring that users always have the latest access rights without the need for manual updates. Find more information about how to manage permissions via Tapkey App or Web Portal here.
As soon as the user interacts with the lock, the new permissions would be downloaded to the transponder and also the access log will display the unlock operation from the user.
If you're using the Tapkey App, you can select “Synchronise Later” when assigning access. This option lets the Updater handle the sync automatically—the permission will be downloaded the next time the transponder is presented at the door.
5. How to Set Additional Networking Configuration
In certain network topologies, you can define specific network configurations. If no network configuration is provided, the Updater will attempt to connect to the internet using DHCP by default. However, once any of the configurations below are specified, the Updater will use the provided settings to establish a network connection.
Navigate to the Lock’s details page,
- Go to the drawer Navigation menu as Owner.
- Navigate to Locks.
- Find the Updater lock and tap on the Lock’s name.
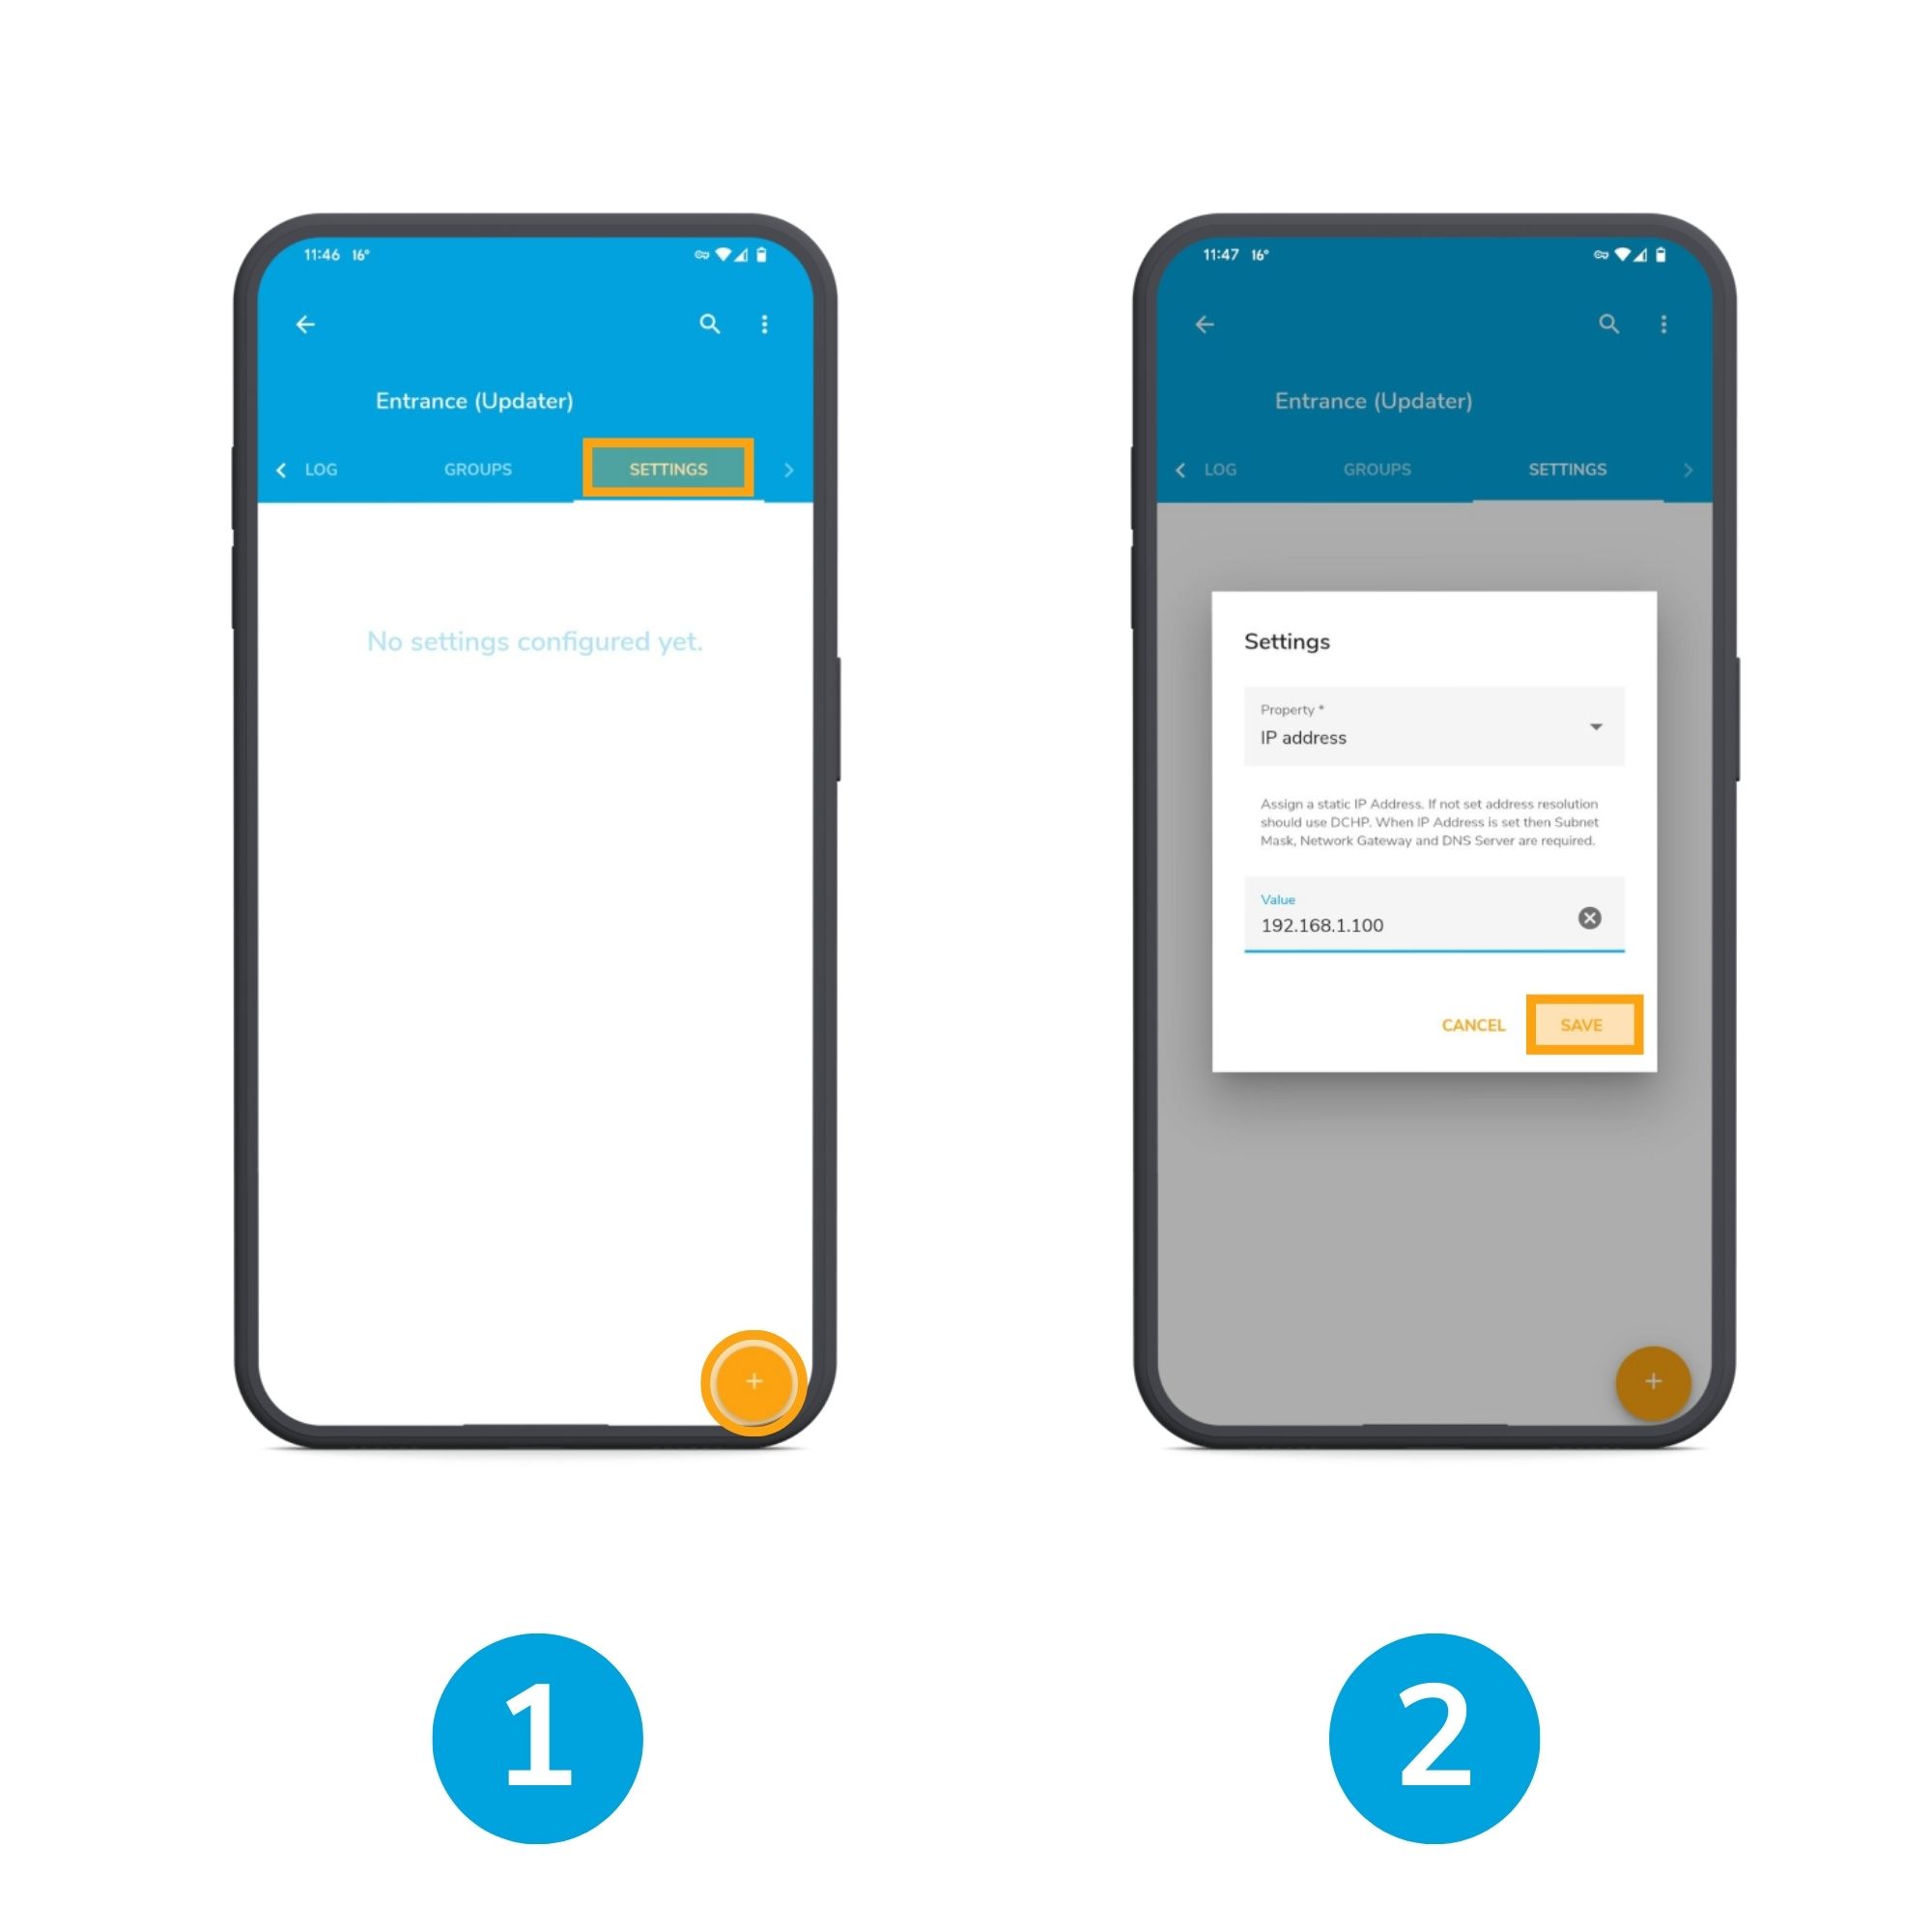
1. Once in details, navigate to the Settings tab and tap on the Add (+) button on the bottom right corner
2. Now select the Network settings in Property, input the value and Save
In this example we are setting IP address as 192.168.1.100
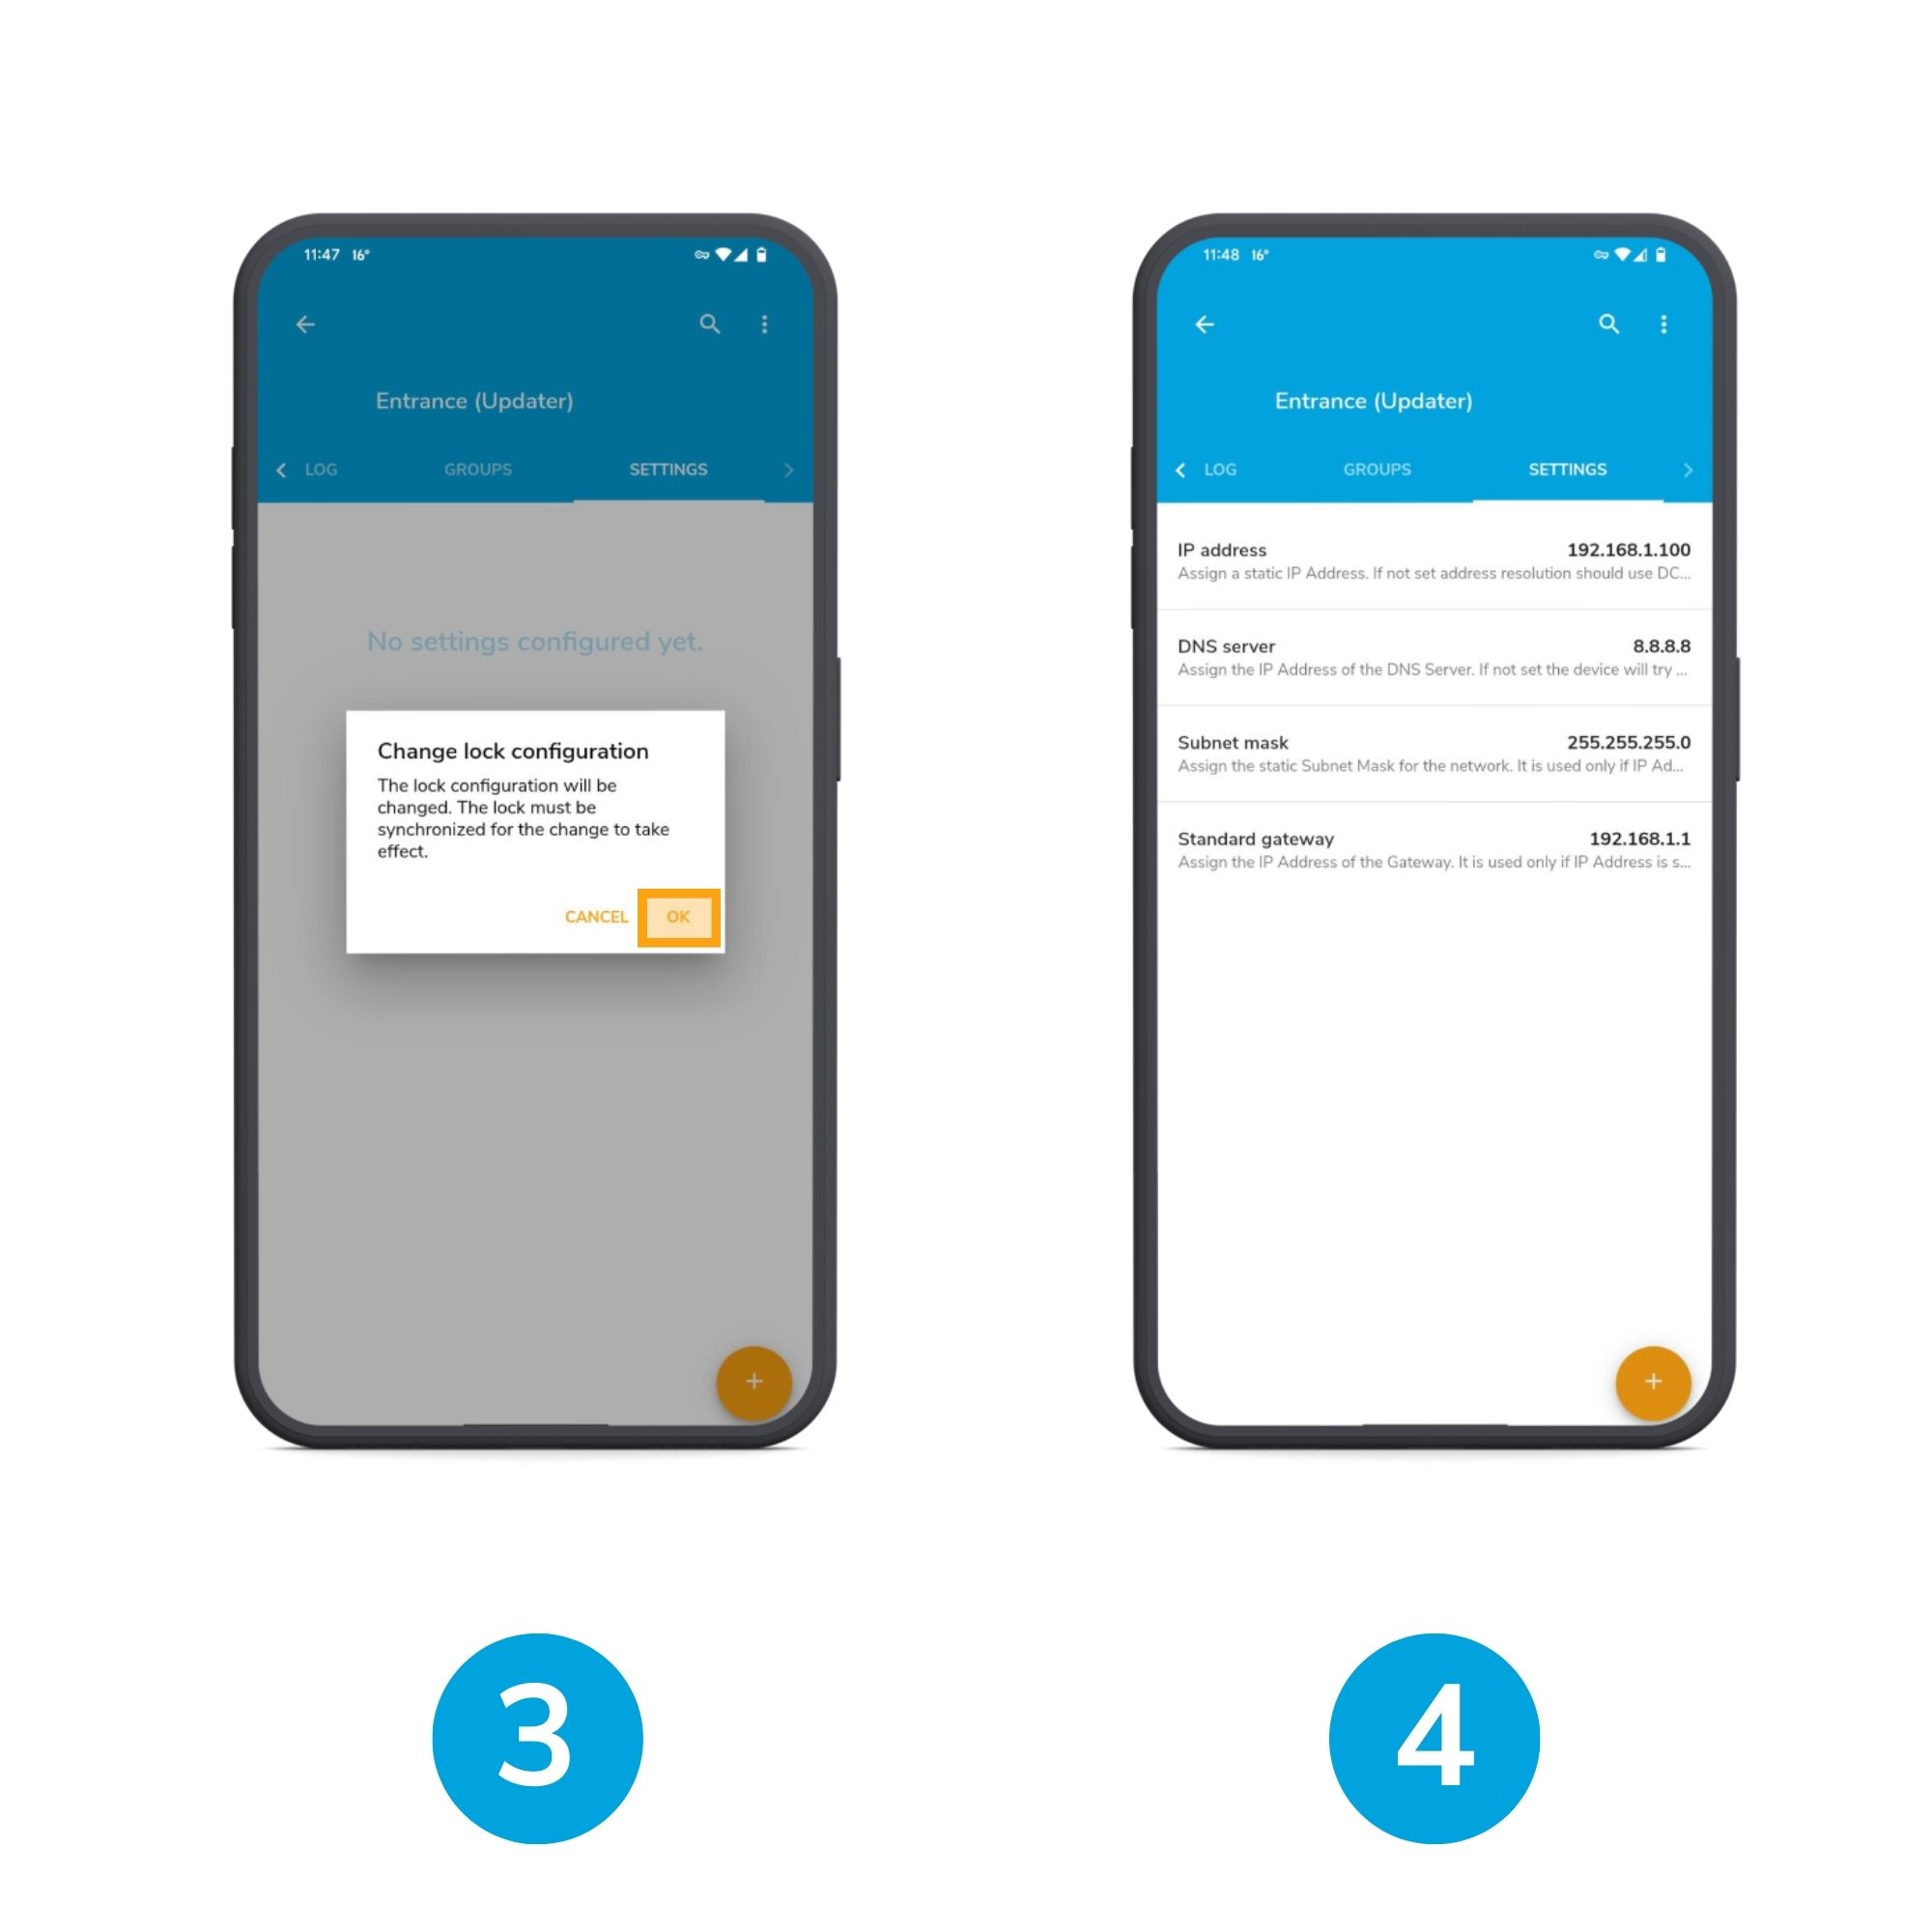
3. The system will indicate that Lock requires synchronisation. Press OK
4. Now wait till all your values are set
You can set the following:
- IP address
- DNS Server
- Subnet mask
- Standard gateway
Once finished you can now synchronise your Updater.
6. Adding Our Services to Your Firewall Whitelist
If you're using a corporate firewall, it's important to ensure your network can connect to our trusted services. To keep everything running smoothly, please make sure the following domains are allowed through your firewall.
Domains to Whitelist
- gw.iot.core.tapkey-svc.com
- my.tapkey.com
Was this article helpful?
That’s Great!
Thank you for your feedback
Sorry! We couldn't be helpful
Thank you for your feedback
Feedback sent
We appreciate your effort and will try to fix the article