Access Schedules Explained: How to Create and Assign Them
Access Schedules let you define specific timeframes during which people can unlock doors, making time-based access easy and efficient. Instead of creating the same time-limited access for each individual user again and again, you can simply set up a schedule once and assign it to as many people as needed.
Managing access for multiple users with different time schedules can quickly become repetitive, especially when everyone needs access at certain times, like during office hours. Access Schedules simplify this process: You can pre-define typical working hours (e.g., 9:00 to 17:00) and assign them to different user groups, like day shift, night shift, or guests. This saves time, reduces errors, and makes access management much more flexible.
Preconditions:
To use Access Schedules, make sure the following requirements are in place:
- You need an active Tapkey Account.
- Activate Premium Plan
Benefits:
Access Schedules helps you manage access smarter, not harder. Here’s why:
- Efficiency: No more repetitive process of manually creating weekly access rules per user or per grant. Simply assign persons or person groups to pre-defined schedules according to their requirements. It reduces administrative time spent on access management.
- Flexibility: Create as many schedules as you need—for day shifts, night shifts, temporary access, or anything in between. This makes it easy to adapt access permissions to your organisation’s working or access patterns.
Step-by-Step Guide
1. How to Create an Access Schedule
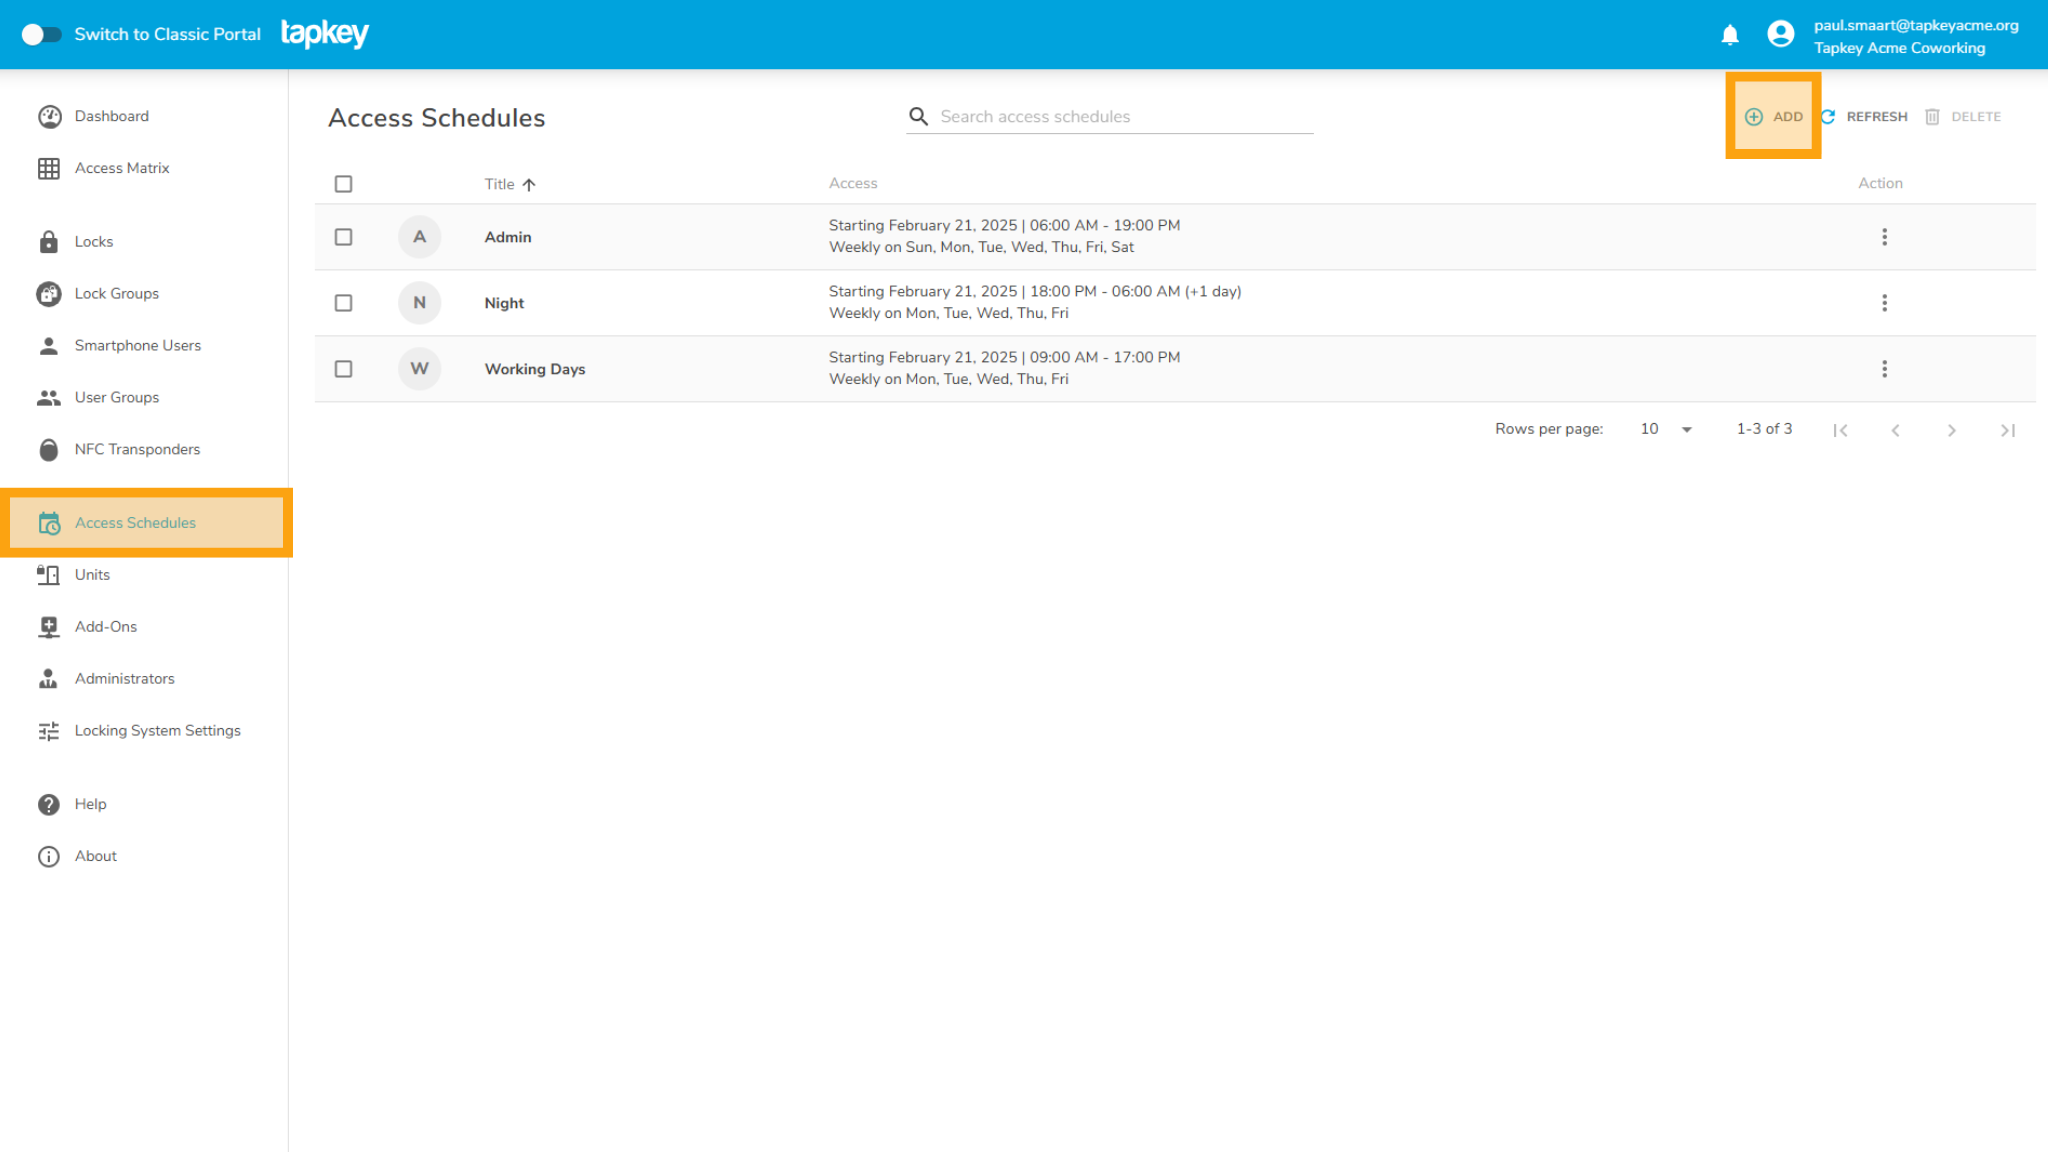 1. To get started, go to Access Schedules in the left-hand menu.
2. Navigate to Access Schedules and then tap “Add”.
Here, you can create time-based schedules that can be reused across different locks, for individual persons, groups, or even NFC transponders.
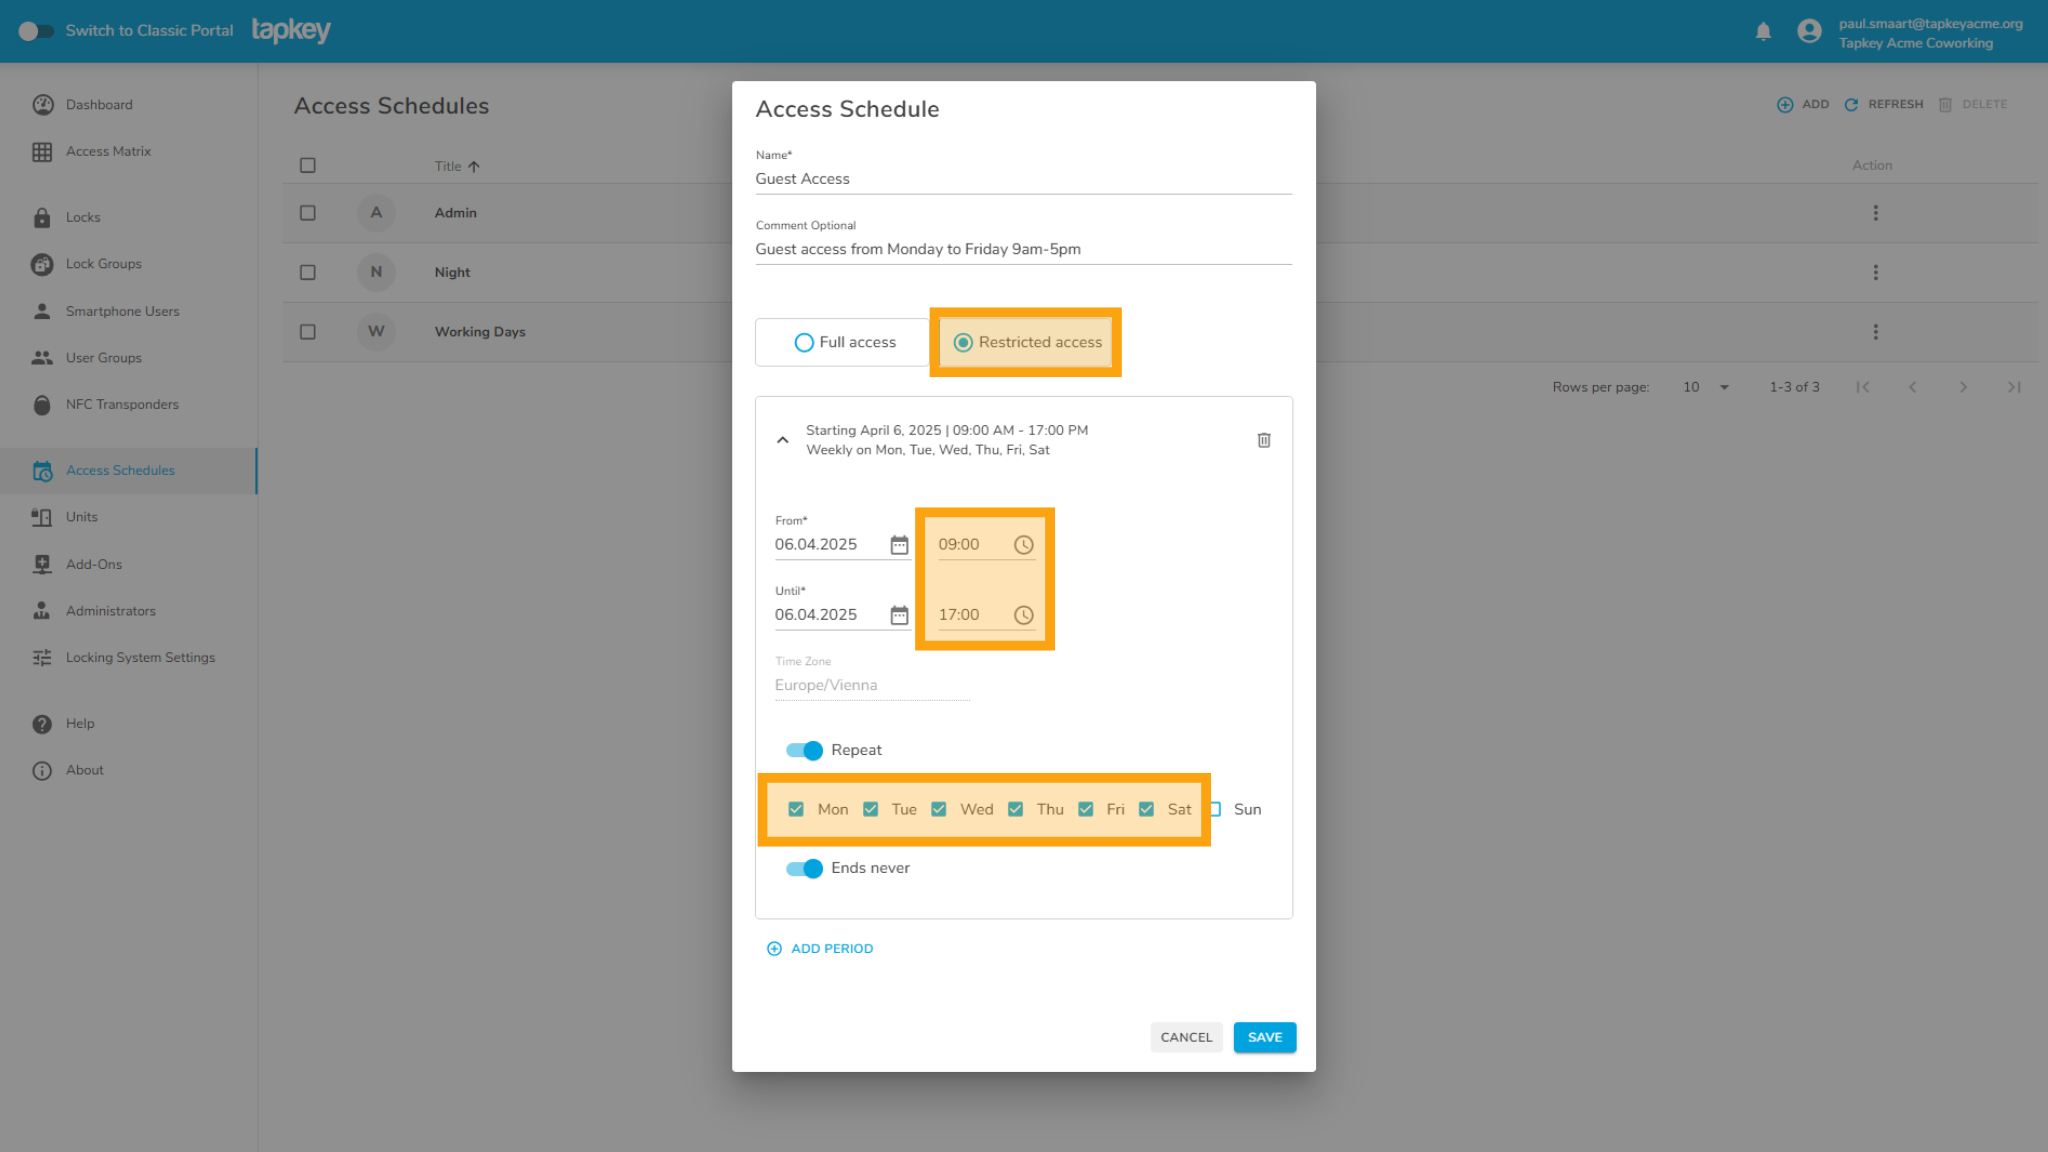
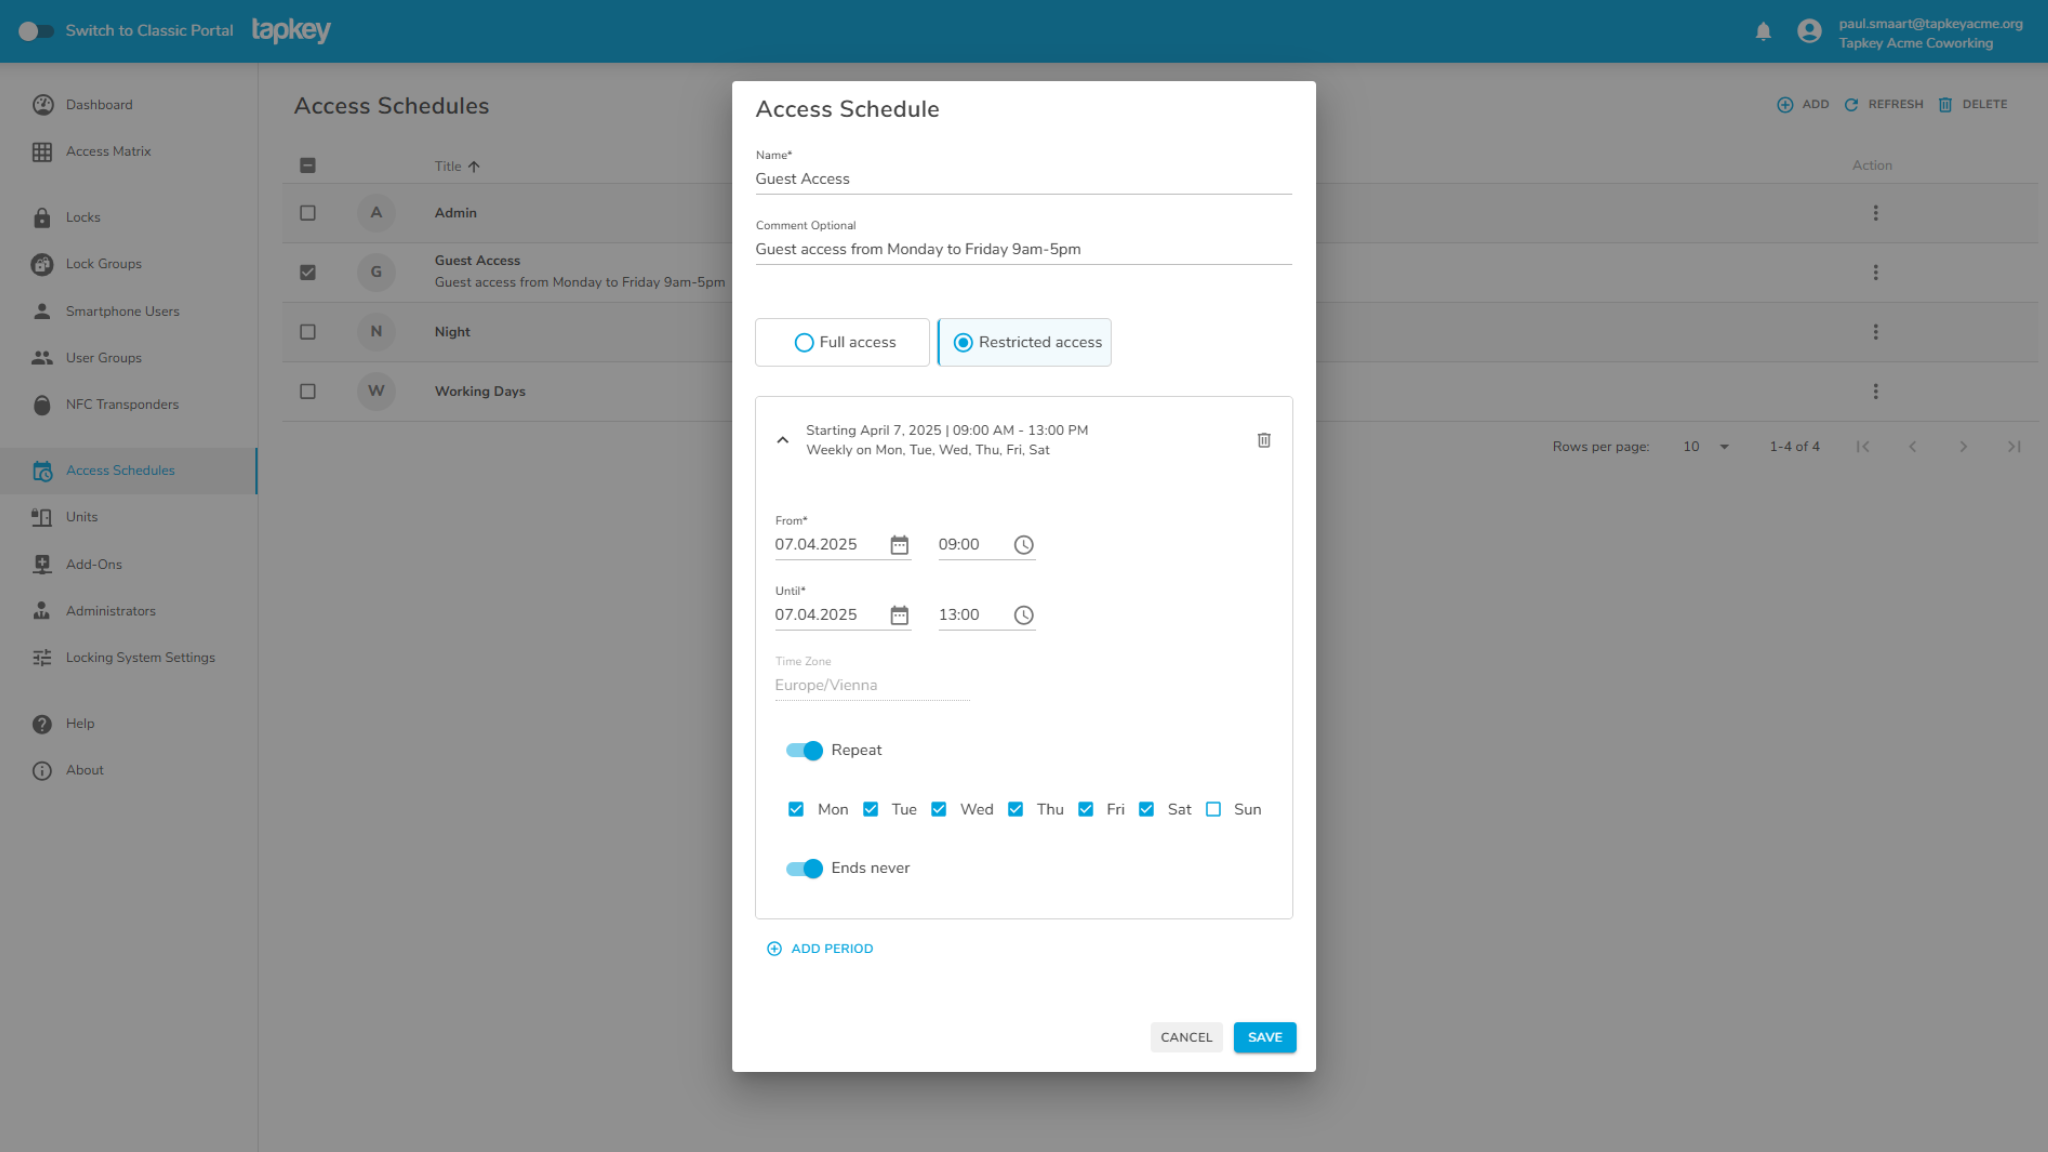
3. Define the access schedule rules
Set a From and Until time, enable repeat and select the days the schedule should apply. Afterwards, tap Save to confirm. In this example, we’ll create a schedule called Guest Access, which allows access from Monday to Saturday, 9:00–17:00. This could be used for guests who visit regularly. The great thing is: if business hours change (e.g. for a promotion), you can simply adjust the schedule—no need to update each person manually.
This schedule will now be available to assign to persons, groups, or transponders.
More information about weekly recurring access here.
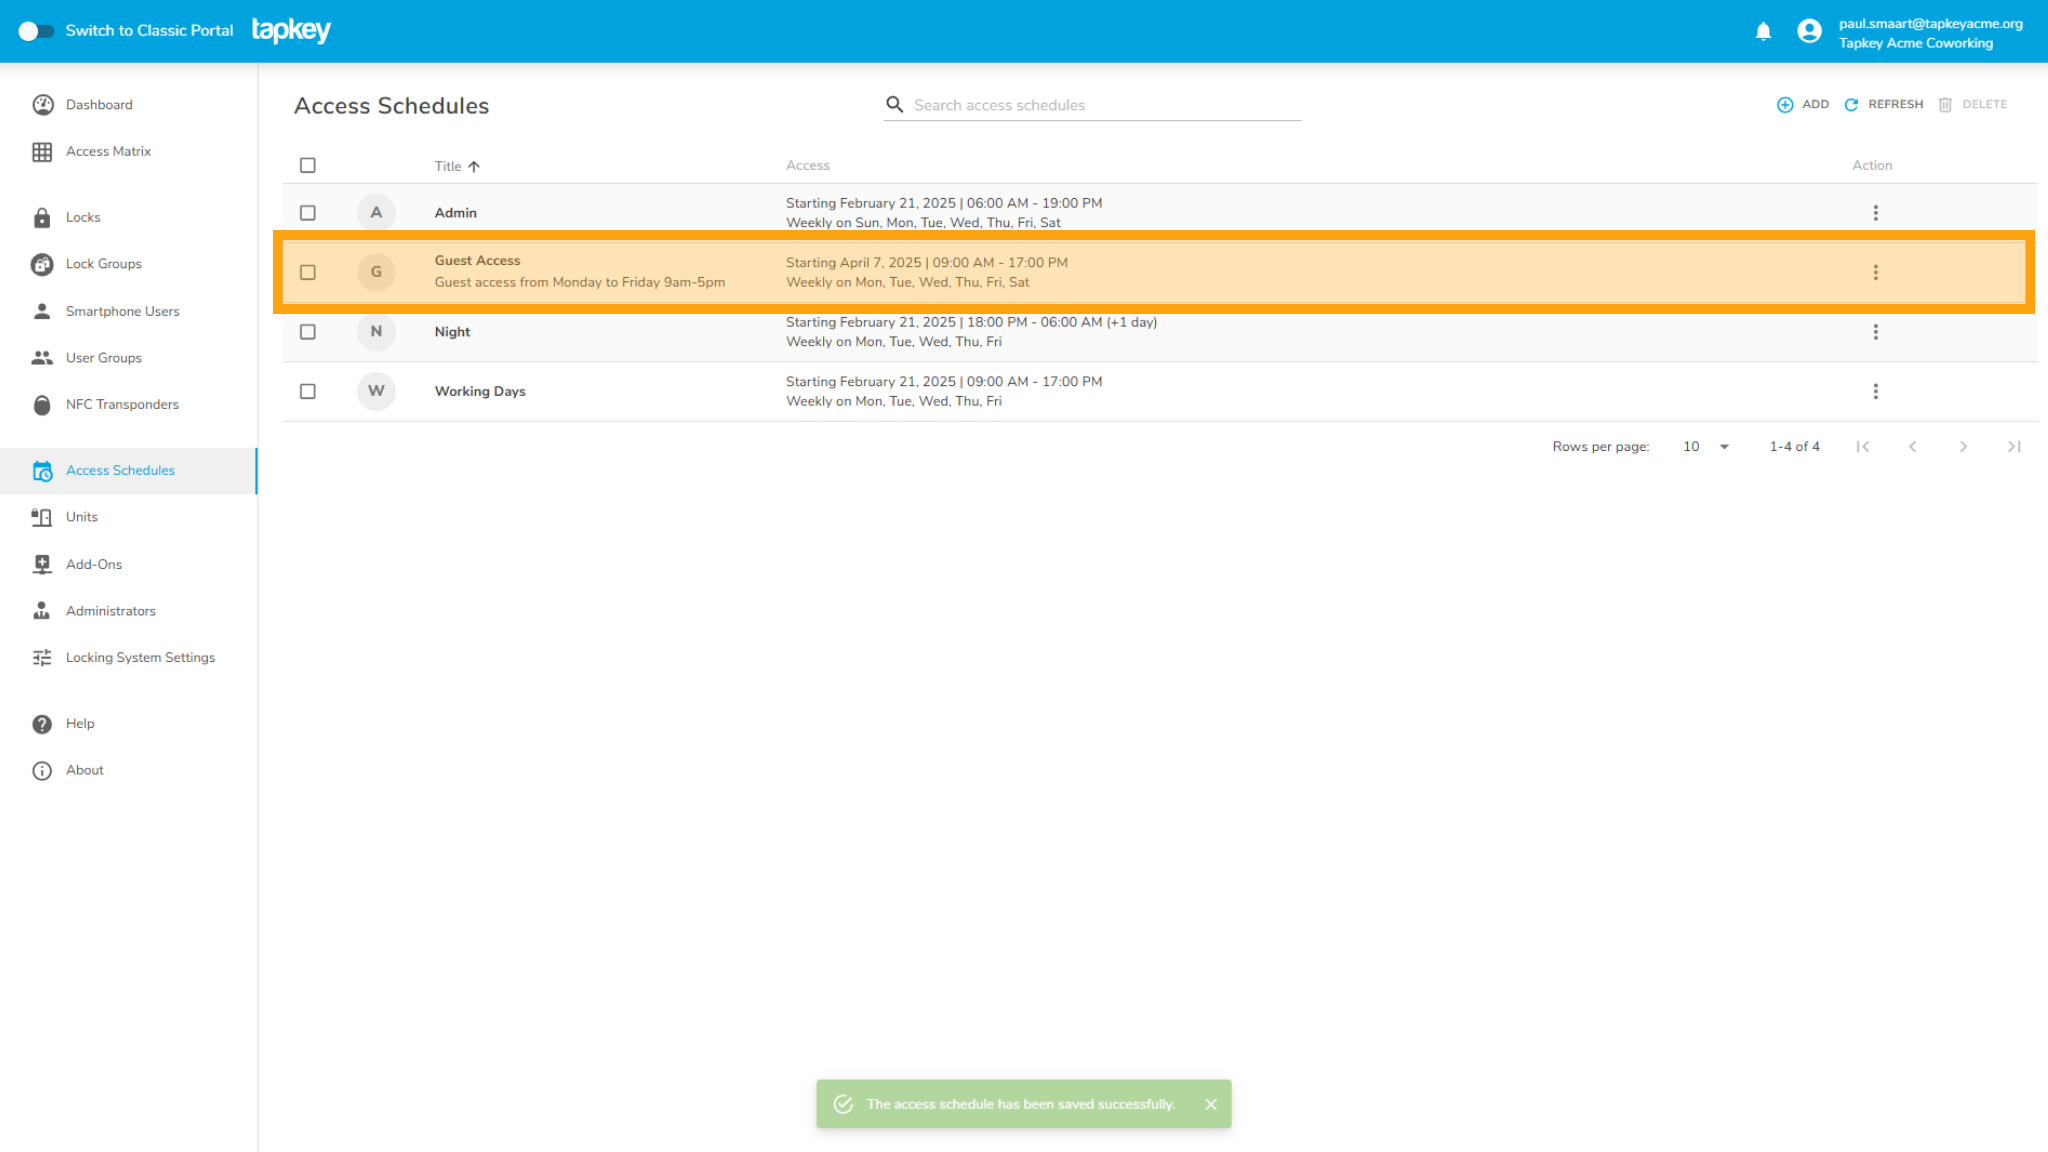
4. Access Schedule has been created.
Now you can use it to create Grants.
2. How to Assign an Access Schedule
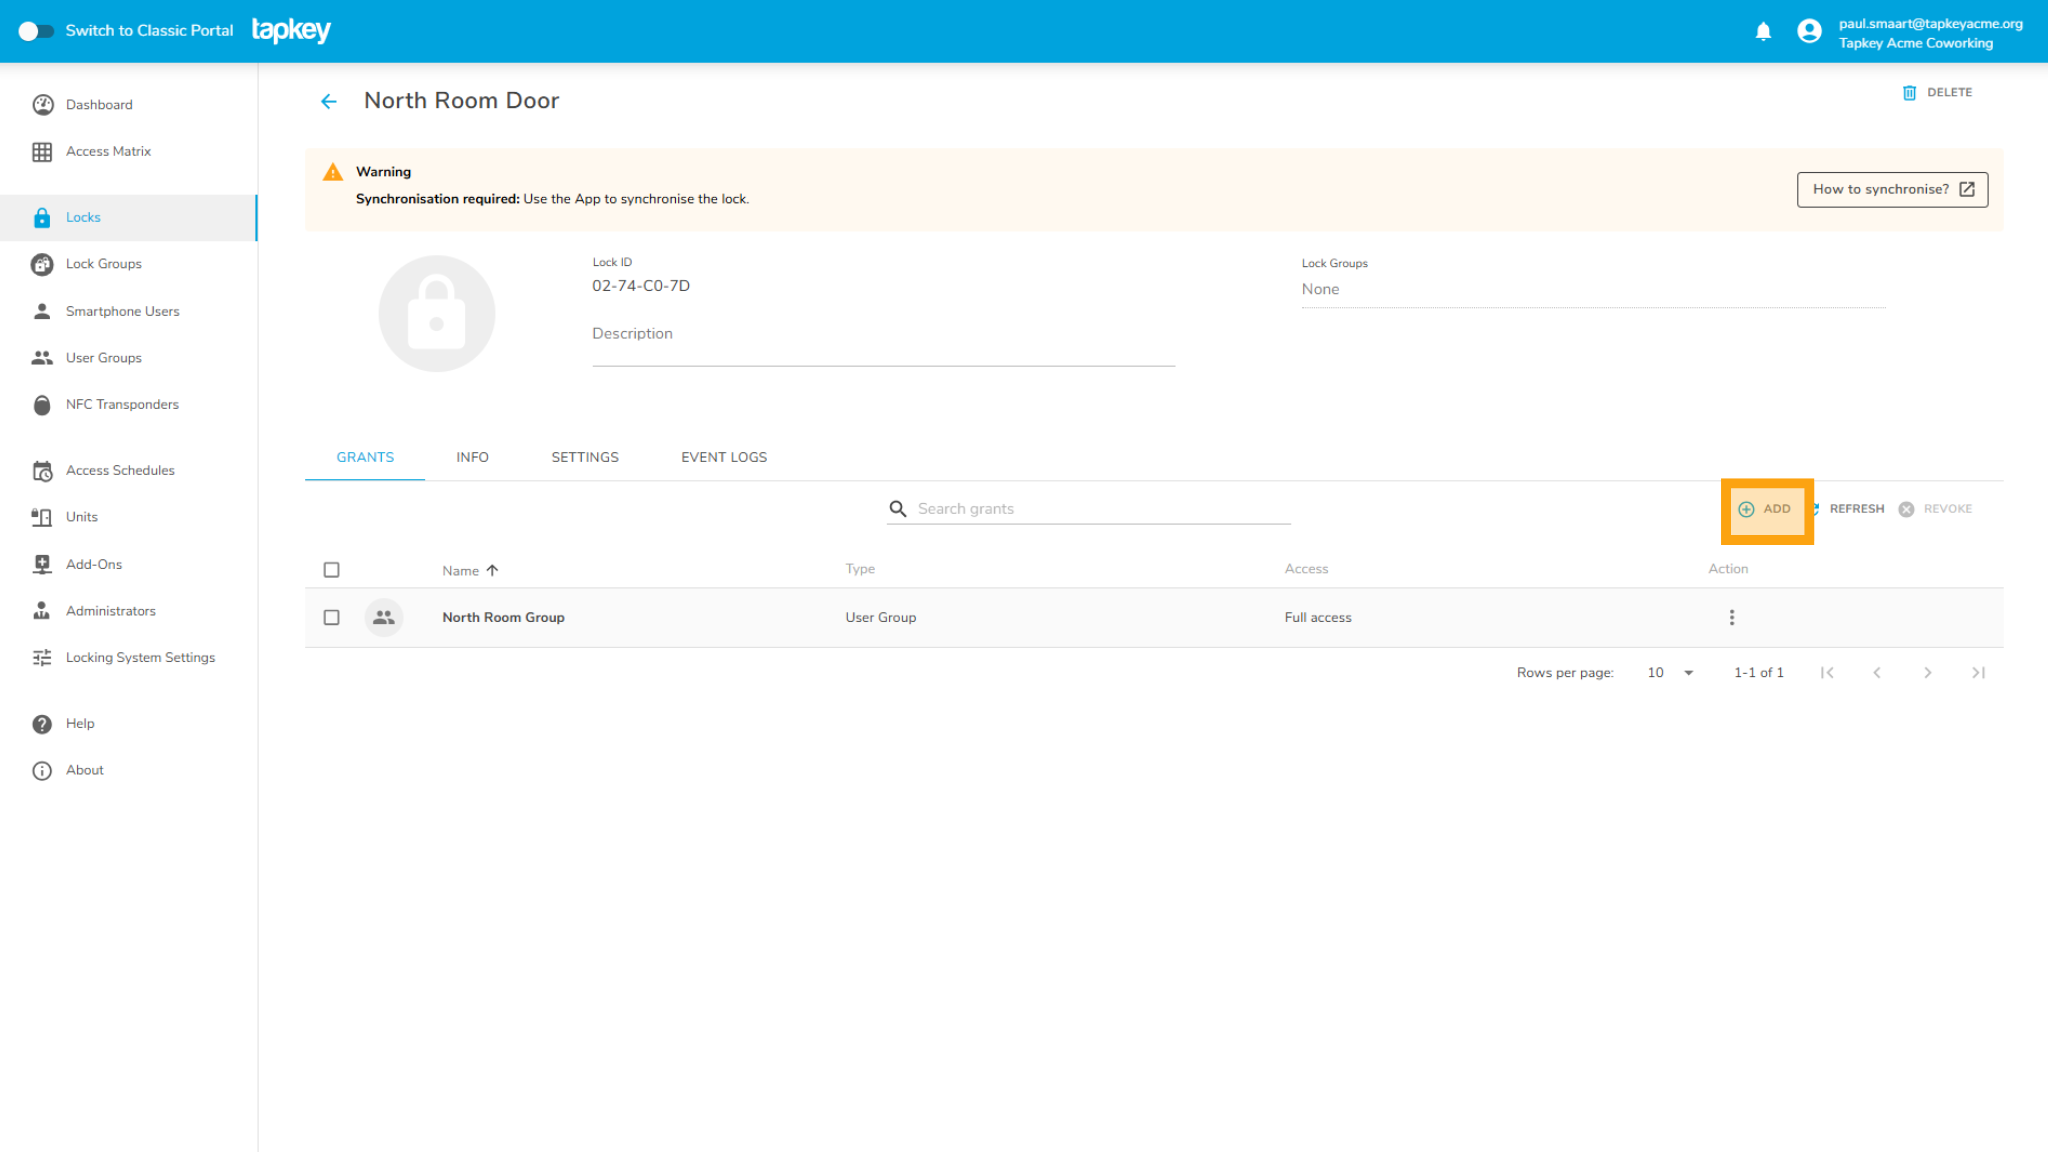 1. Navigate to one of your Locks and tap Add in the lock details page
In this example, we’ll grant access to Brenda, who will use the installations as a Guest
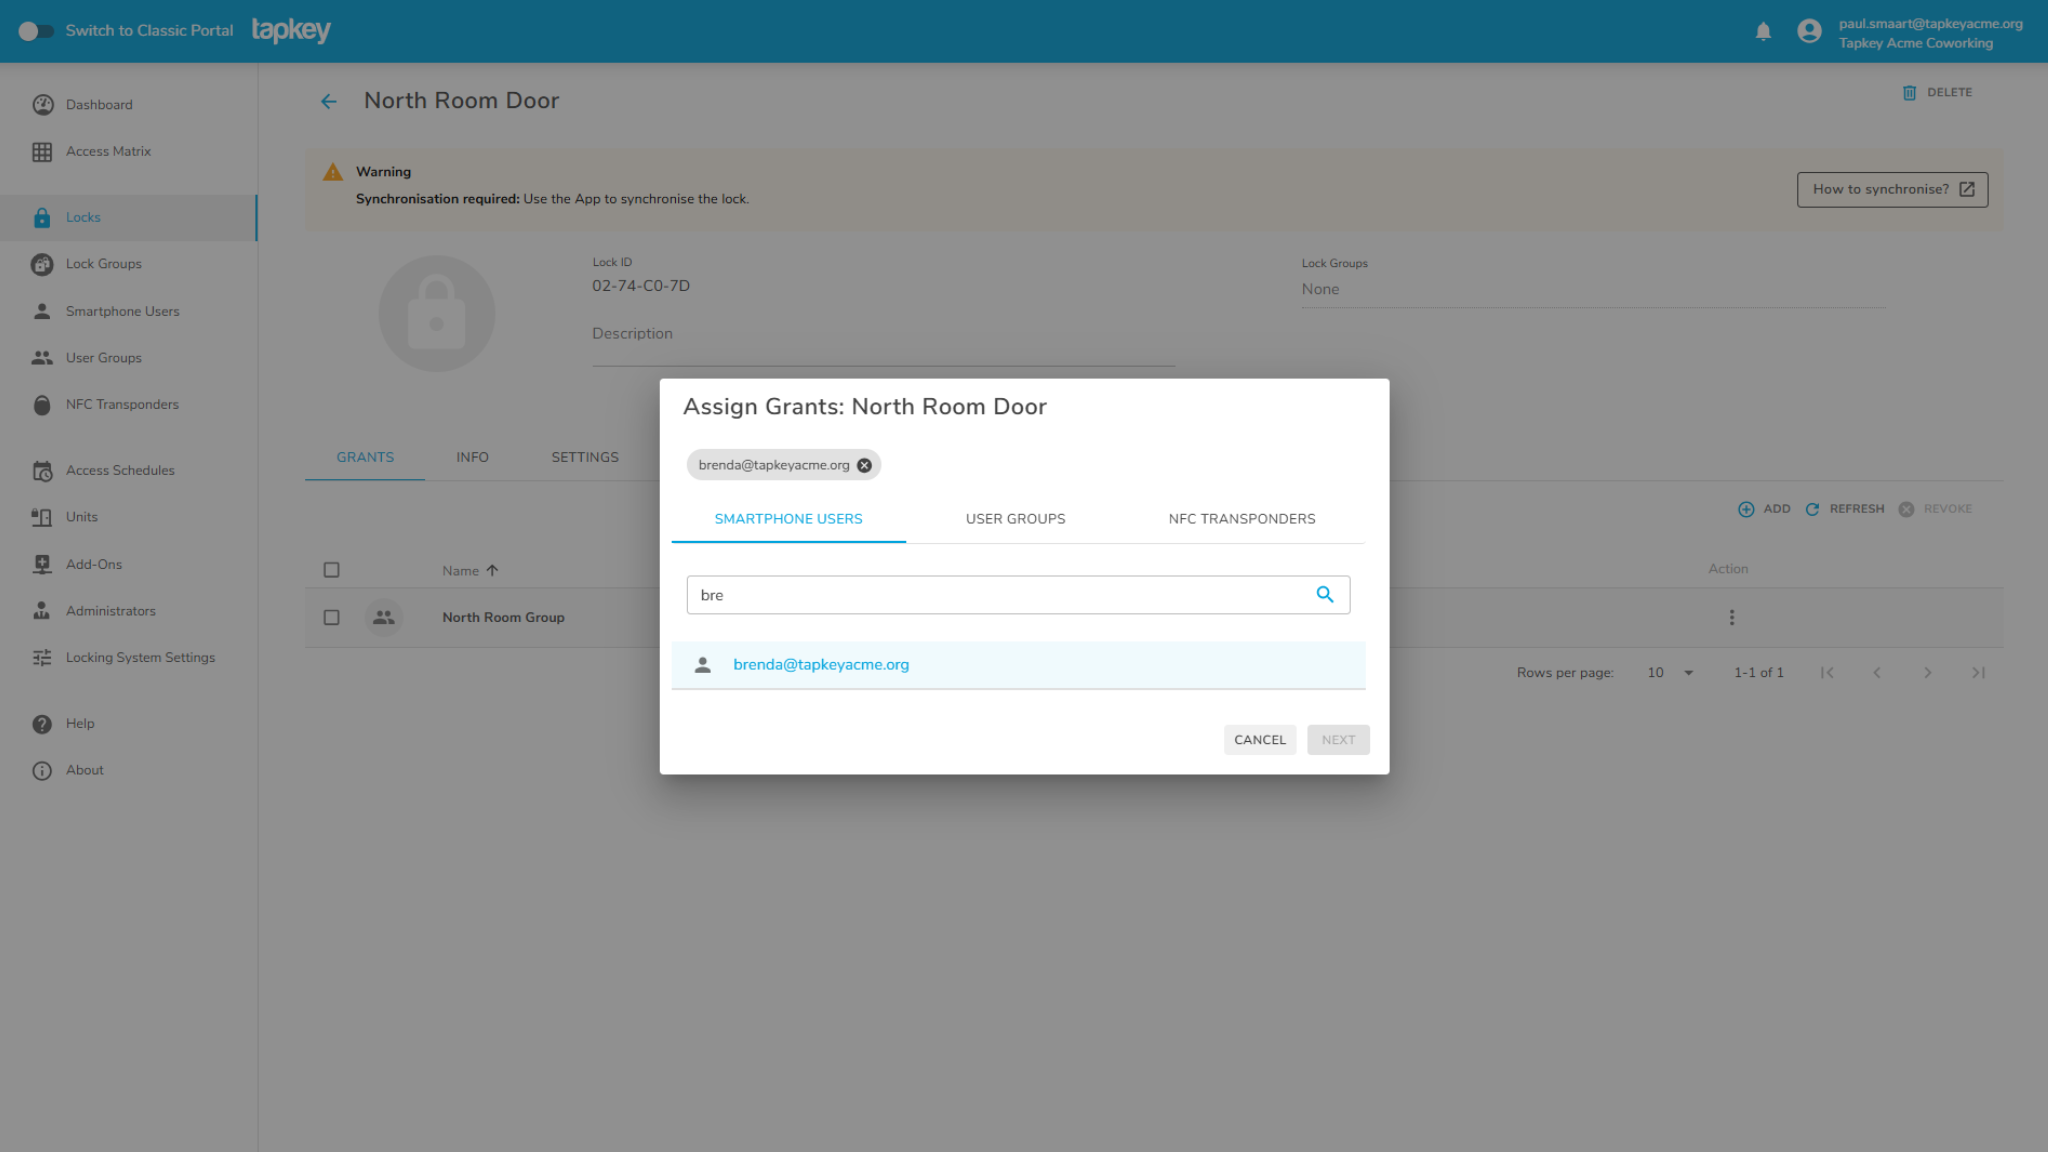
2. Select Brenda in the list of users
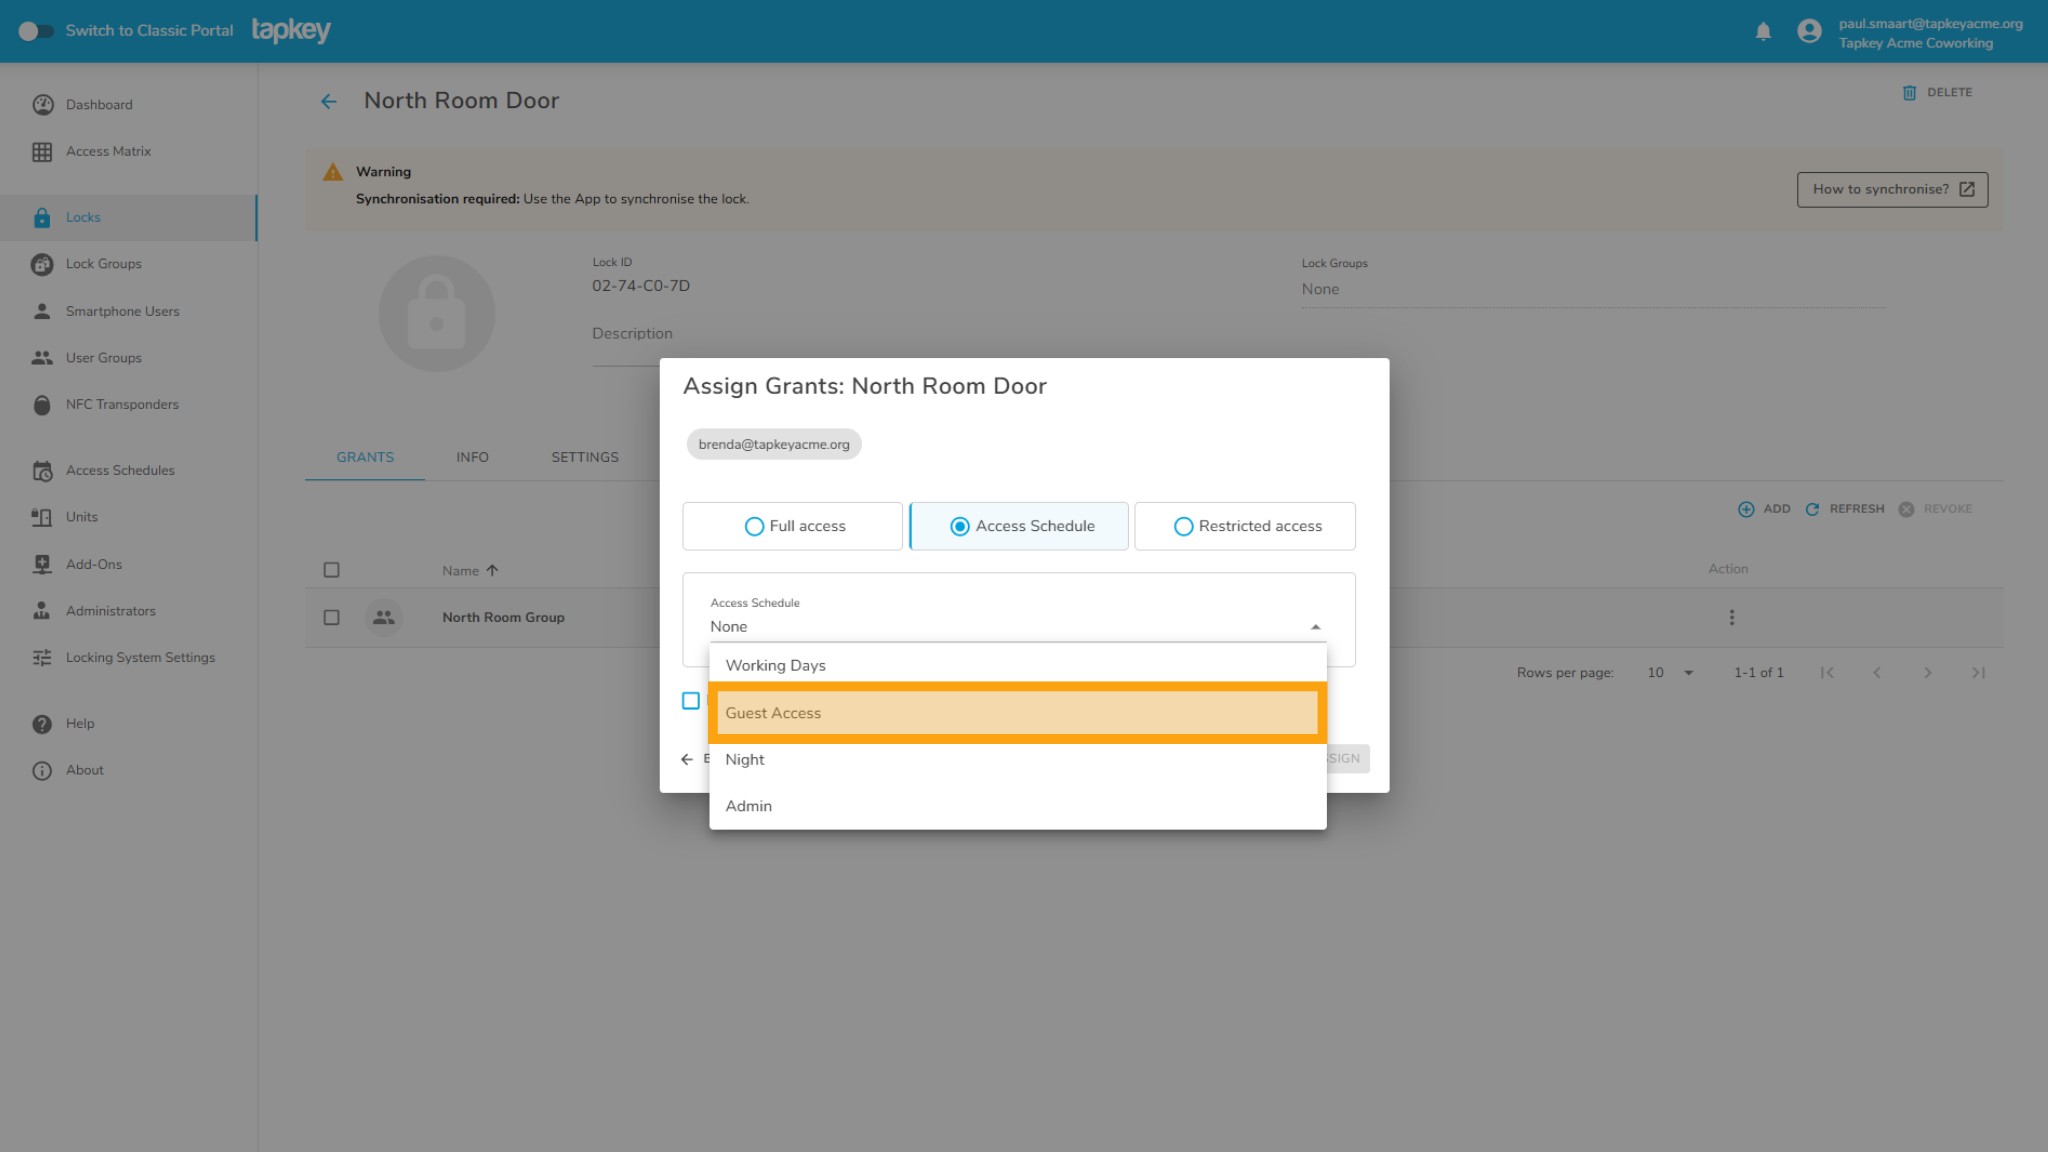
3. Select Access Schedules in the step of permissions.
In this case we are selecting Guest Access.
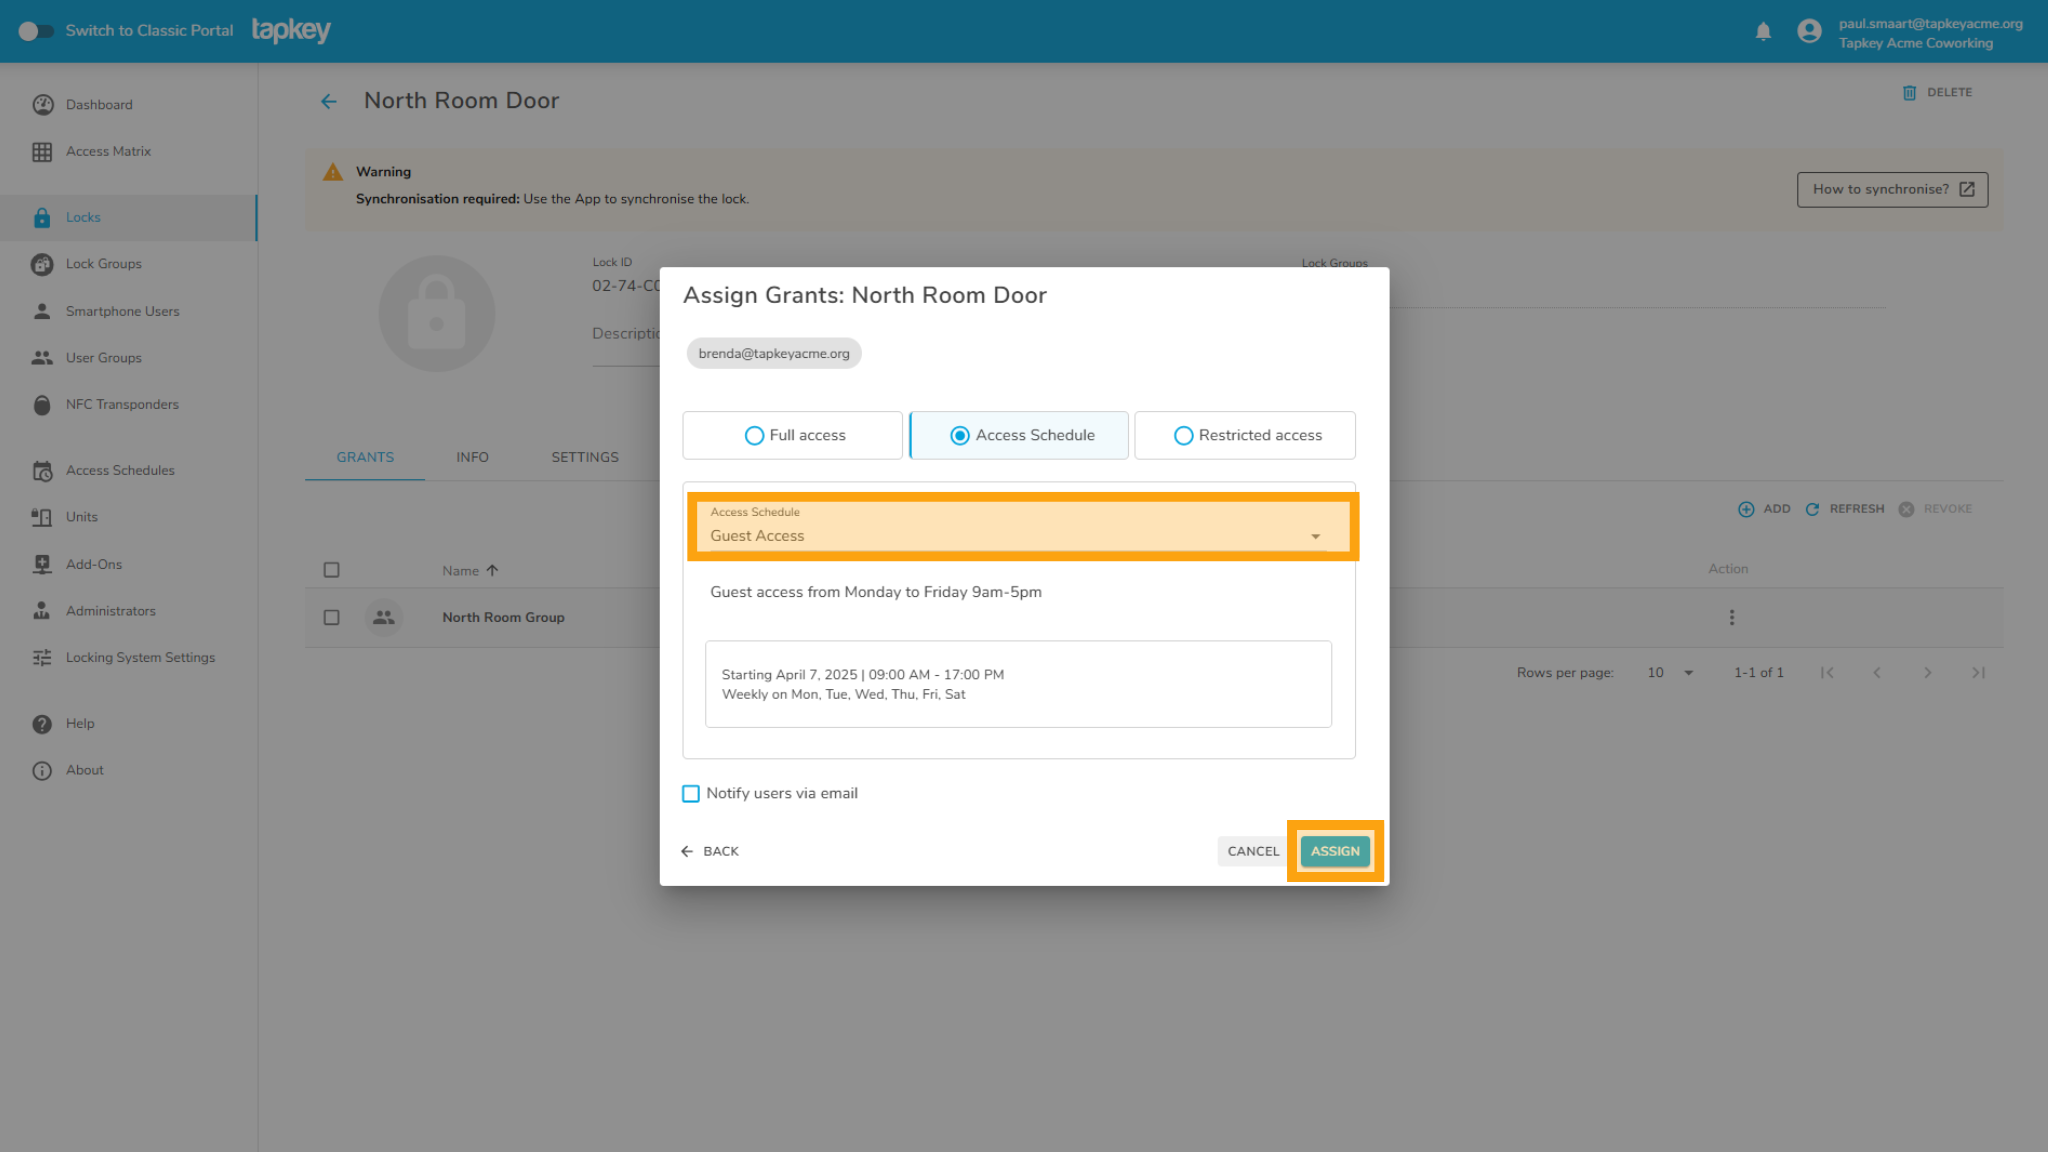
4. Tap Assign to add the grant to Brenda
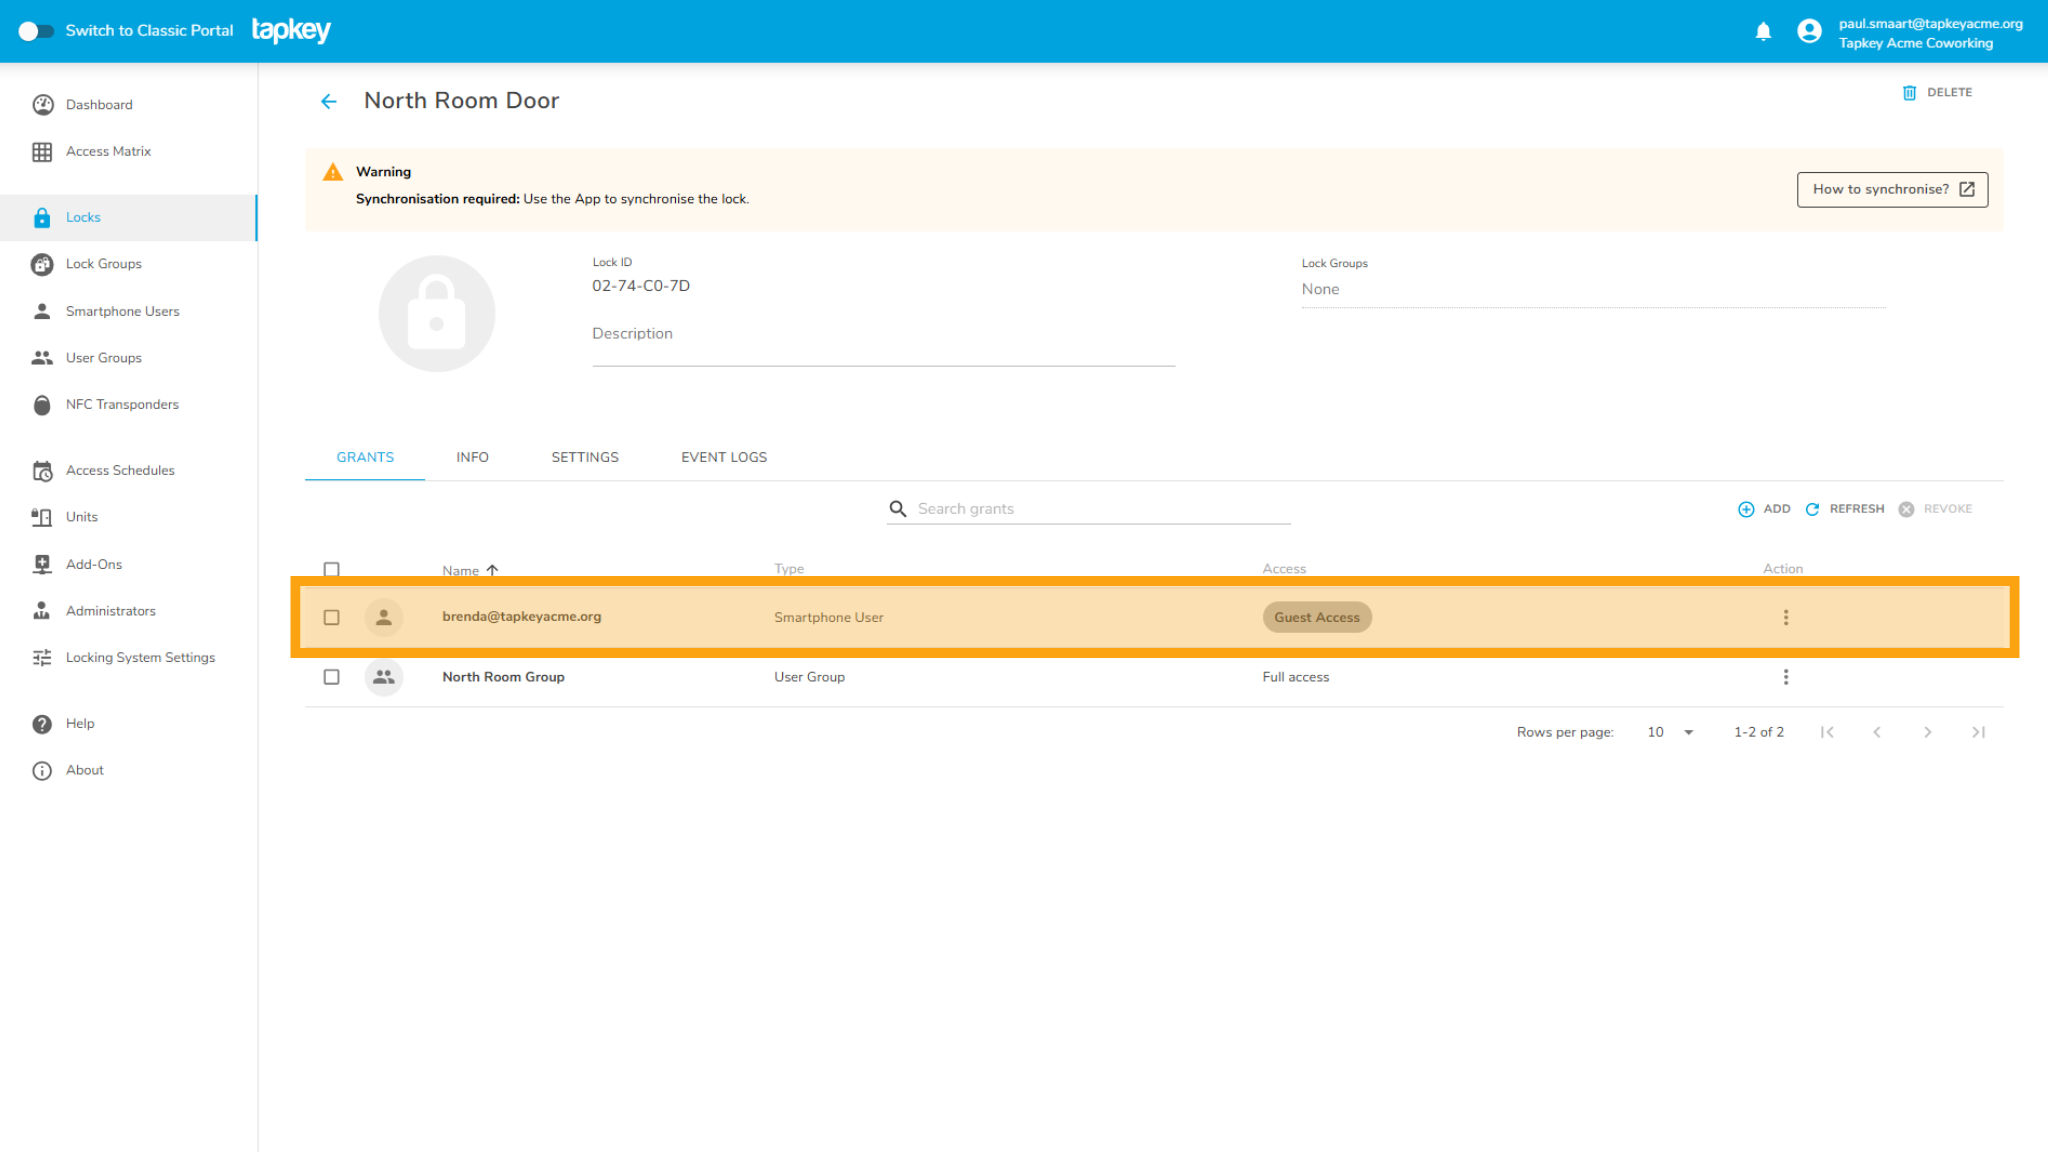
5. Congrats. The grant has been created.
3. How to Change an Access Schedule
You can change schedules according to needs, in this case we are assuming that the owner of the locking system wants to change the access to 09:00 - 13:00. Now this access can be updated centrally.
- Navigate to Access Schedules.
- Find the Schedule you want to change.
- Tap on the actions ellipsis and then Edit.
- Change the Access Schedule and finally tap SAVE.
Automatically Brenda and all grants created from this schedule would be updated.
Was this article helpful?
That’s Great!
Thank you for your feedback
Sorry! We couldn't be helpful
Thank you for your feedback
Feedback sent
We appreciate your effort and will try to fix the article