What's the Access Matrix and how can I use it?
Access Matrix is a helpful tool that makes it easier and faster for admins to manage access in the locking system.
Normally, you have to click through different sections like Persons, NFC transponders, Locks, and Lock Groups to see or change who has access to what. This can be confusing and take a lot of time. It’s also easy to make mistakes when you don’t have everything in one place.
That’s where the Access Matrix comes in. It gives you a clear, consolidated, single table where you can view and manage all important access details like transponders, lock settings, and the overall structure of your system. Once everything is fully available, you’ll be able to handle most tasks, like creating access grants right from this one view, without switching between different tabs.
This article will show you everything you need to know about the Access Matrix.
1. The Feature in Detail
3. How the Access Matrix works
4. How to add permissions in the Access Matrix
The Feature in Detail
The Access Matrix brings together key access control features like Persons, NFC transponders, and the locking system structure into one clear and easy-to-use table. No more jumping between different sections of the portal. Now, you can view and manage everything from one central location. This simplification makes it faster and more intuitive to manage access control across the entire system.
Benefits:
- Centralised Management: Everything you need is in one comprehensive view. No more jumping between different tabs.
- Time Efficiency: Streamline administrative tasks like grant creation, making the process quicker and reducing the risk of errors.
- Ease of Use: The consolidated view reduces complexity and helps you stay on top of everything and make smarter decisions and updates more easily.
- Improved Workflow: With all features accessible from a single table, managing your system feels smoother and more intuitive.
Step-by-Step Guide
How the Access Matrix works
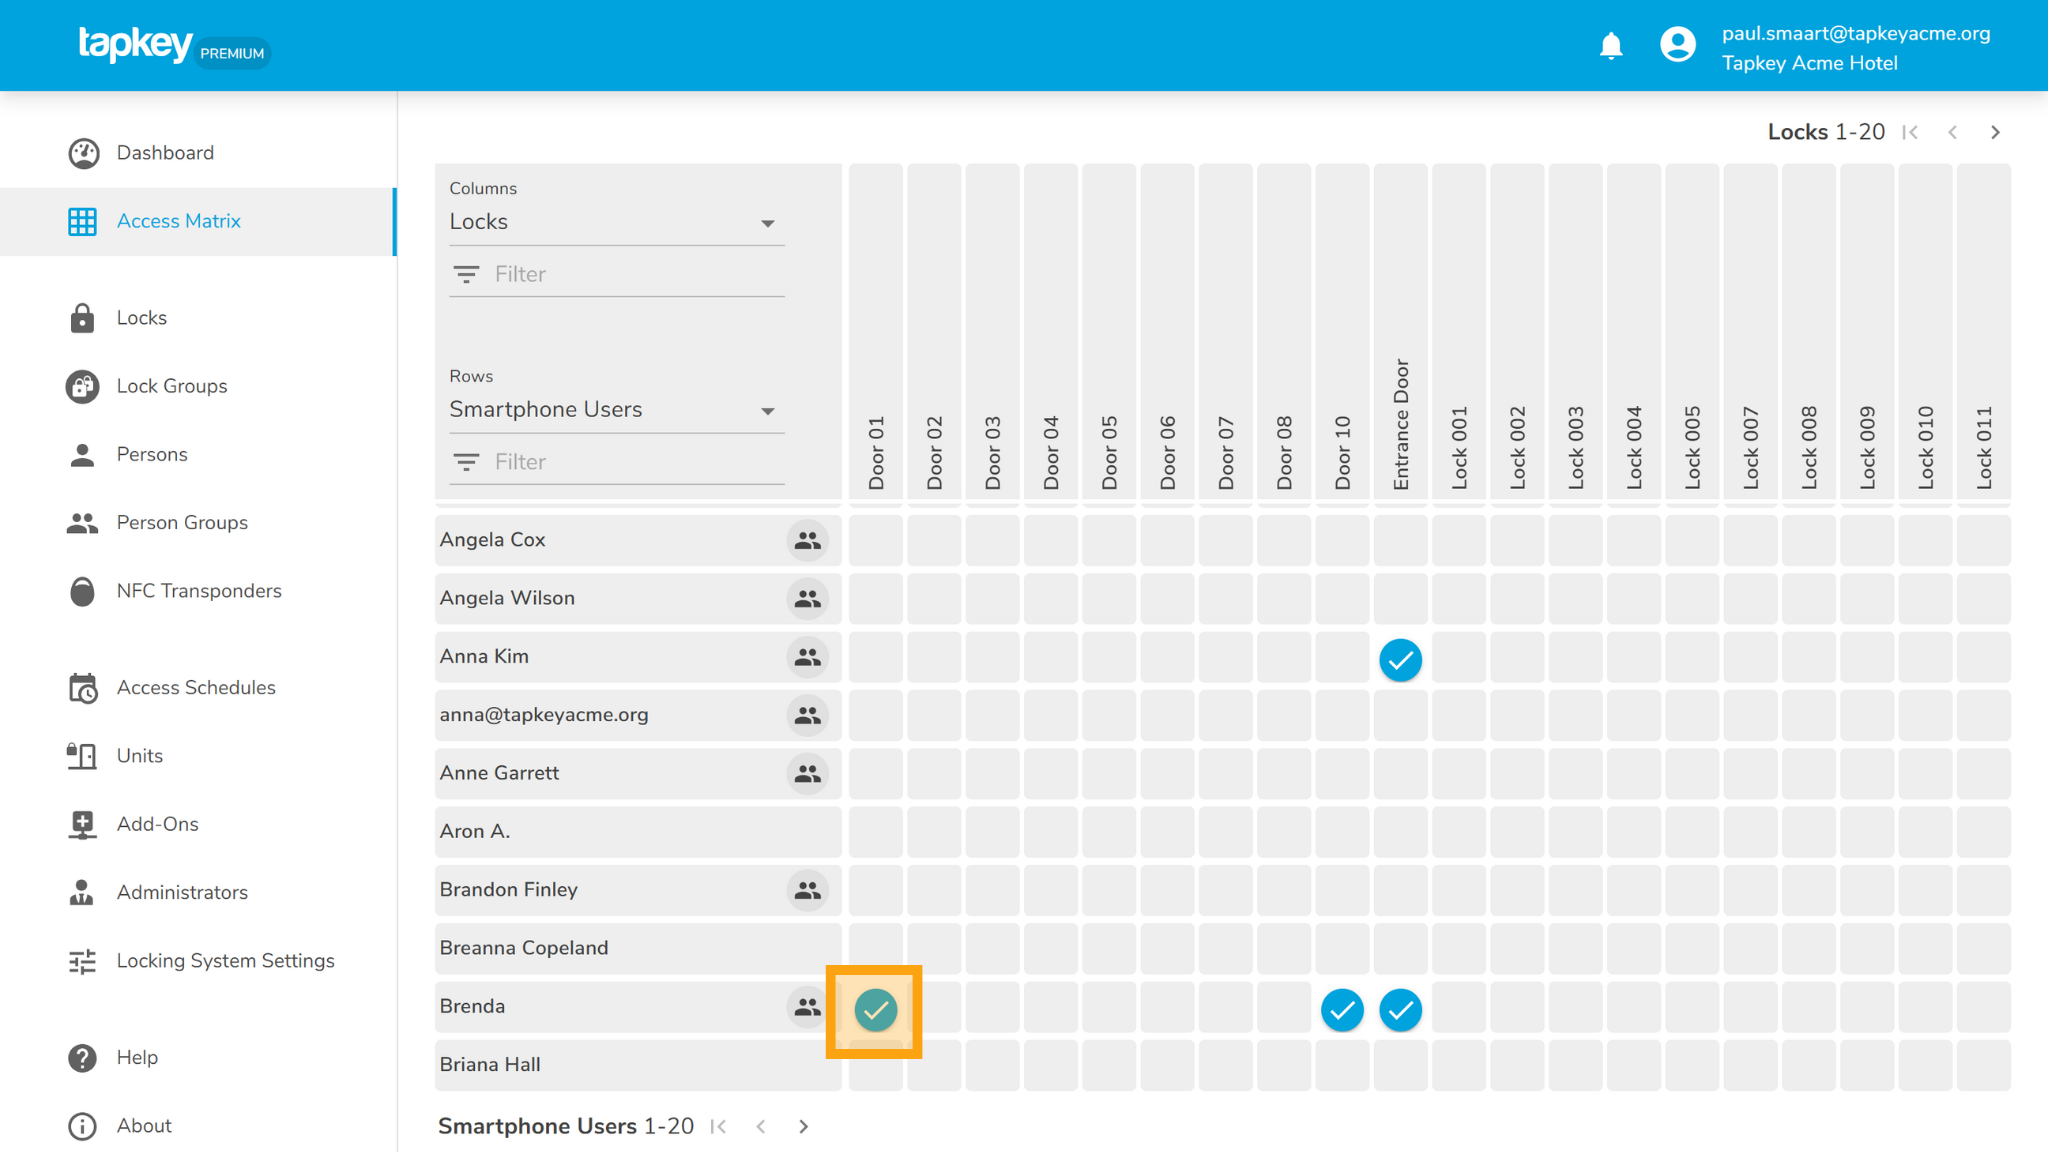
- You can view the Access Matrix by tapping Access Matrix in the navigation menu.
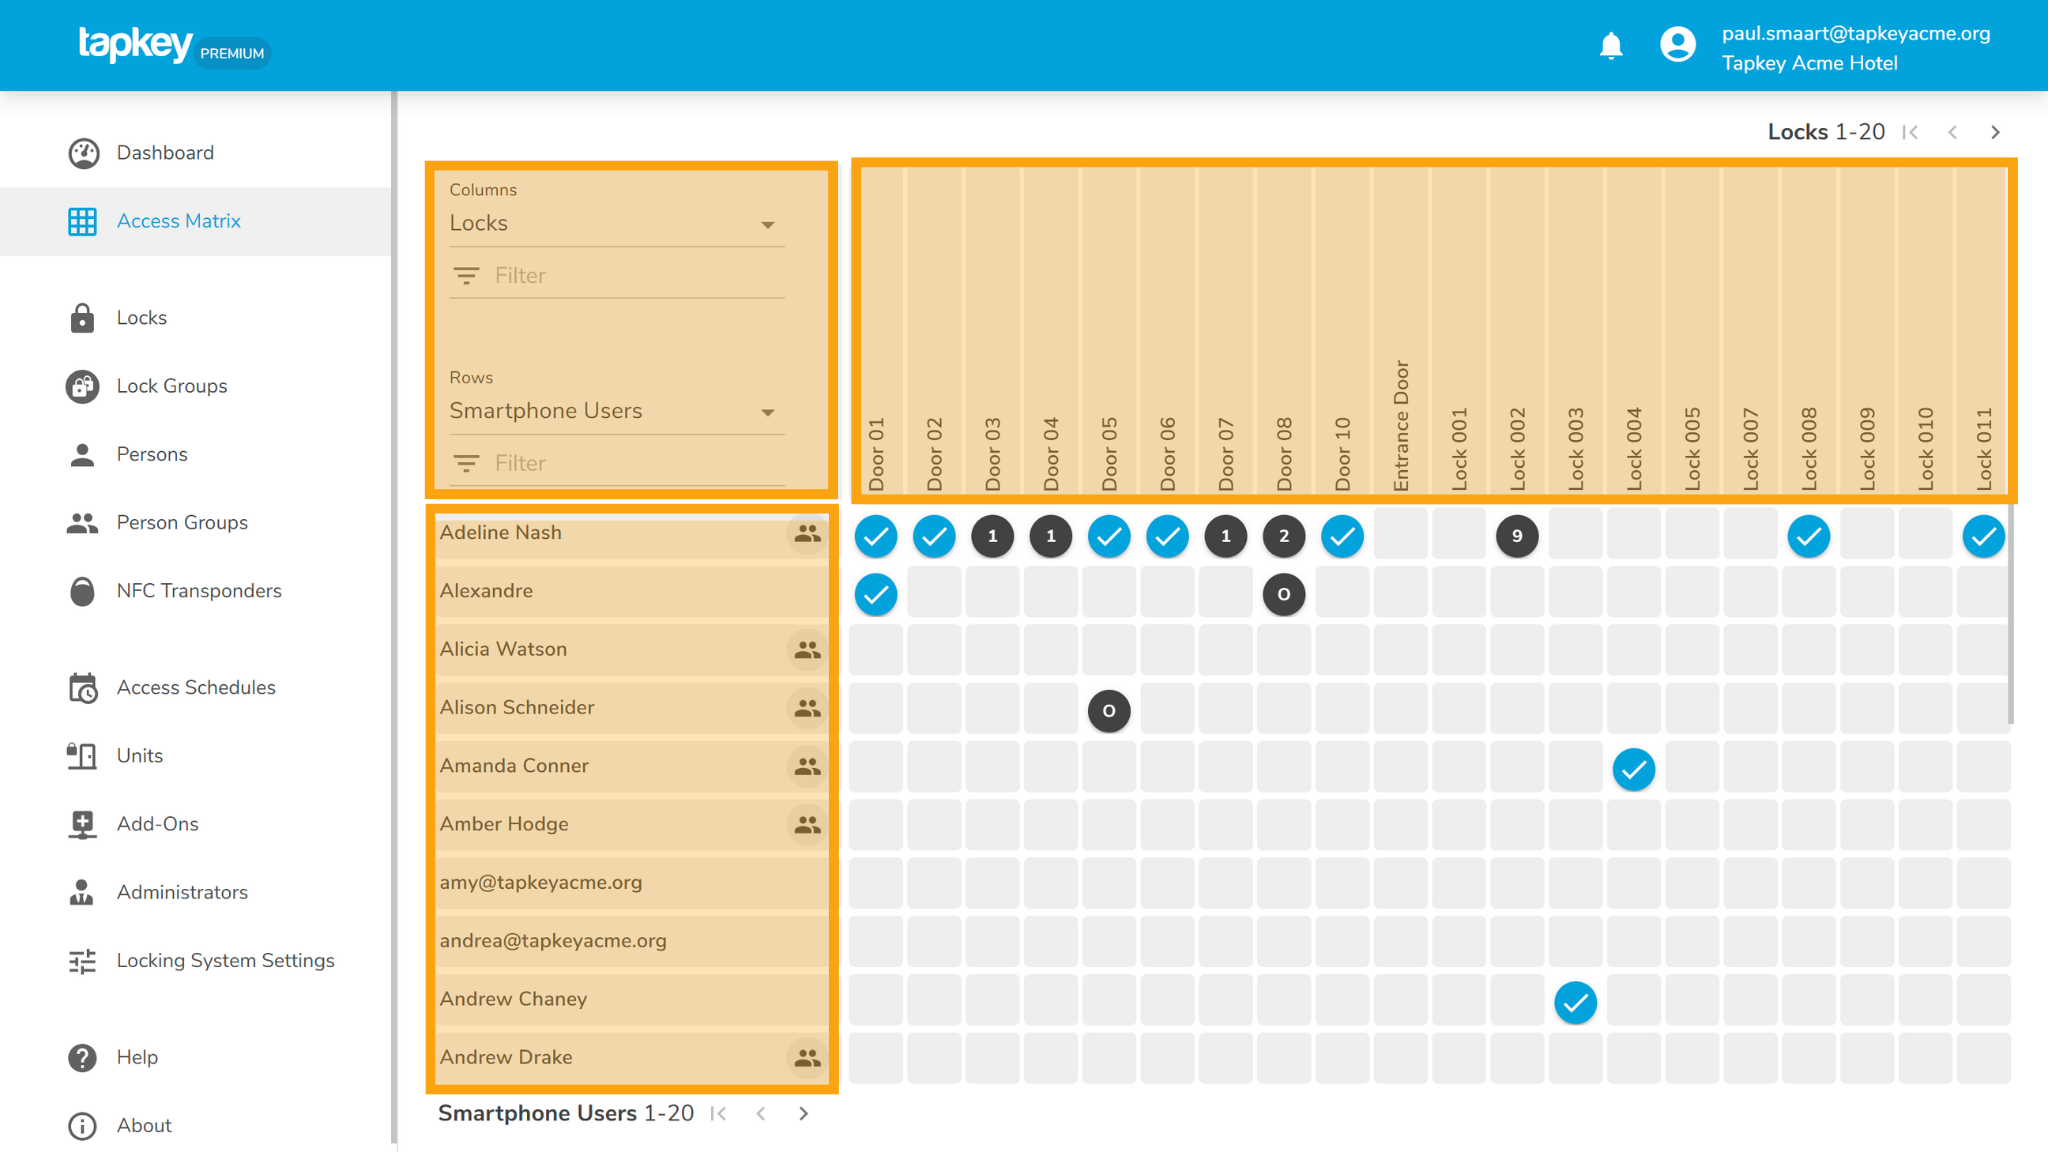
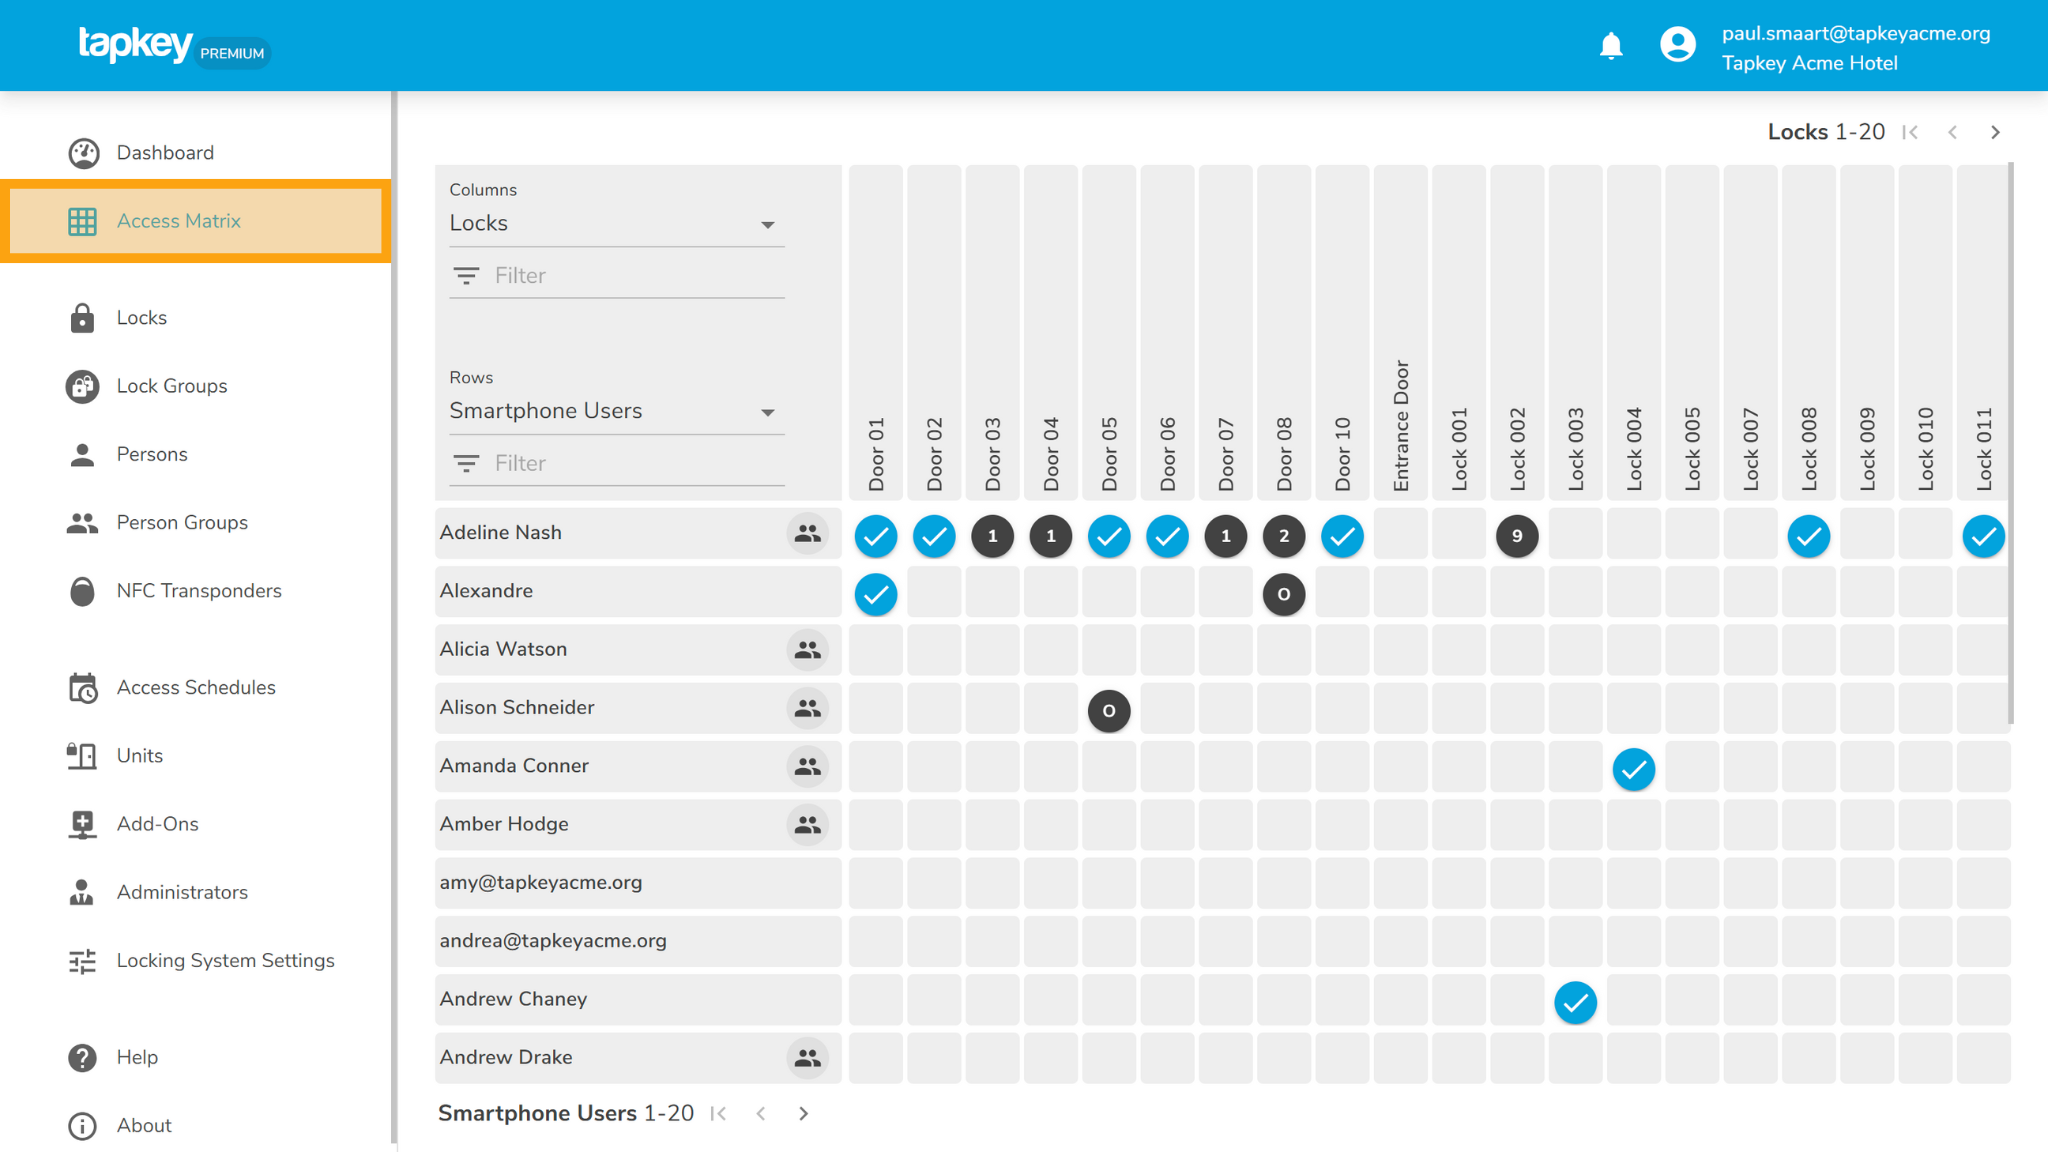
2. When you open the Access Matrix, you'll see locks and lock groups listed across the top (horizontally), and on the left side (vertically). You'll find Persons, Person Groups, NFC transponders, and other entities that can receive access.
In the top-left corner of the Access Matrix, you’ll find the “View Selection” square. This lets you customise how the table is displayed.
- Columns: Choose whether to show Locks or Lock Groups across the top.
- Rows: Switch between different types of access holders, such as Smartphone Users, NFC transponders, Persons, or Person Groups.
By selecting the type of elements you want to compare, you can tailor the view to suit your specific access management needs.
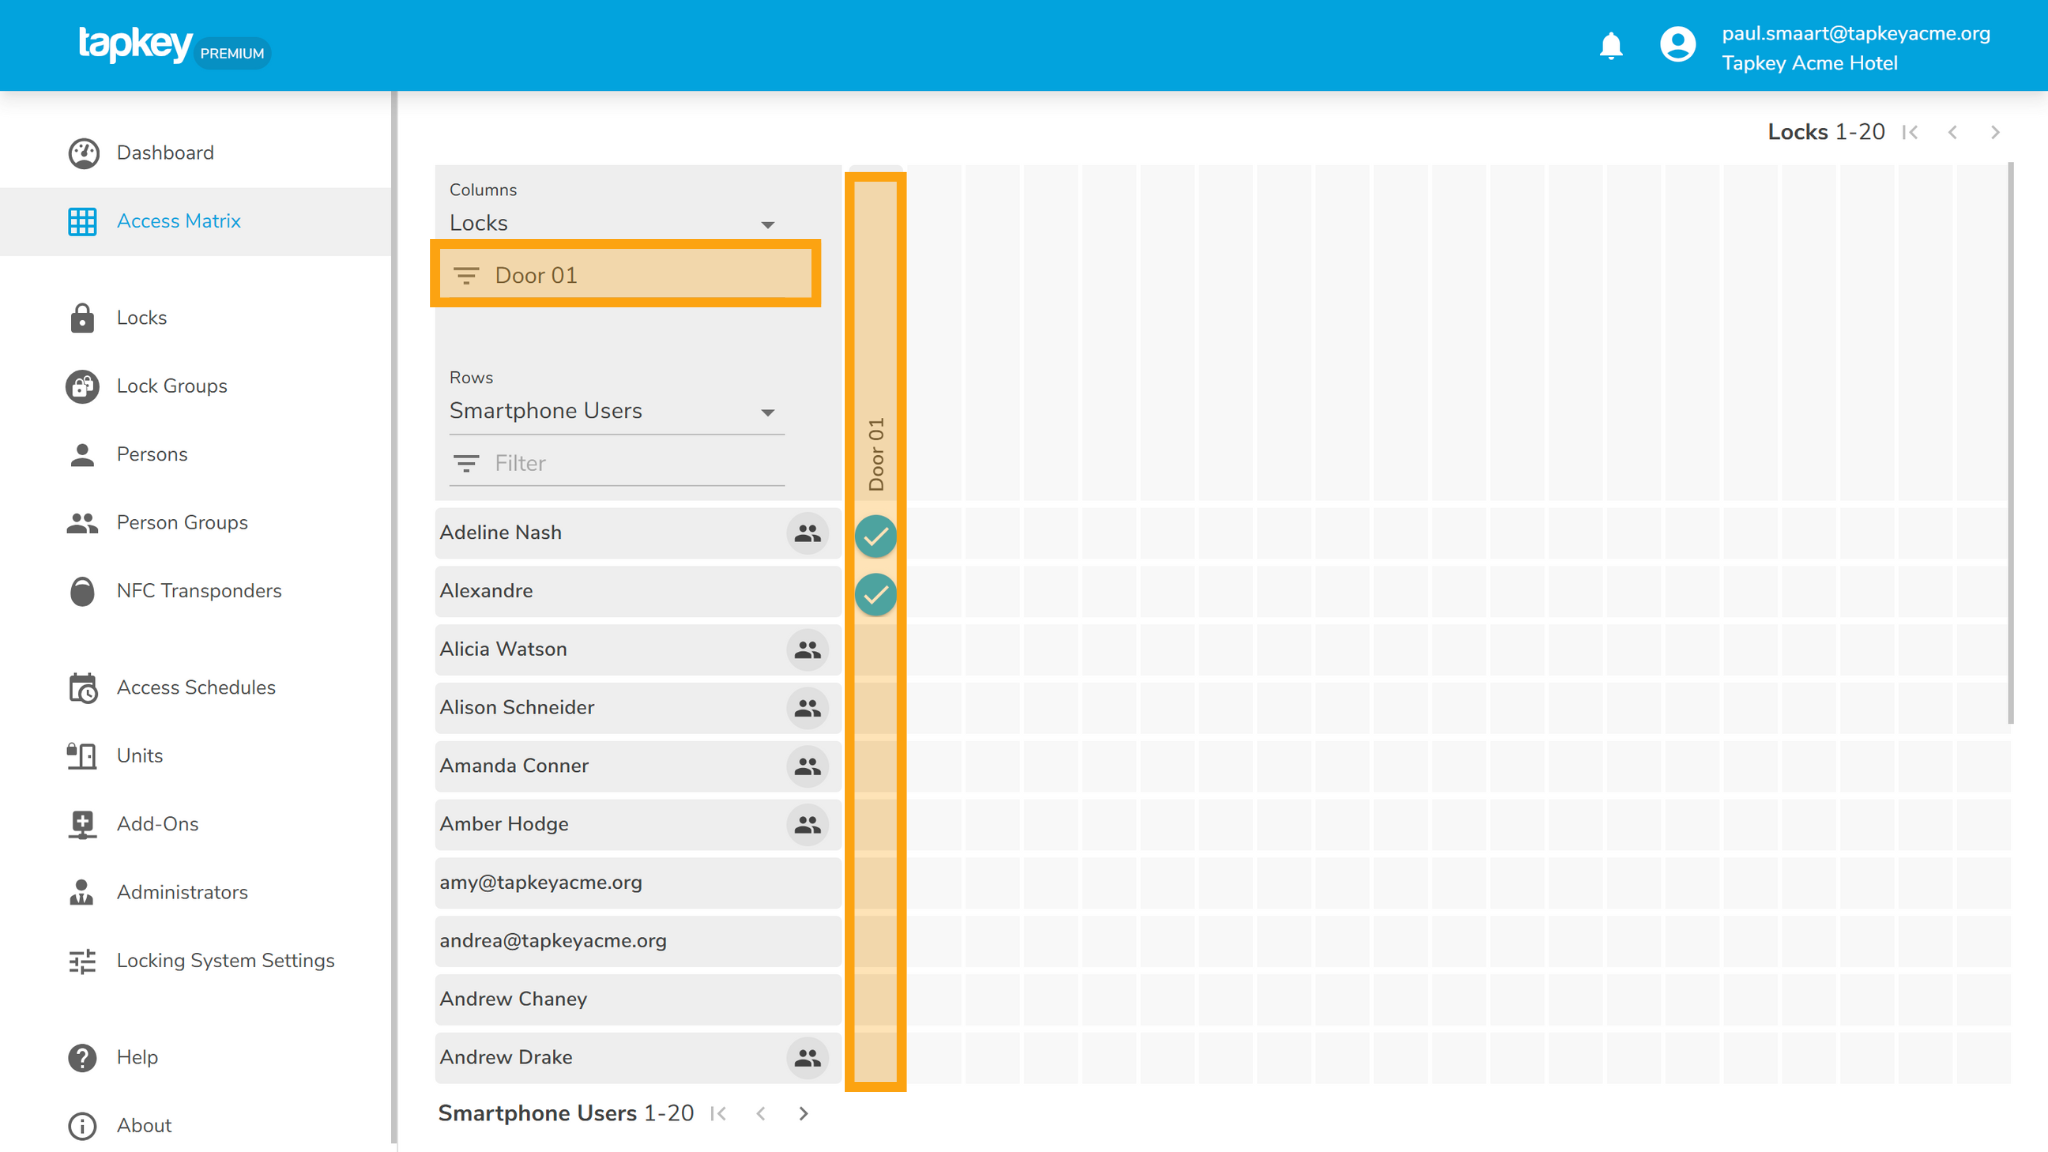
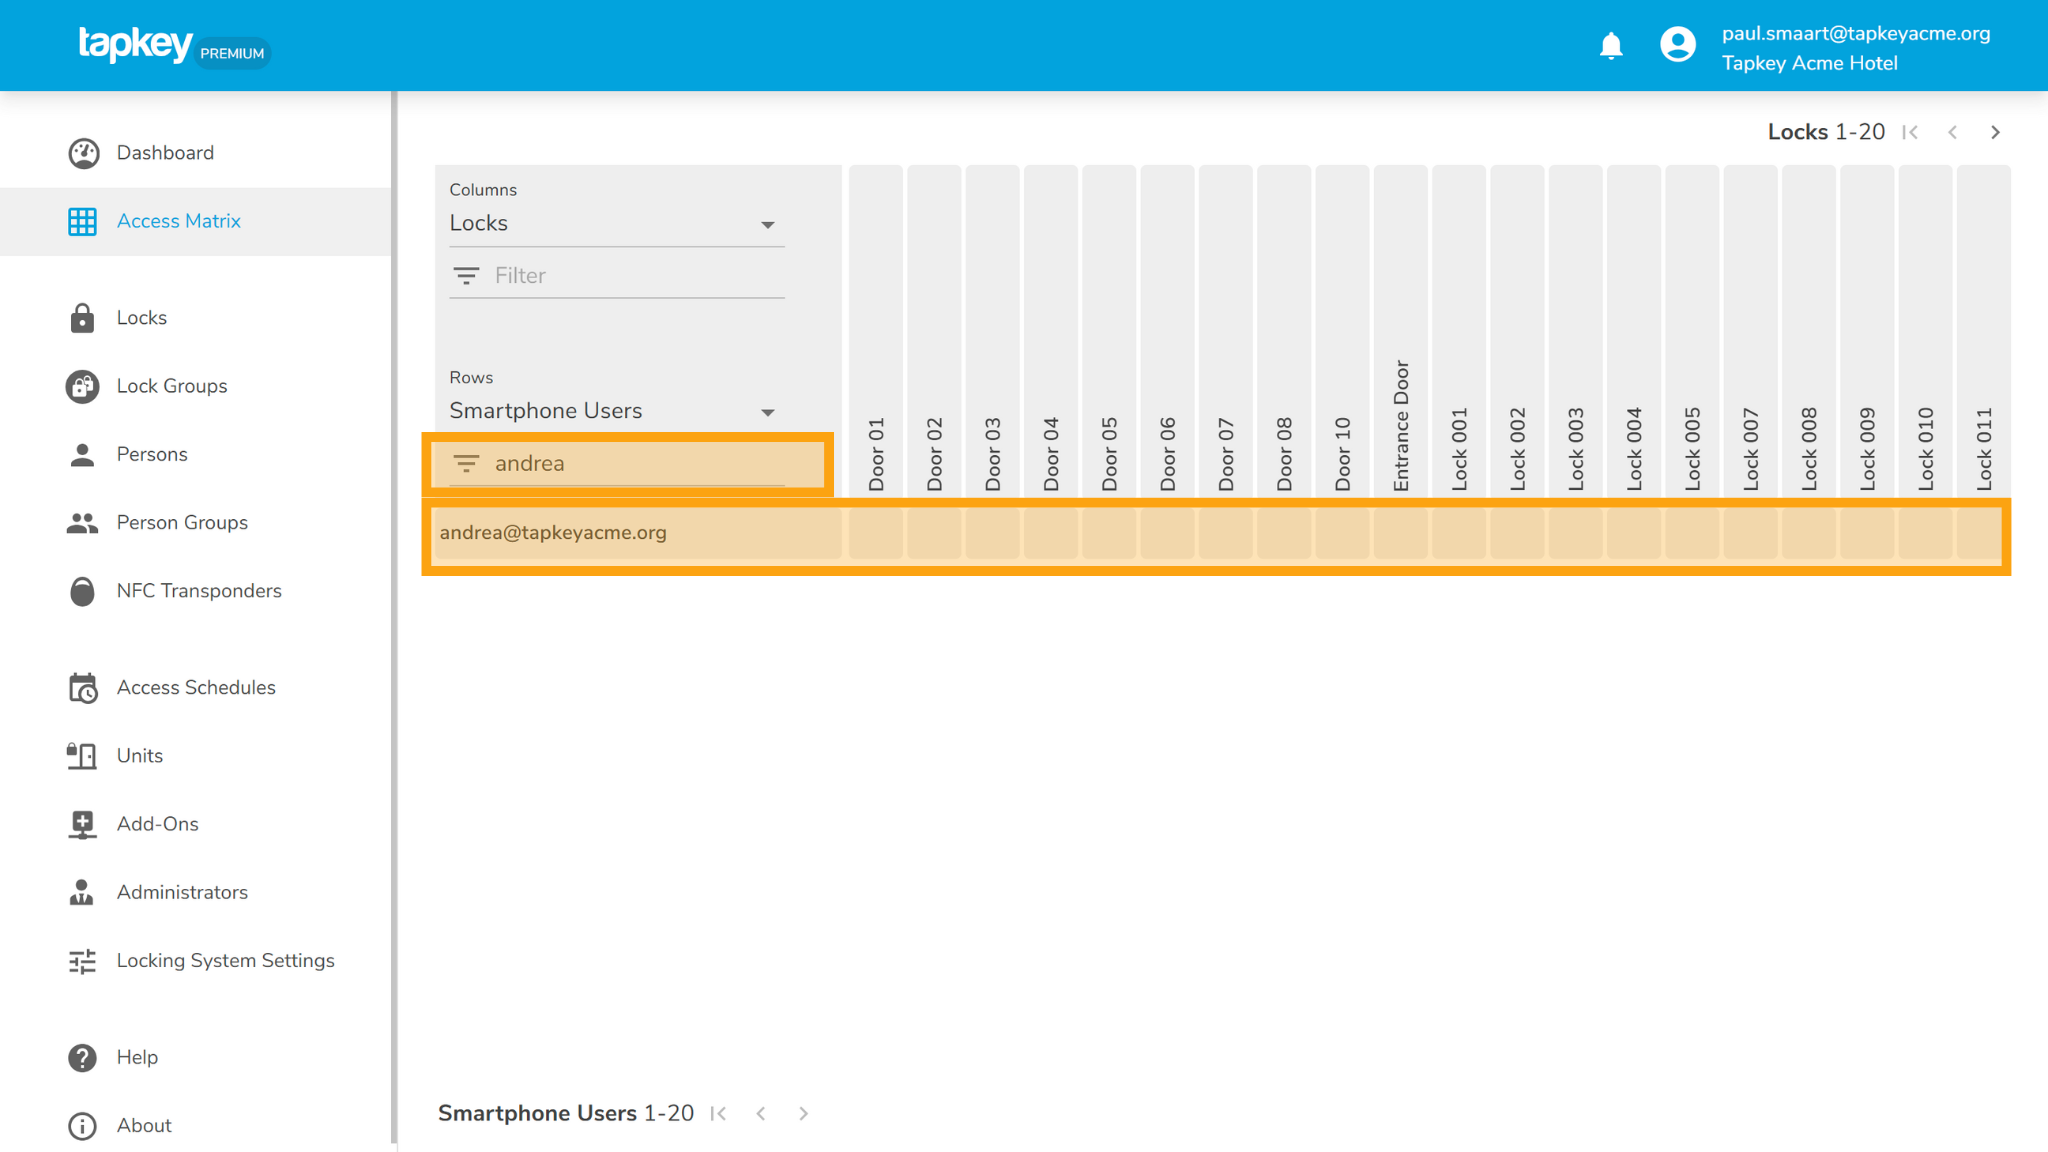
3. You can also filter rows and columns by using the Filter search box behind the type of element selector.
How to Add Permissions in the Access Matrix
Each cell in the Access Matrix shows the access level between a person (row) and a lock (column). The symbols in the cells help you quickly understand what kind of access is granted:
- Blue check: Full Access
- Blue clock: Restricted access (e.g. time-limited)
- Gray Initial: Access is managed via an Access Schedule
- Empty: No Access granted

1. To create a new access grant, simply click on an empty cell where a person and a lock intersect. A context menu will appear with available options.
For example: To give Brenda full access to “Door 01”, click the cell where Brenda’s row meets the “Door 01” column, and choose Full Access from the menu.
2. After the grant has been created, the Access Matrix will display an indicator: a blue bubble with a checkmark will appear next to the person who received the grant.

3. You can also edit or remove an existing grant by clicking on a cell with an access indicator.
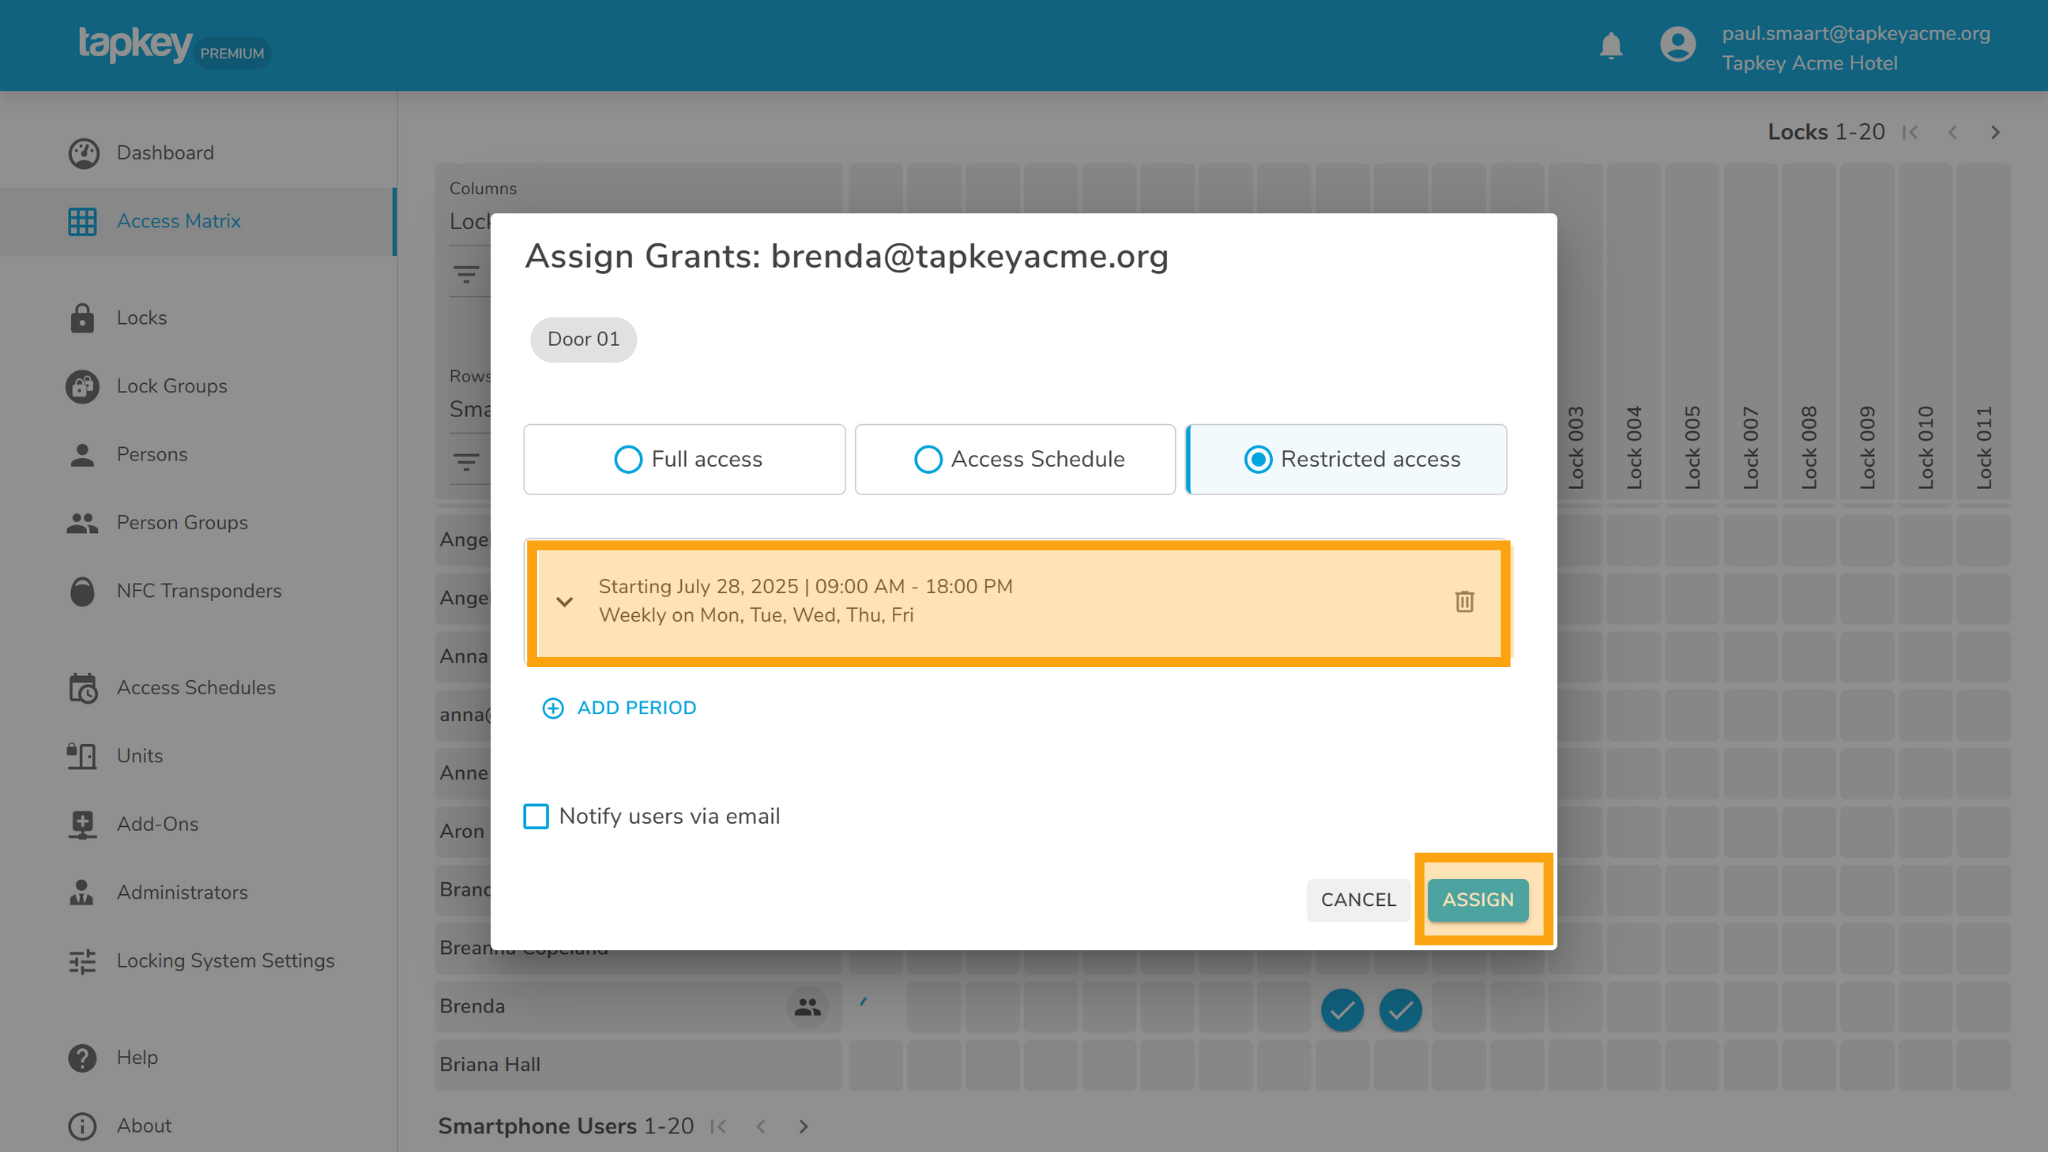
4. You can also create a more complex restriction for your grant by adding the grant with “Custom access”
This will allow you to set up grant restrictions or use an Access Schedule.
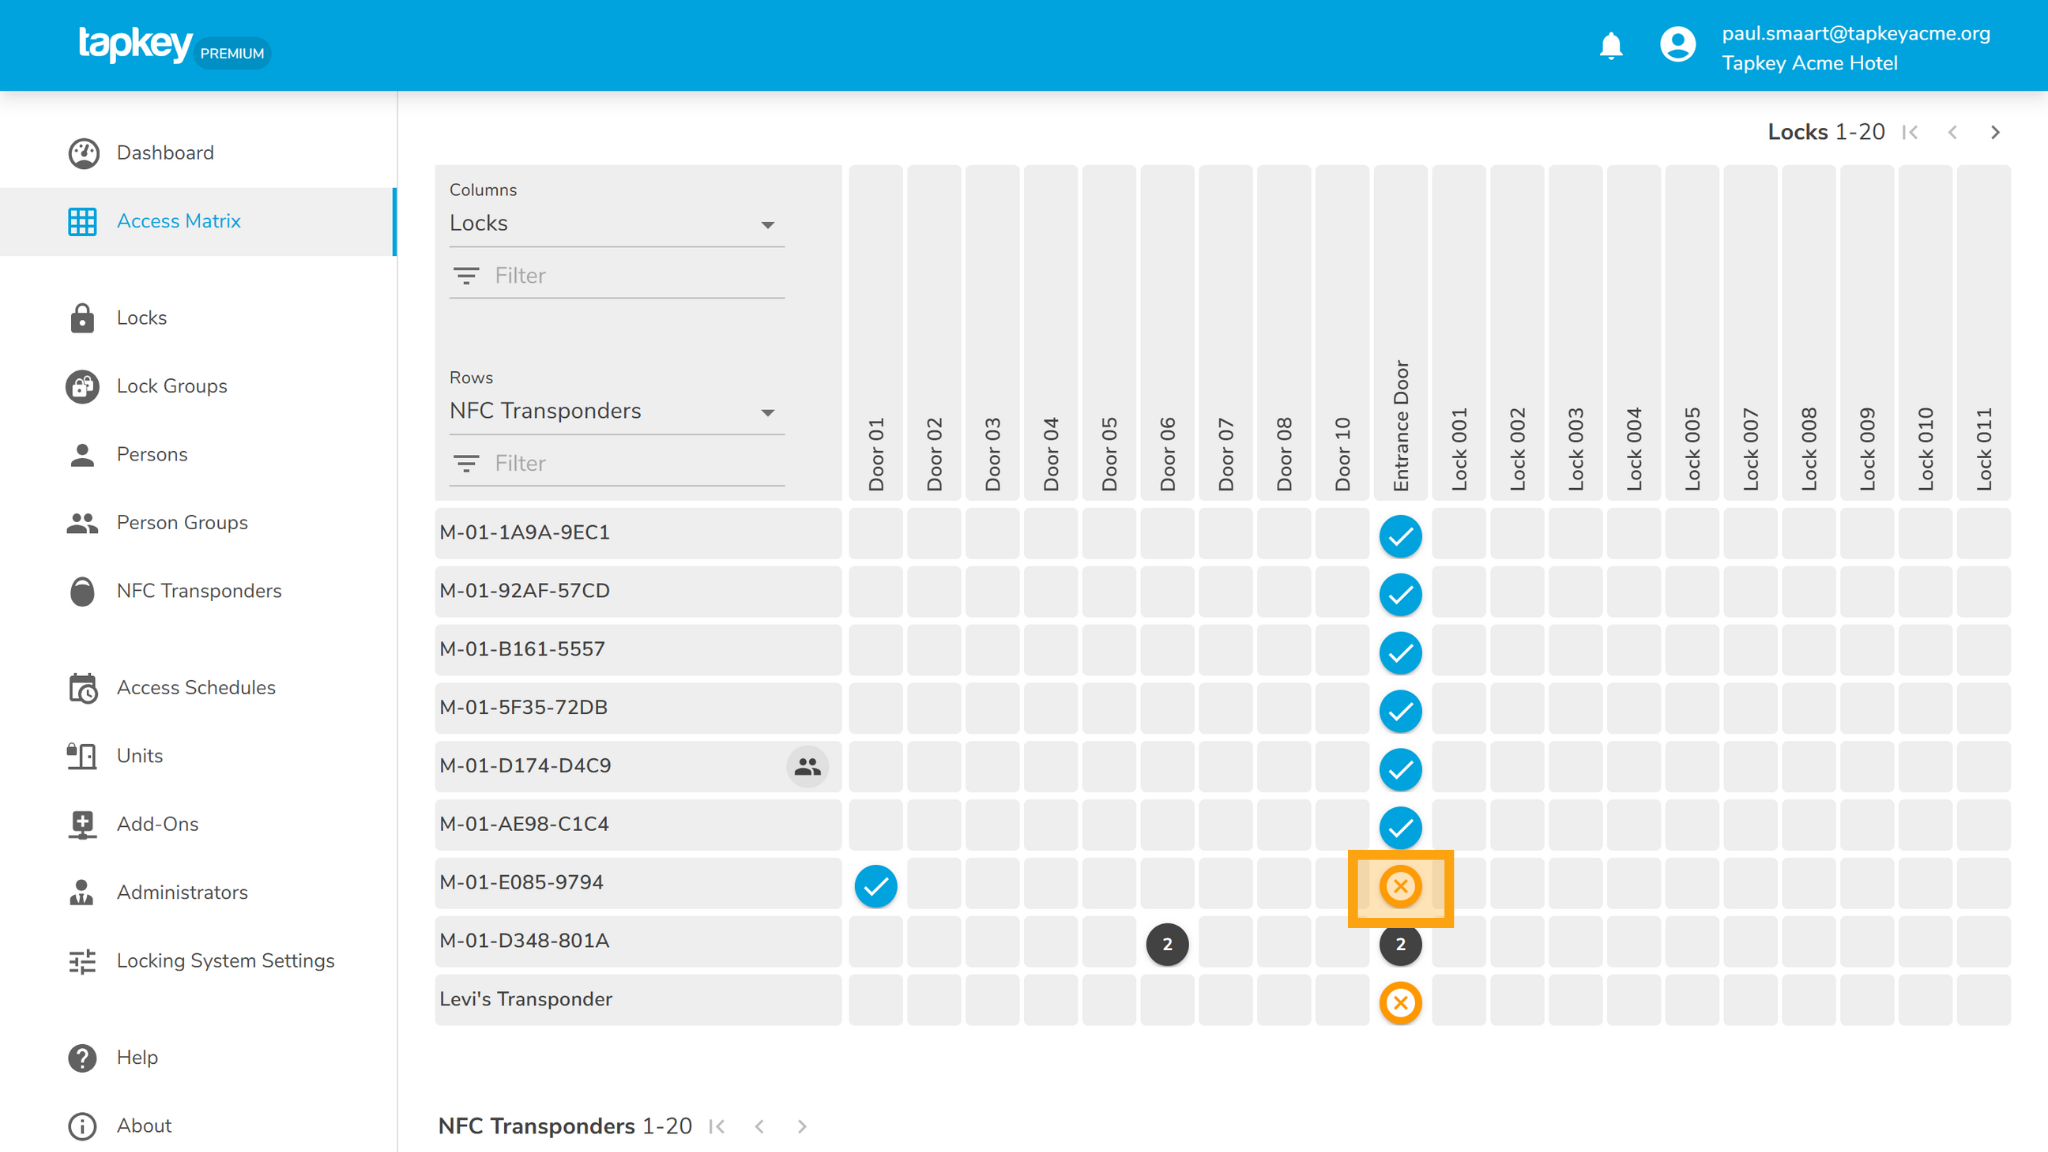
5. All grants can be managed in your locking system using Access Matrix. For example, with NFC transponders, the Access Matrix indicator will show additional information if synchronisation is required.
Was this article helpful?
That’s Great!
Thank you for your feedback
Sorry! We couldn't be helpful
Thank you for your feedback
Feedback sent
We appreciate your effort and will try to fix the article