How to set up Nexudus Calendar Booking and connect with Tapkey
Nexudus is a software platform designed to streamline the management of coworking spaces and shared office environments. By integrating with the Nexudus Add-on, physical access management becomes seamless, automatically handling access as resources are booked and users are associated with plans within Nexudus. In this helpcenter article, we will show you step-by-step how to set up the Nexudus Add-On, from DOM Security and Tapkey.
Installation
Prerequisites
Before starting with this tutorial, it is required:
- Nexudus space already created by Administrator, including:
- Tapkey Smart Locks are already installed in the facilities. Find out how to register locks here.
- If you want to edit the margin time, find a detailed description here.
The Scenario
This tutorial is going to use a hypothetical scenario to describe more in detail how to use the Add-On, we will consider ourselves owners and administrators of a small coworking space with multiple resources that can be used by coworker members, Resources contain 3 Desk Offices, 1 Conference Room and 1 Hot-Desk Area. By assumption, we are going to consider that every resource in the coworking space is required to pass through a building entrance door, to be able to access the facilities.

As a result, every booking in the coworking space is going to automatically reserve physical access to the coworker who reserved using the Tapkey application for the given time reserved.
Step-by-step guide
Step 1: Tapkey Add-On installation from Nexudus
The first step happens on the Nexudus side, where it is required to install the Tapkey Add-On within Nexudus. This process is going to be detailed below. If you have already connected the Add-On, you can skip to Step 2.
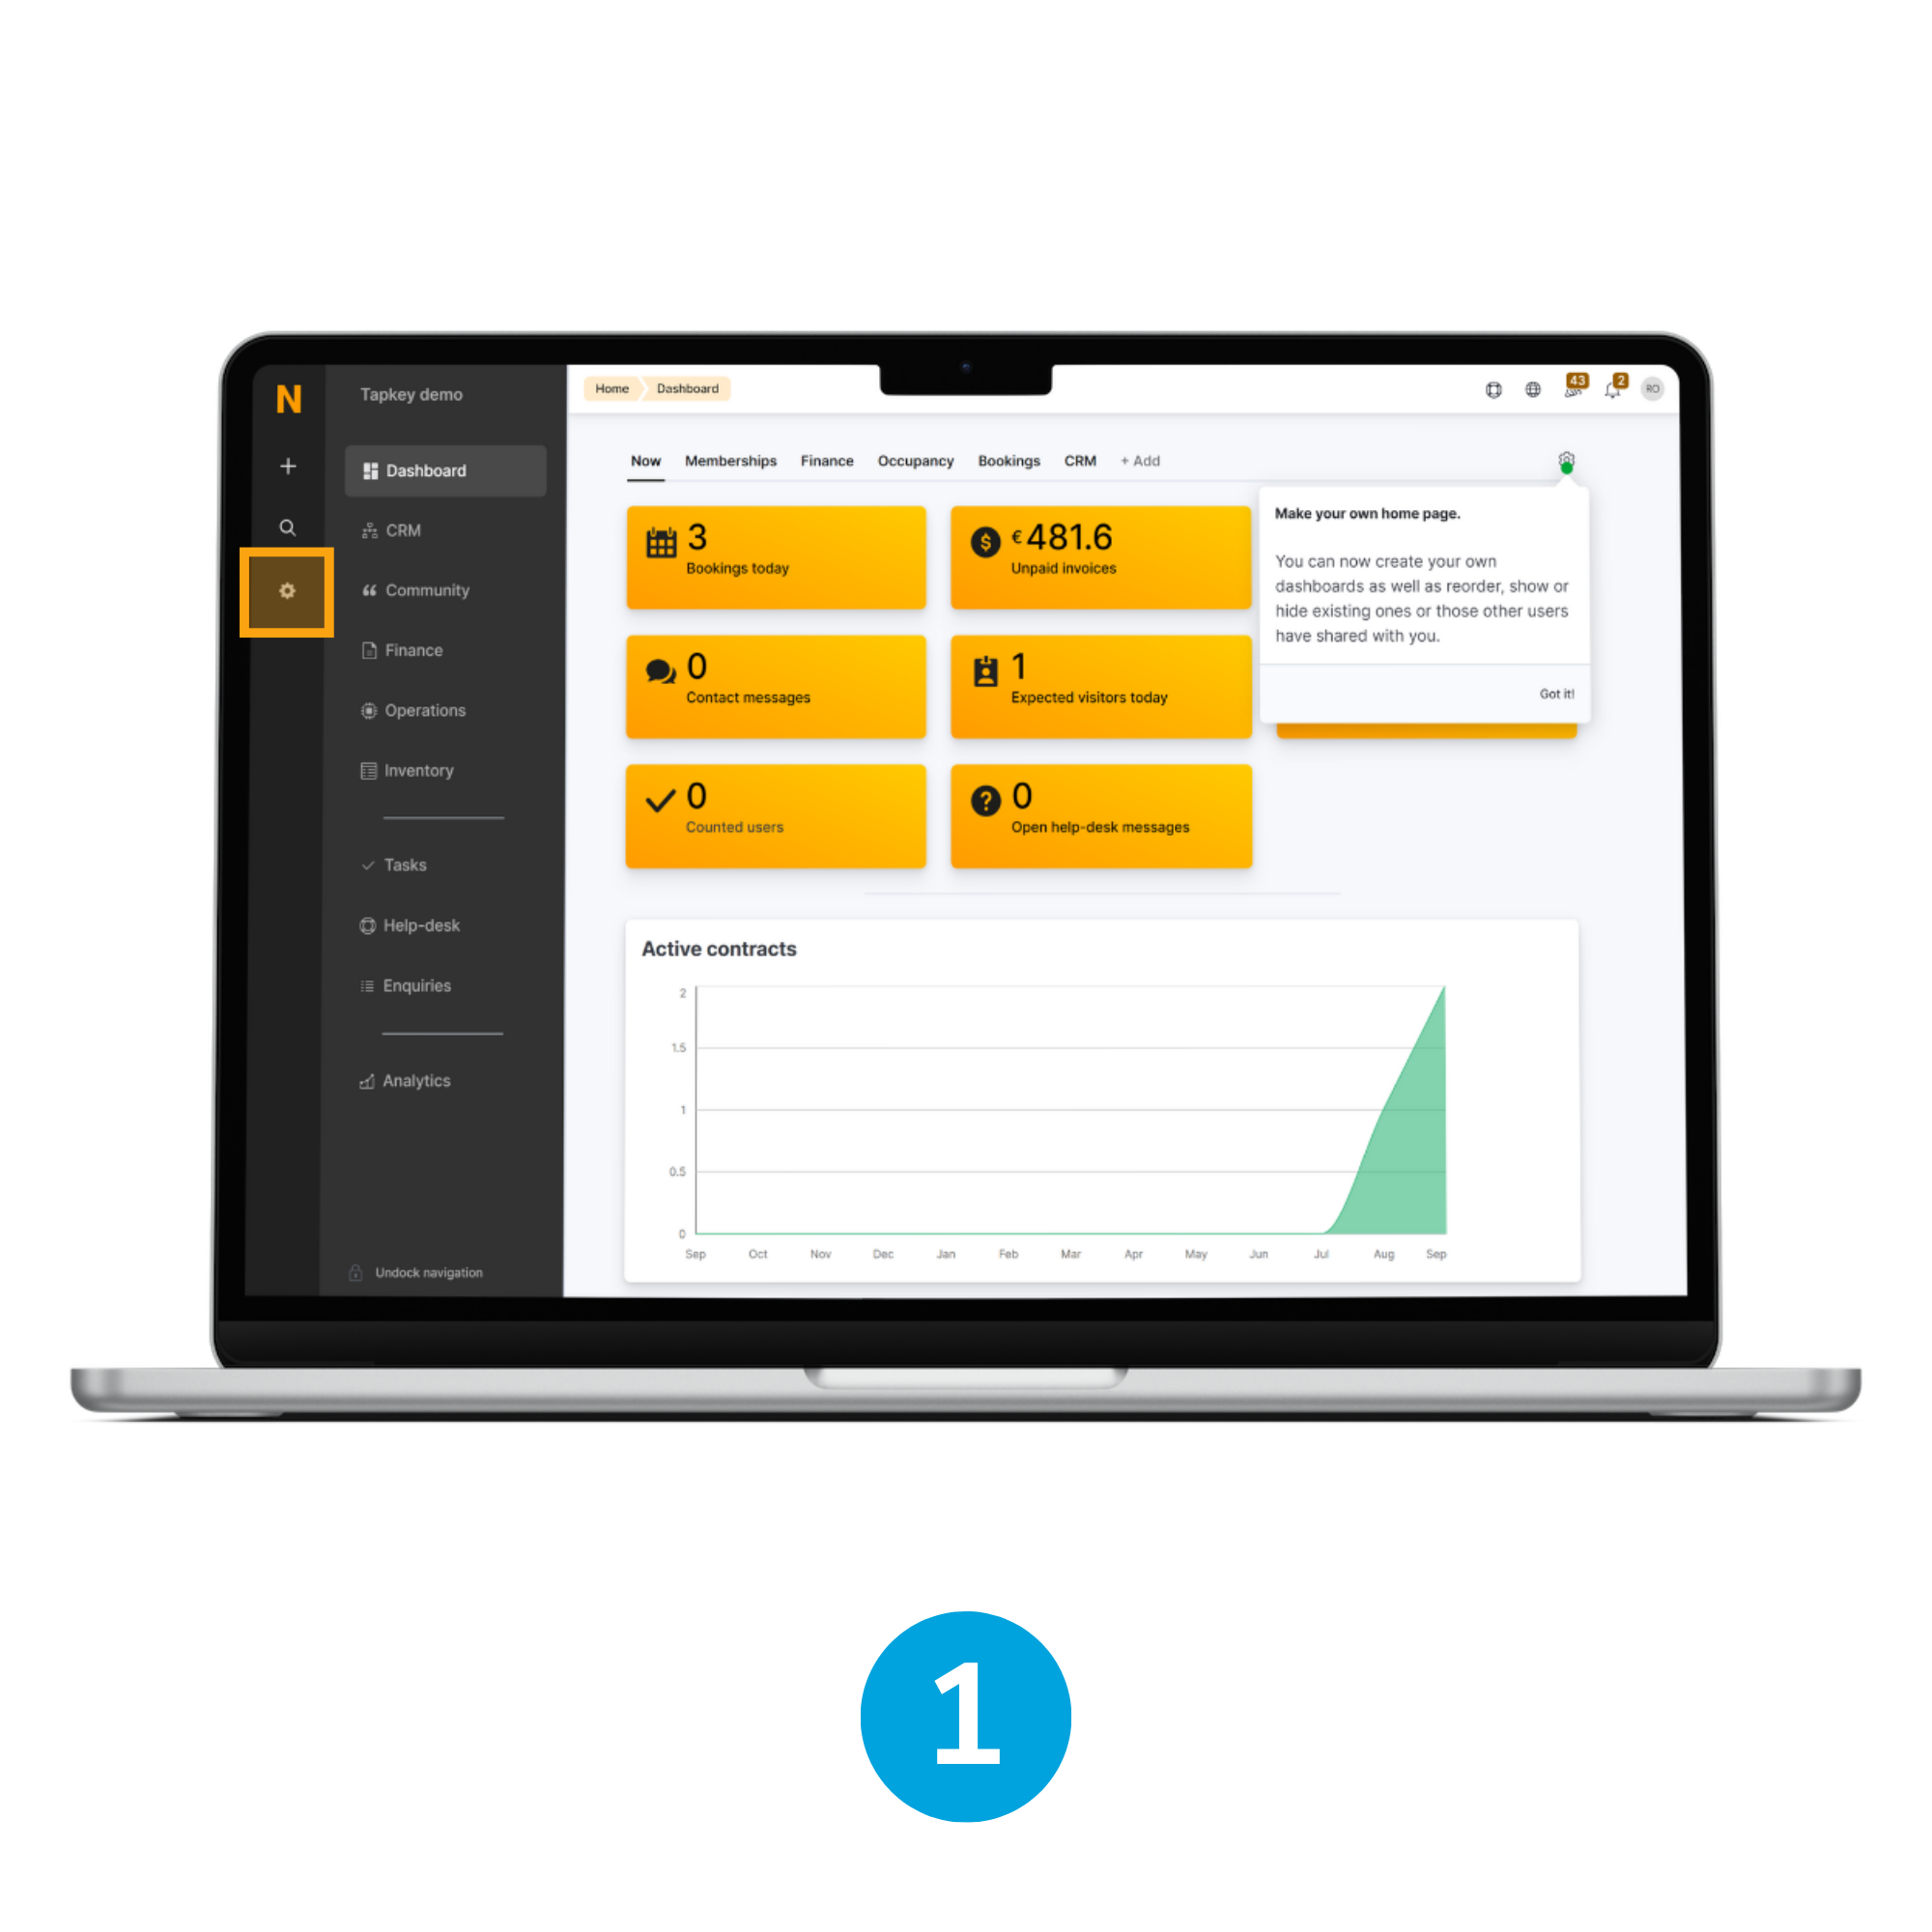
1. Open Settings
As administrator of the coworking space, as soon as you are in the Admin Panel, navigate to the Settings page.
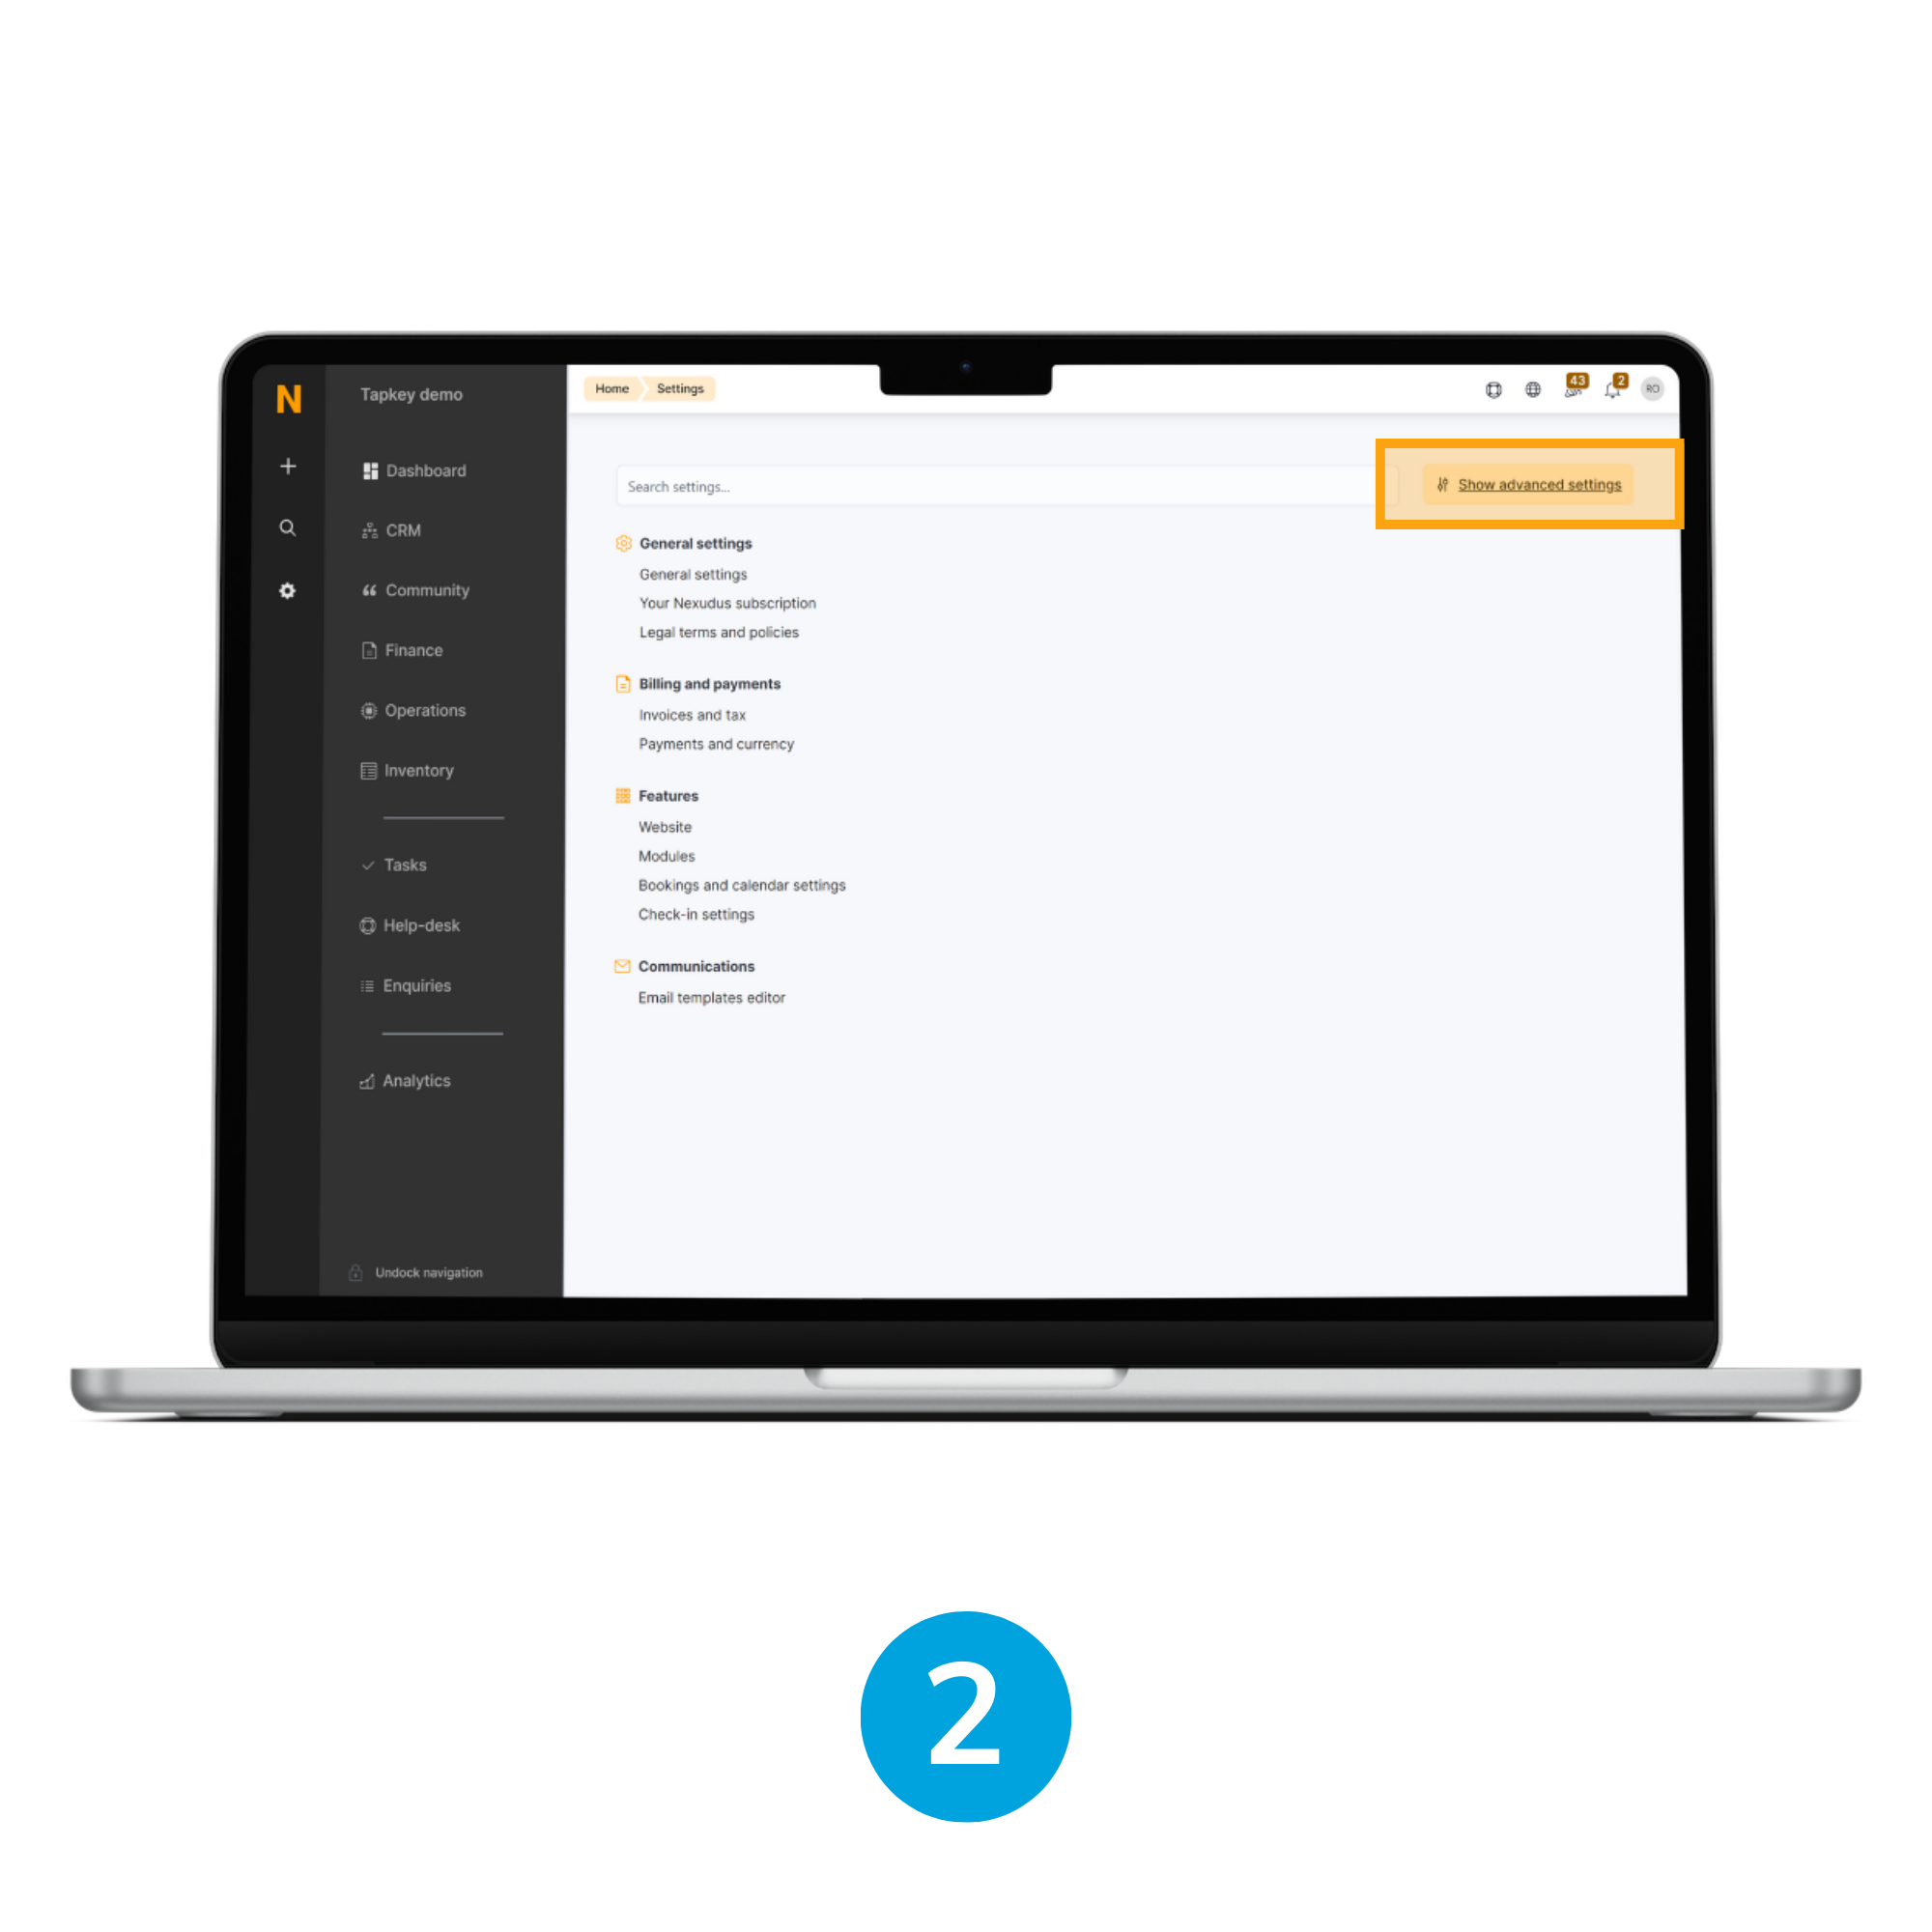
2. Show advanced settings
By default, the settings page does not display Add-ons and Advanced features, so it is required to click the button Show advanced settings next to the Search box.
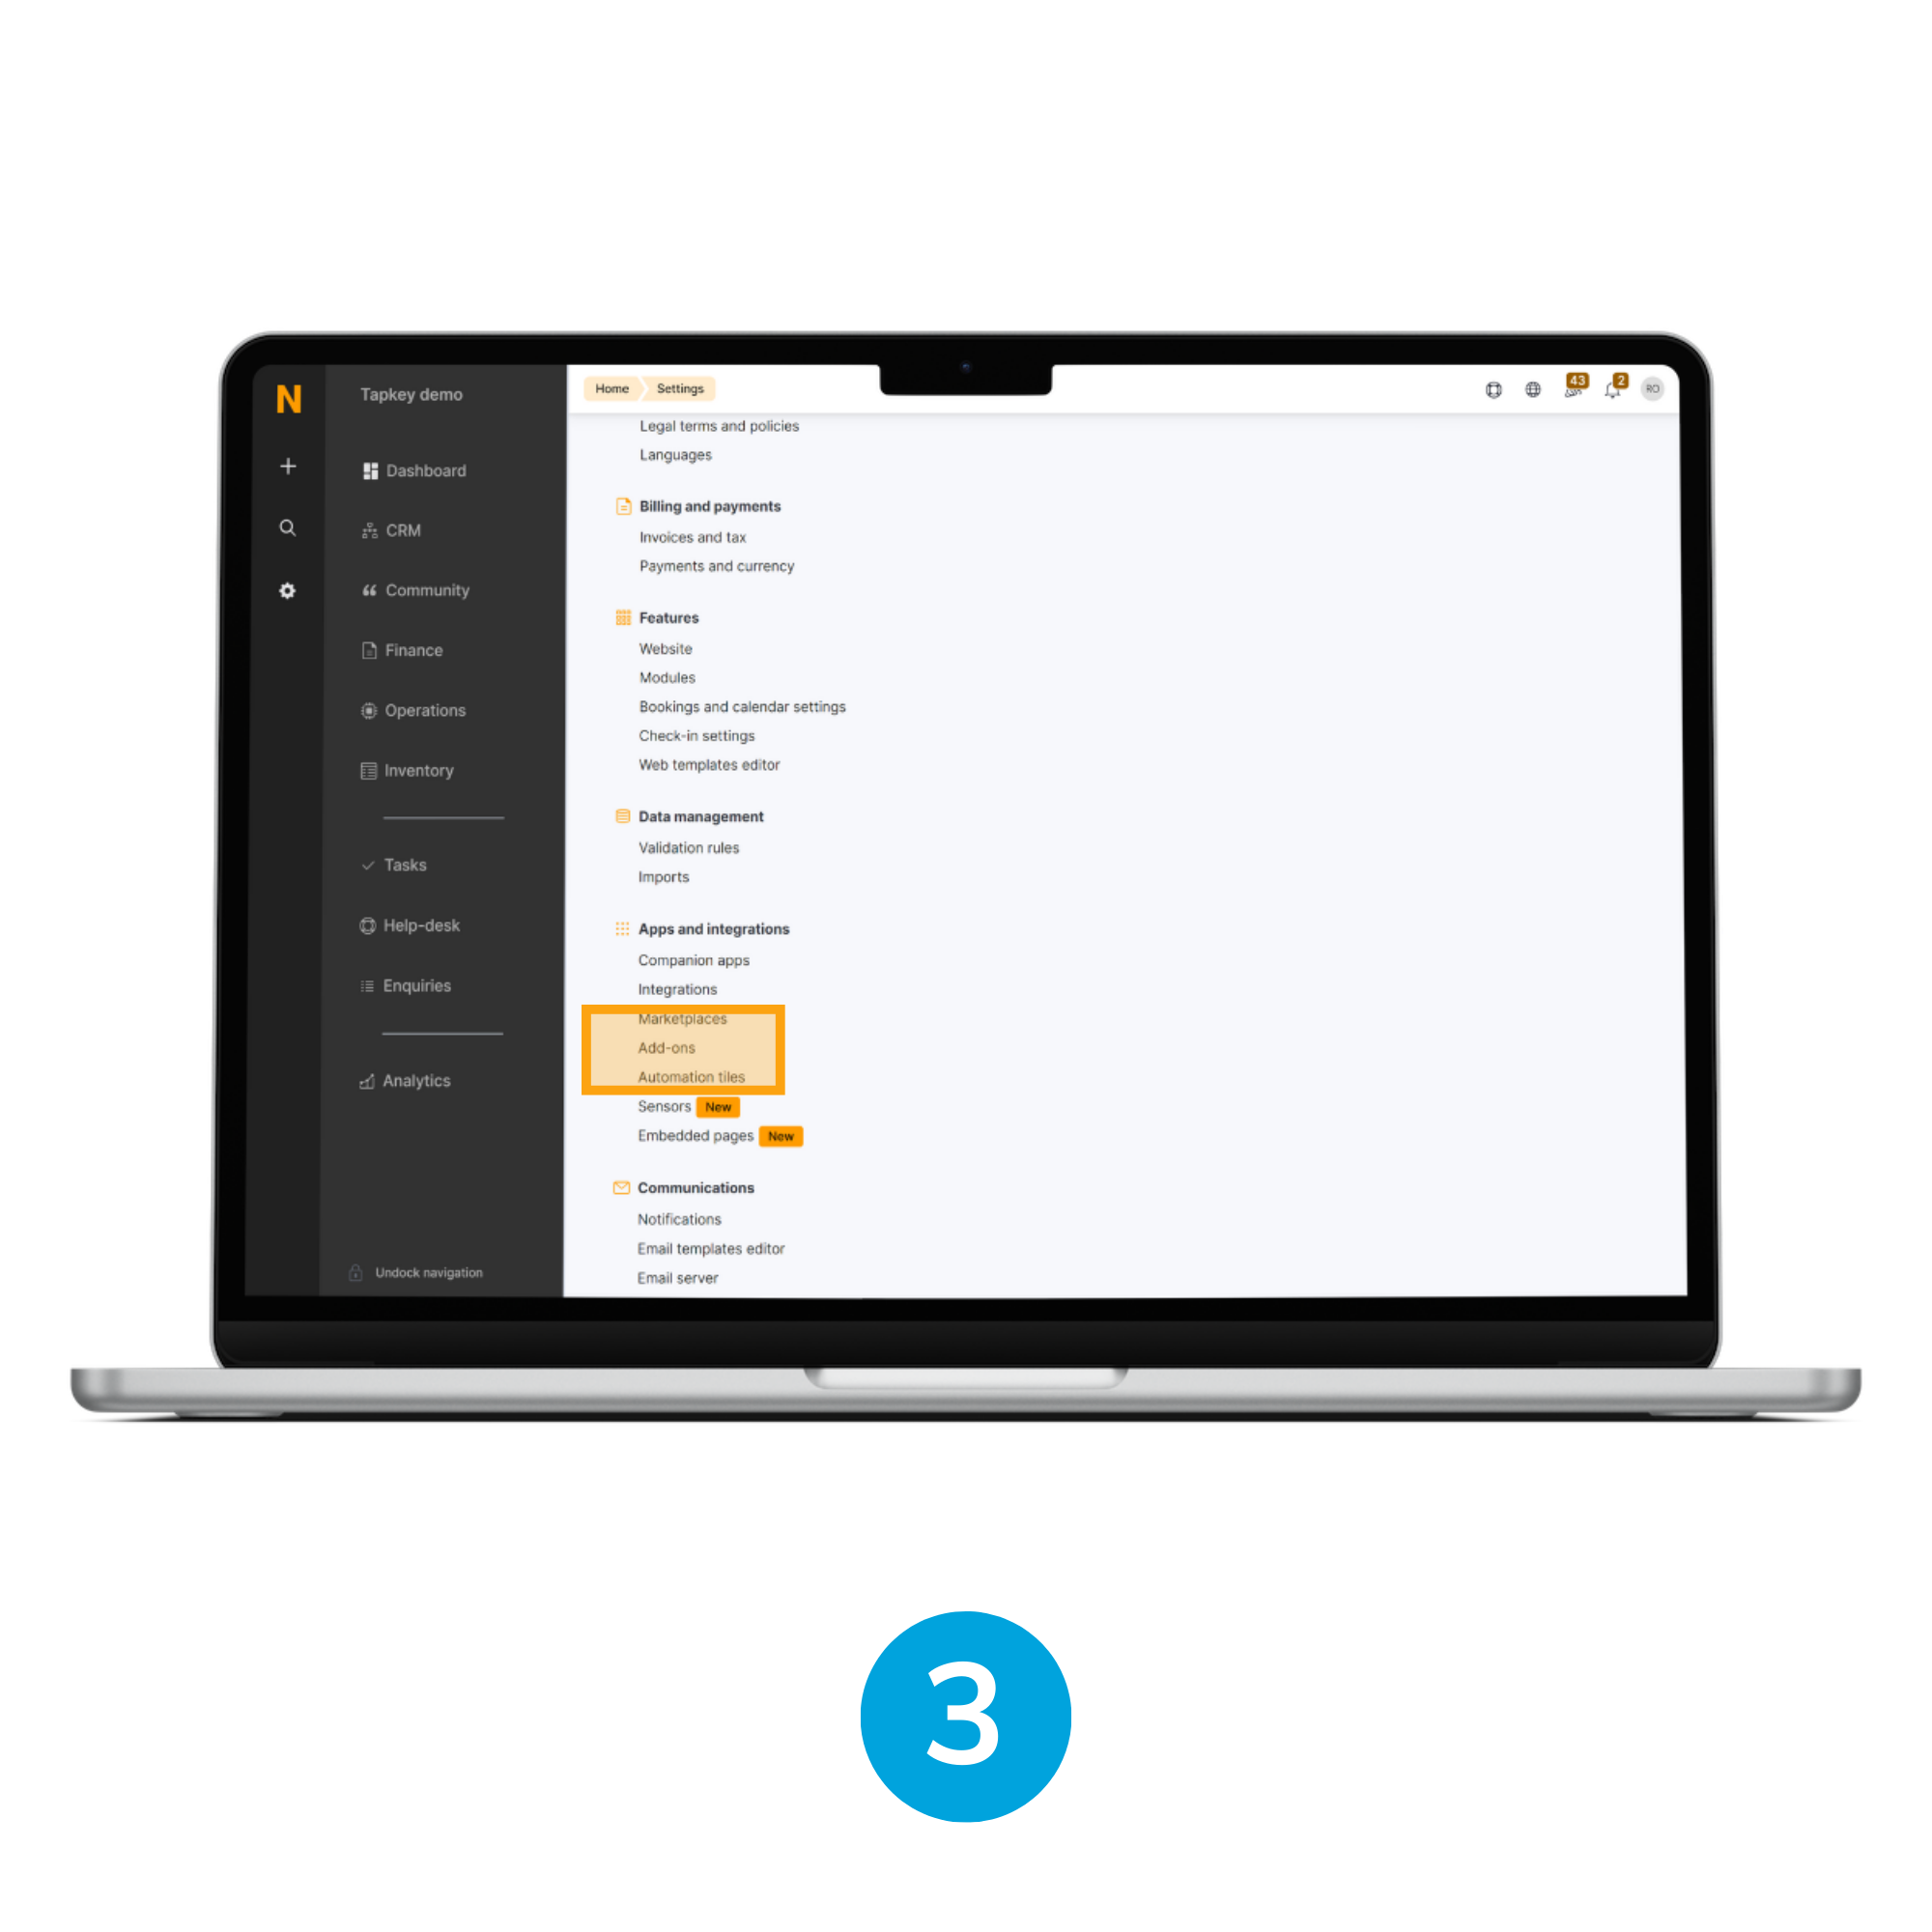
3. Open Add-Ons
Once Advanced Settings are expanded, inside the section “Apps and integrations” you will be able to see the Add-Ons option, tap that button to continue with the installation.
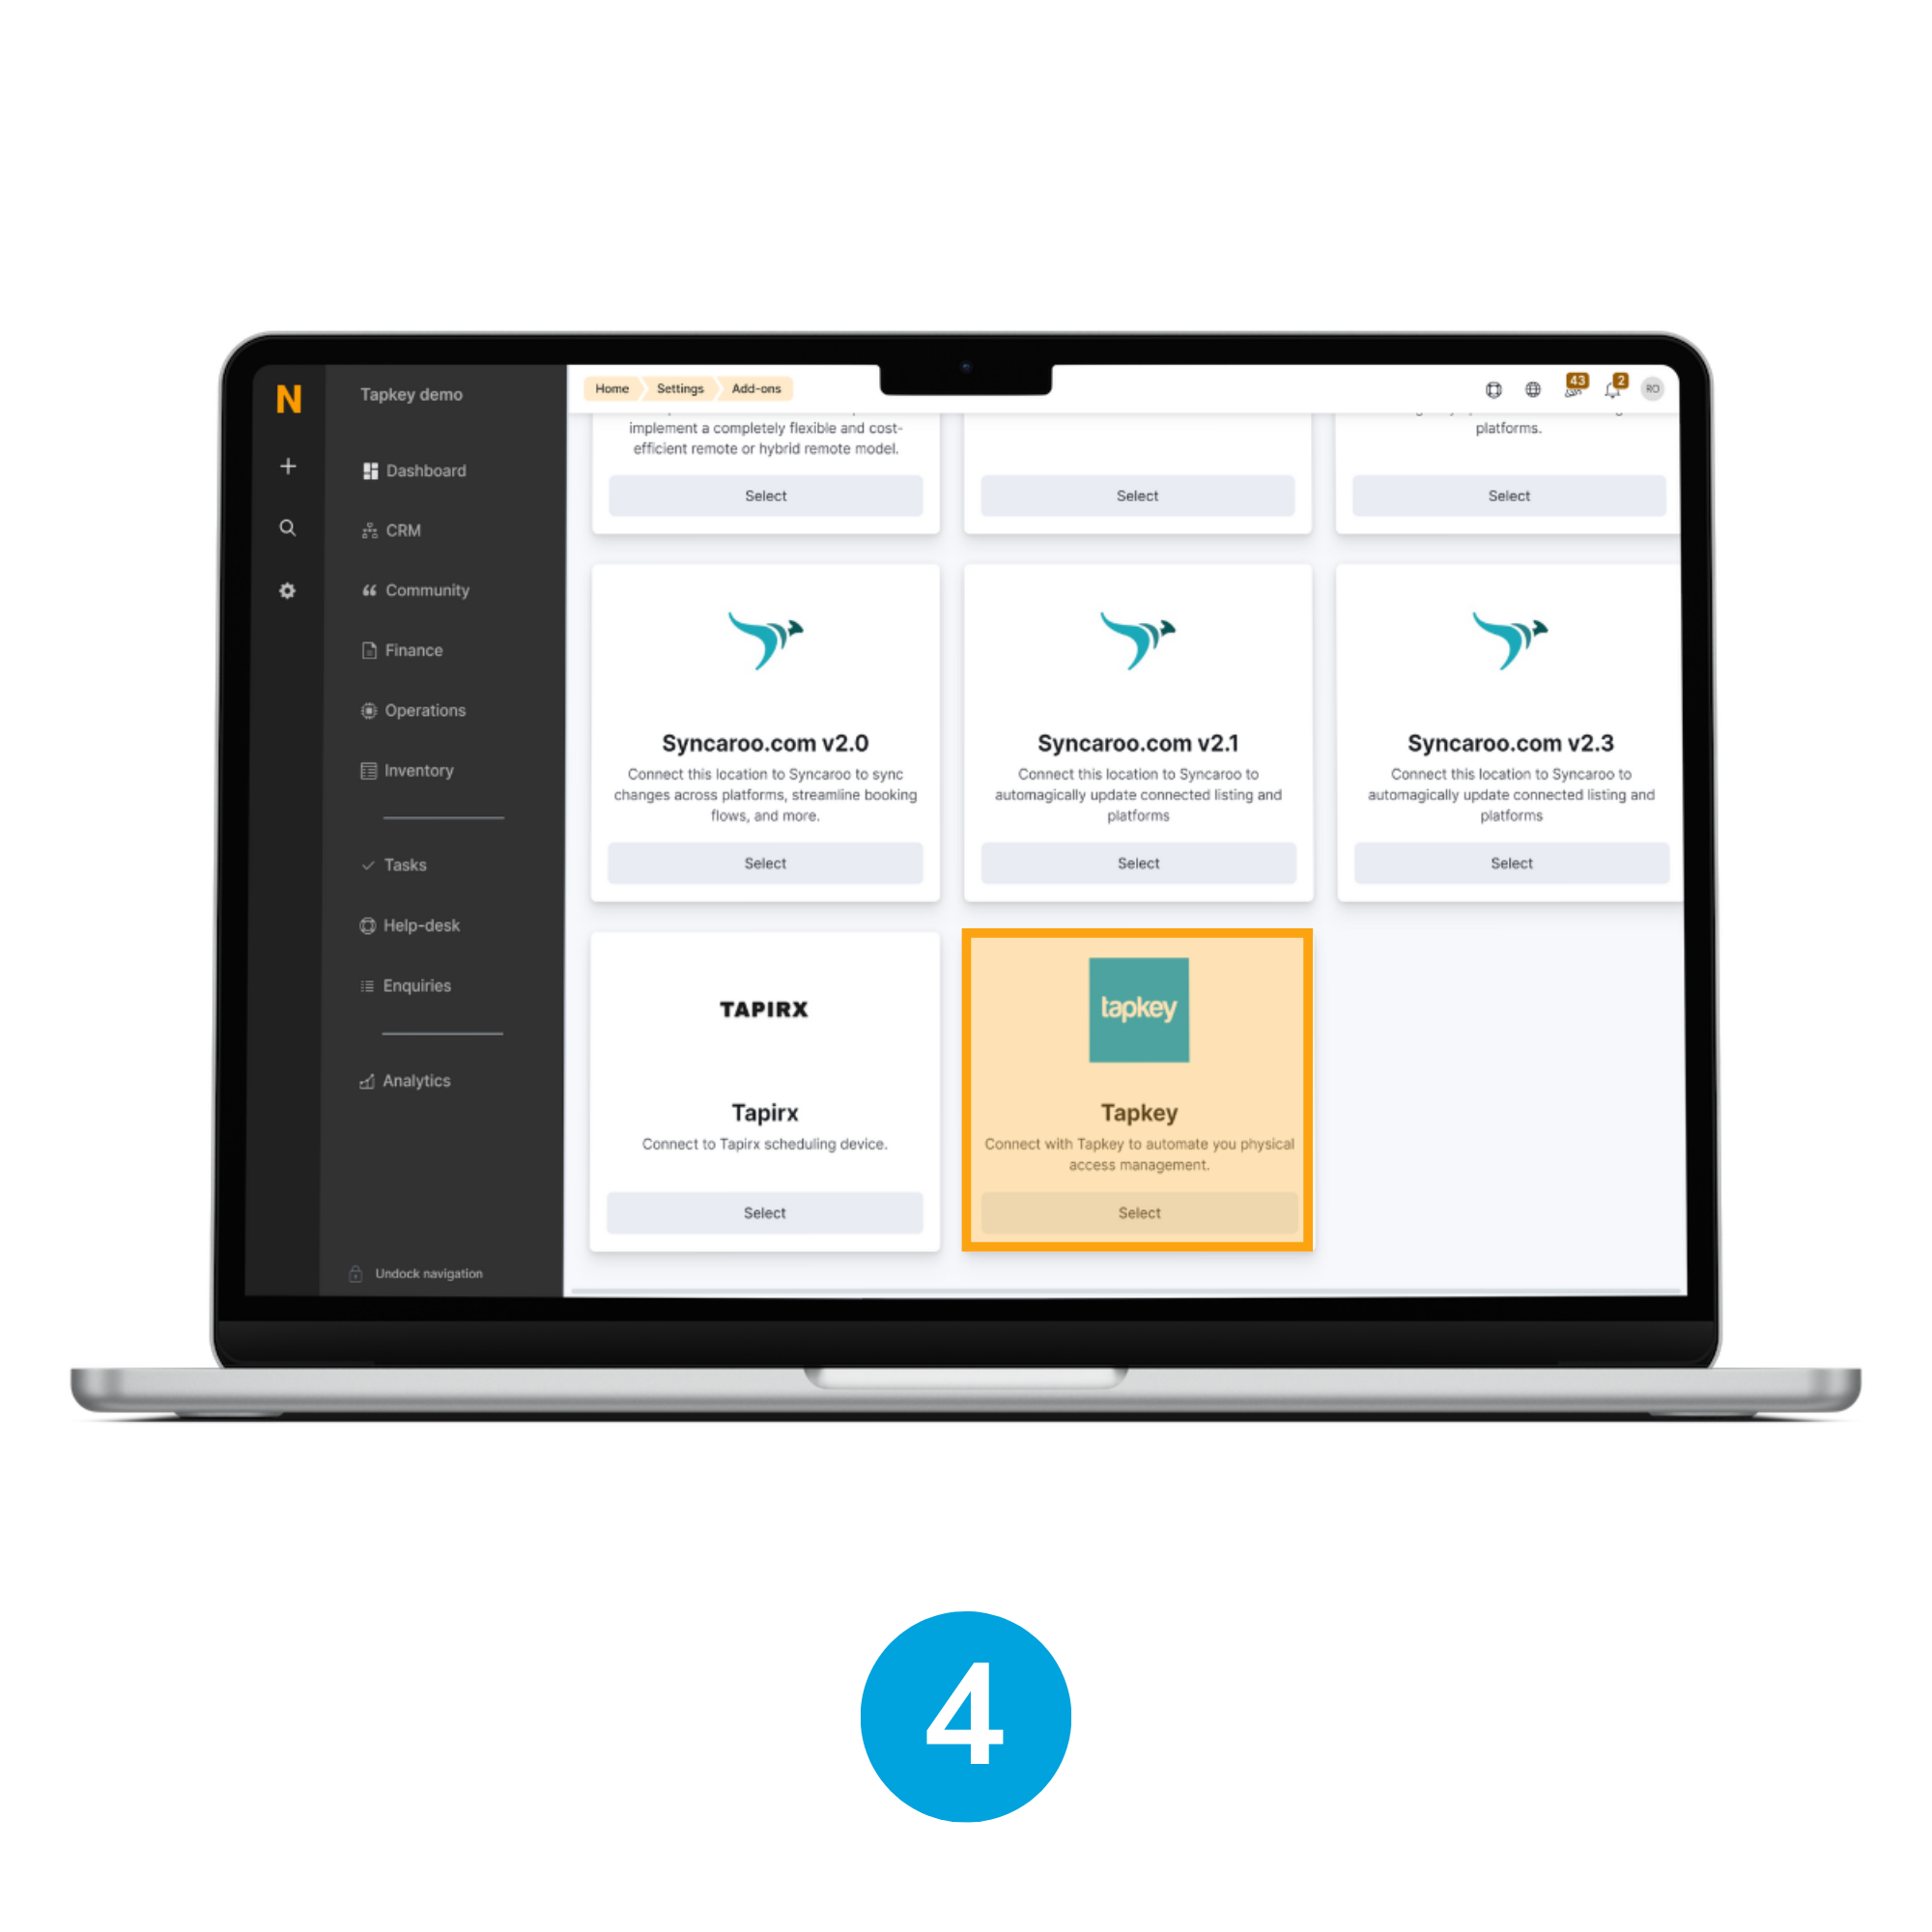
4. Choose Tapkey
In the Add-On section, look for the Tapkey integration and tap the Select button to proceed with the installation.
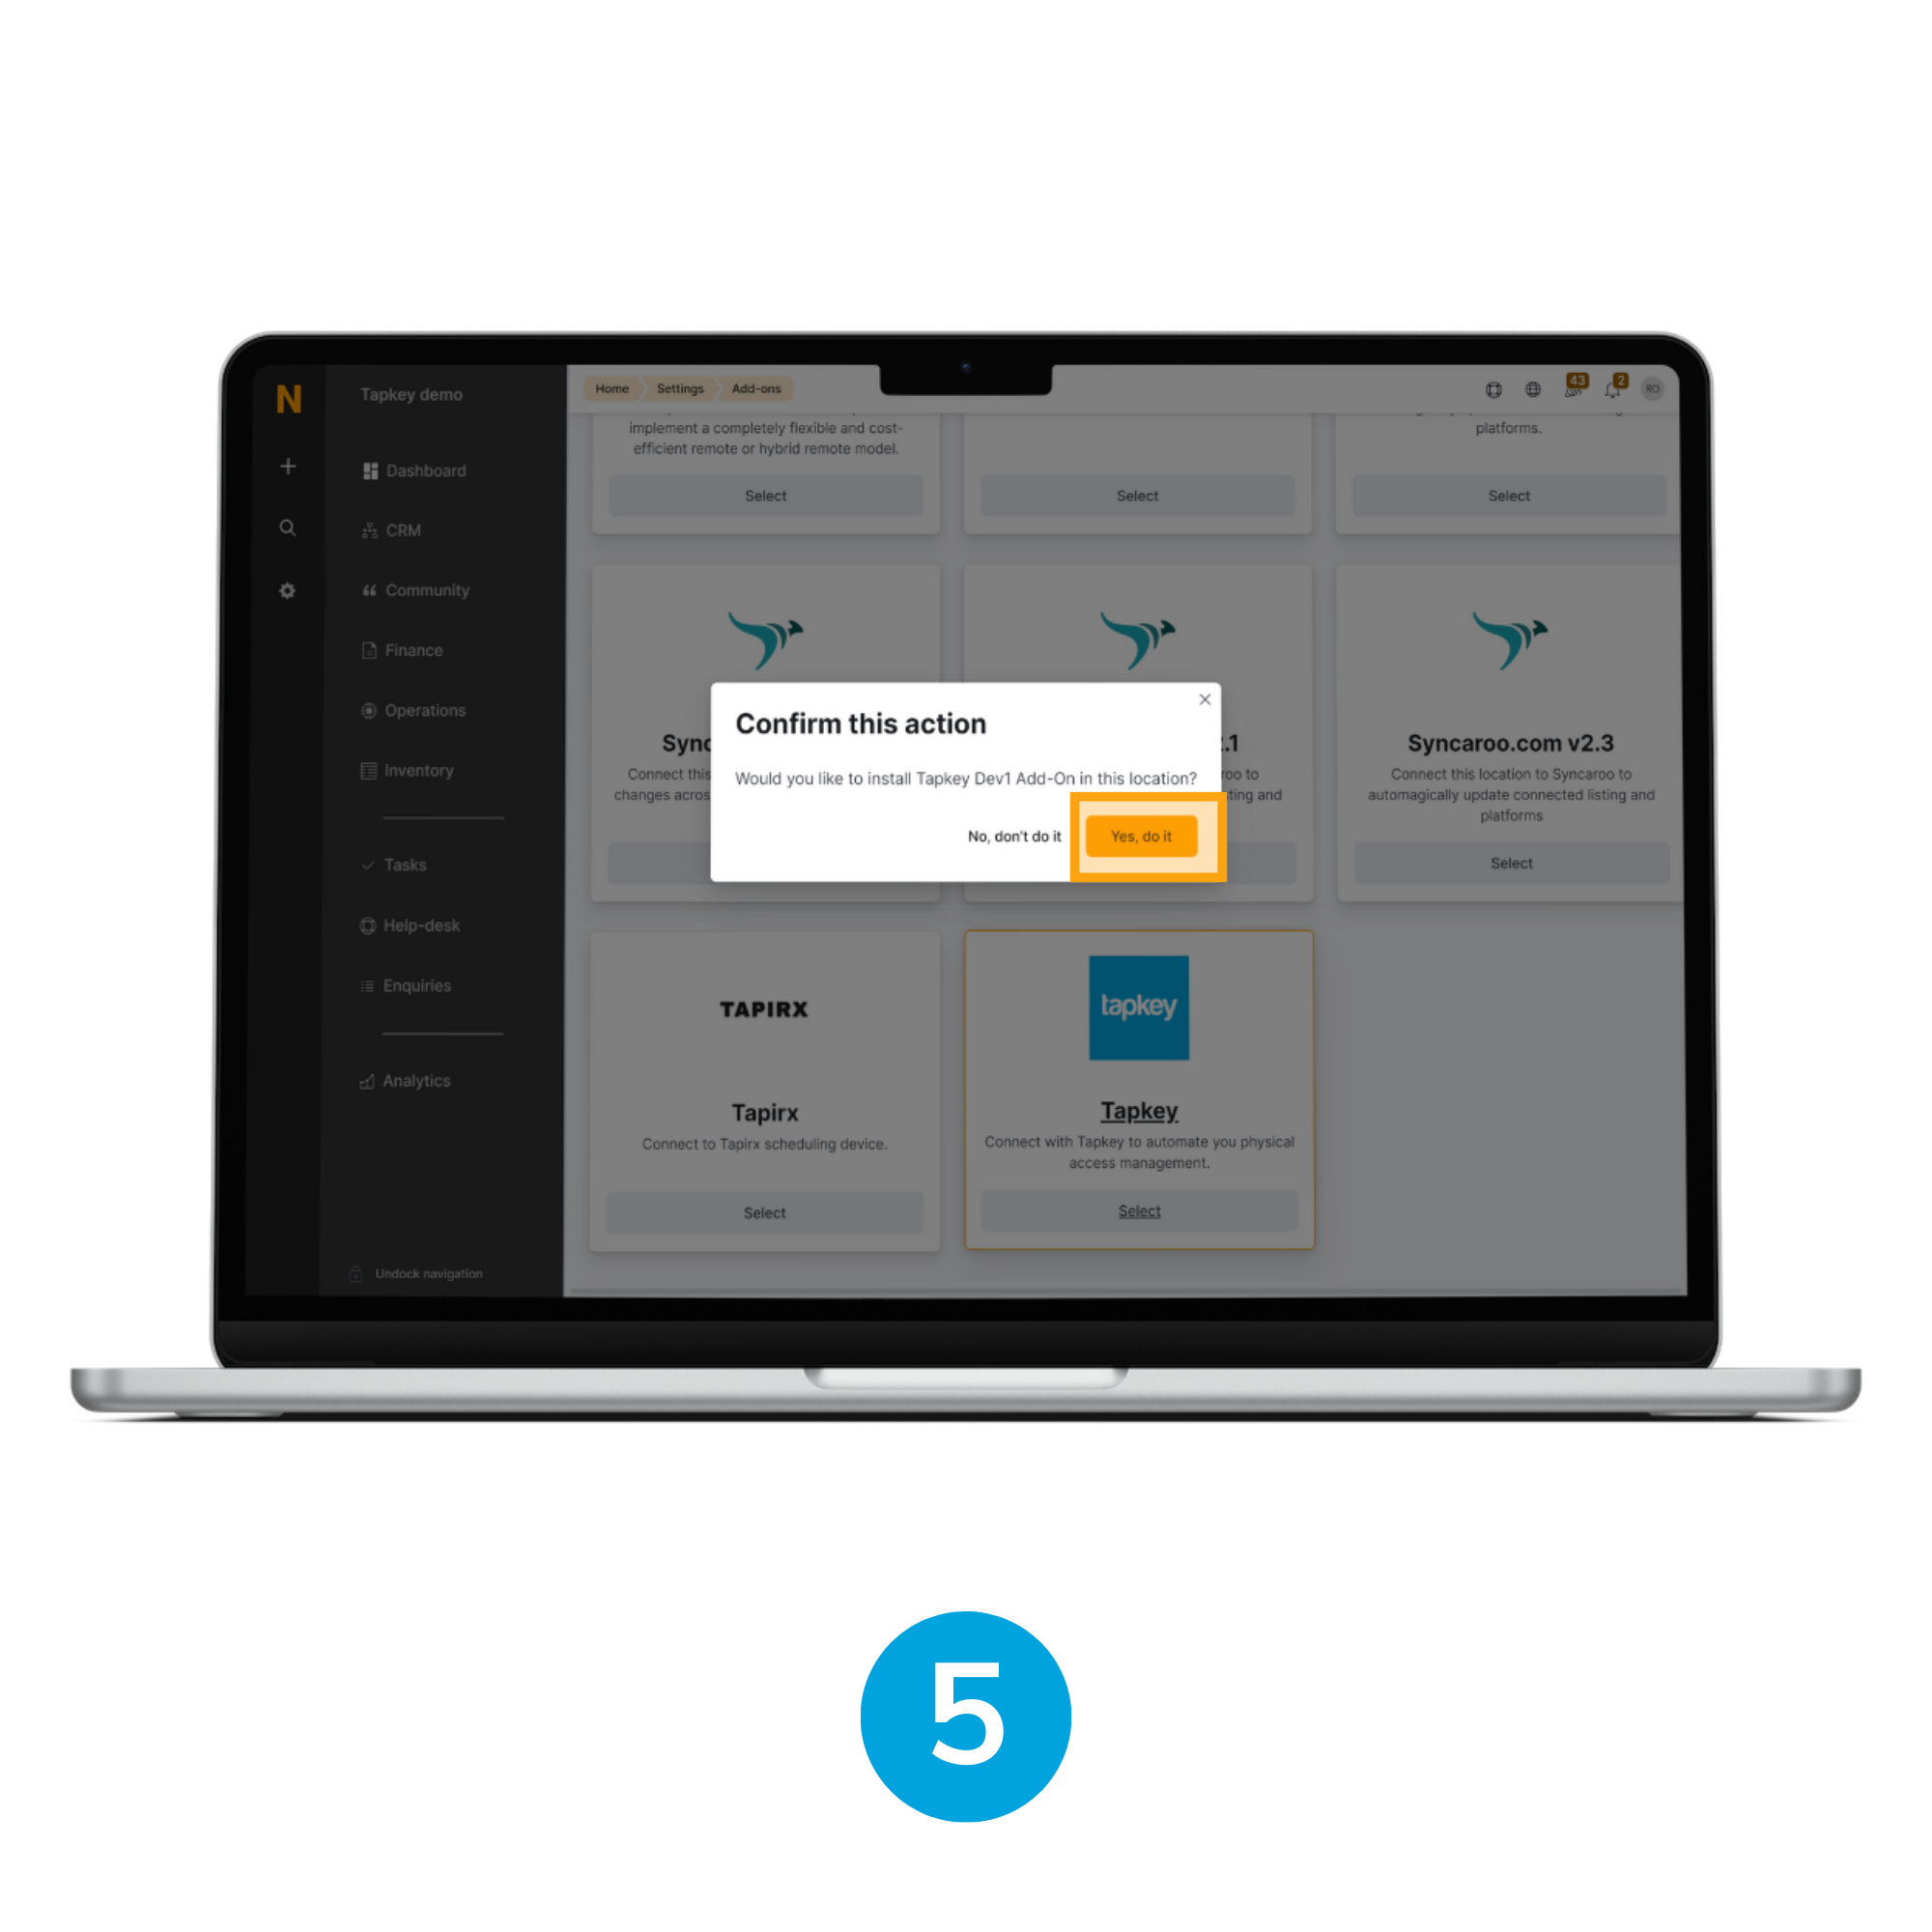
5. Confirm action
A dialogue window will appear asking for confirmation, in this stage it is required to tap Yes, do it.
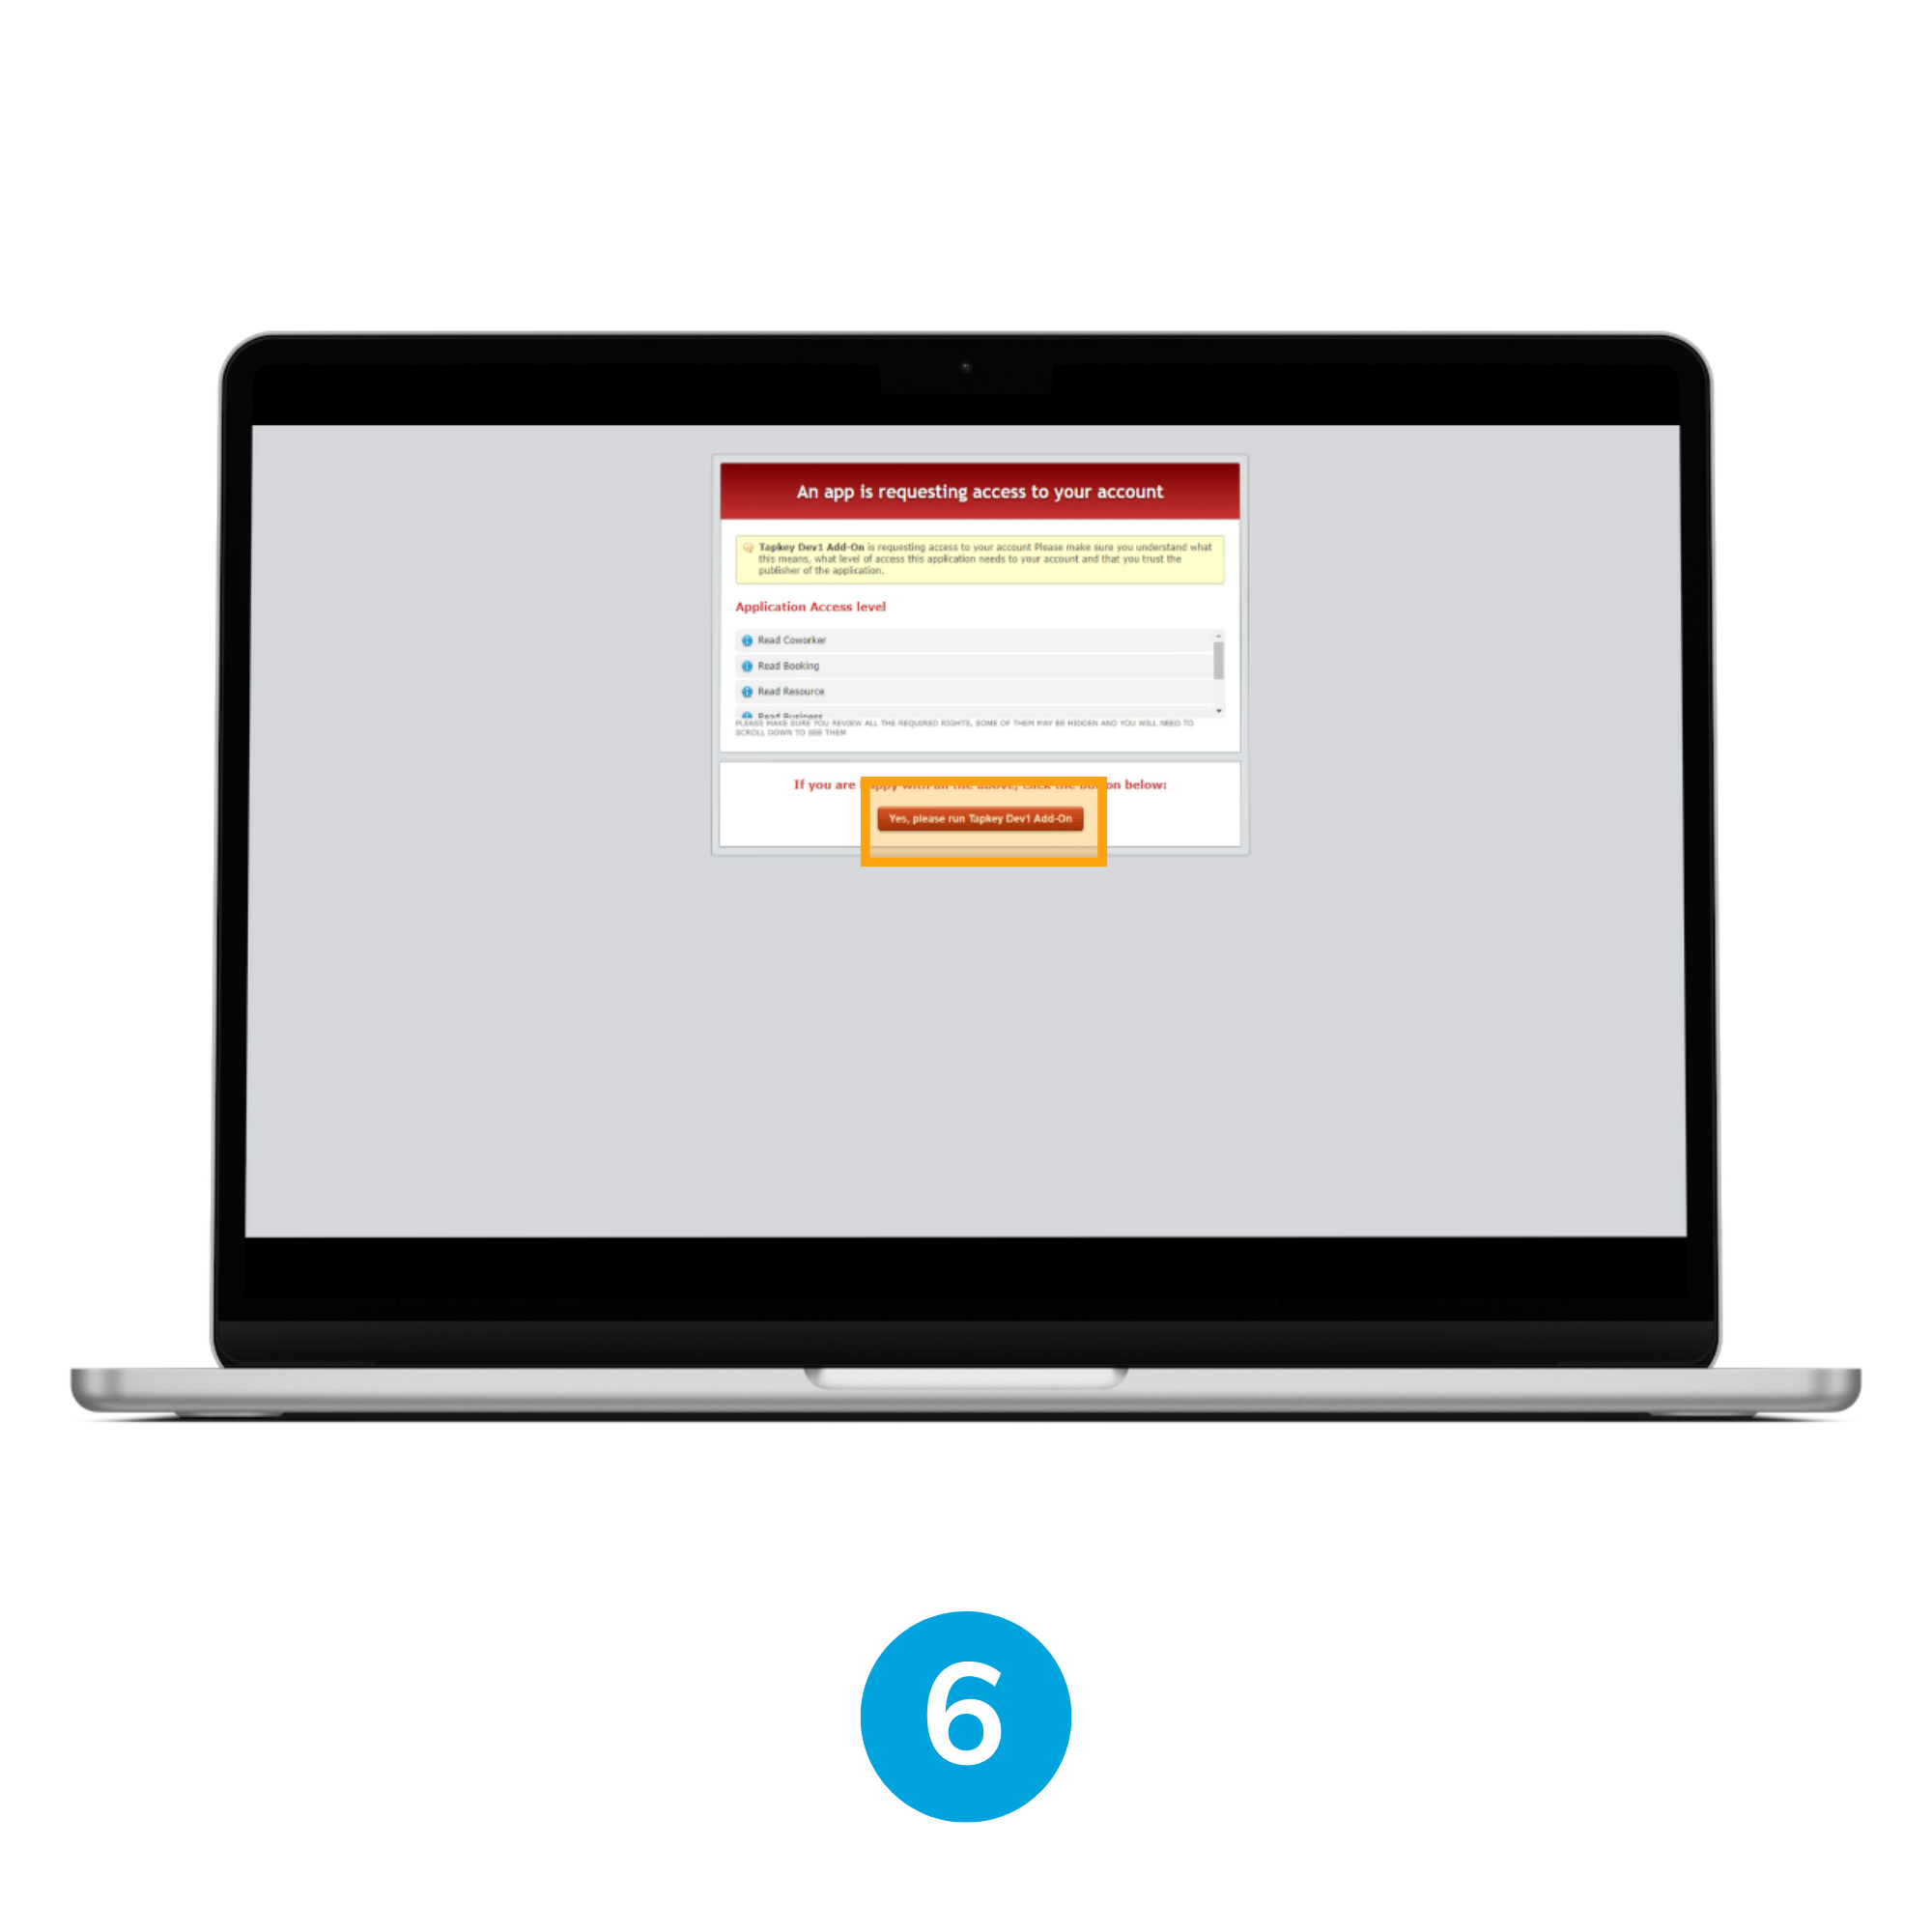
6. Run Tapkey
When the action is confirmed, Nexudus is going to redirect to an access grant permissions page where all the permissions required by Tapkey to enable the sync-up are going to be displayed, some permissions are:
- Booking, Resource, Plans, Business, Coworker: Read and list operations required to perform sync up and extract all the required information about the events created.
- Webhook: Create, Delete, Edit, List, Read, this permission is required to enable real-time connection with Nexudus.
It is required to tap Yes, please run Tapkey.
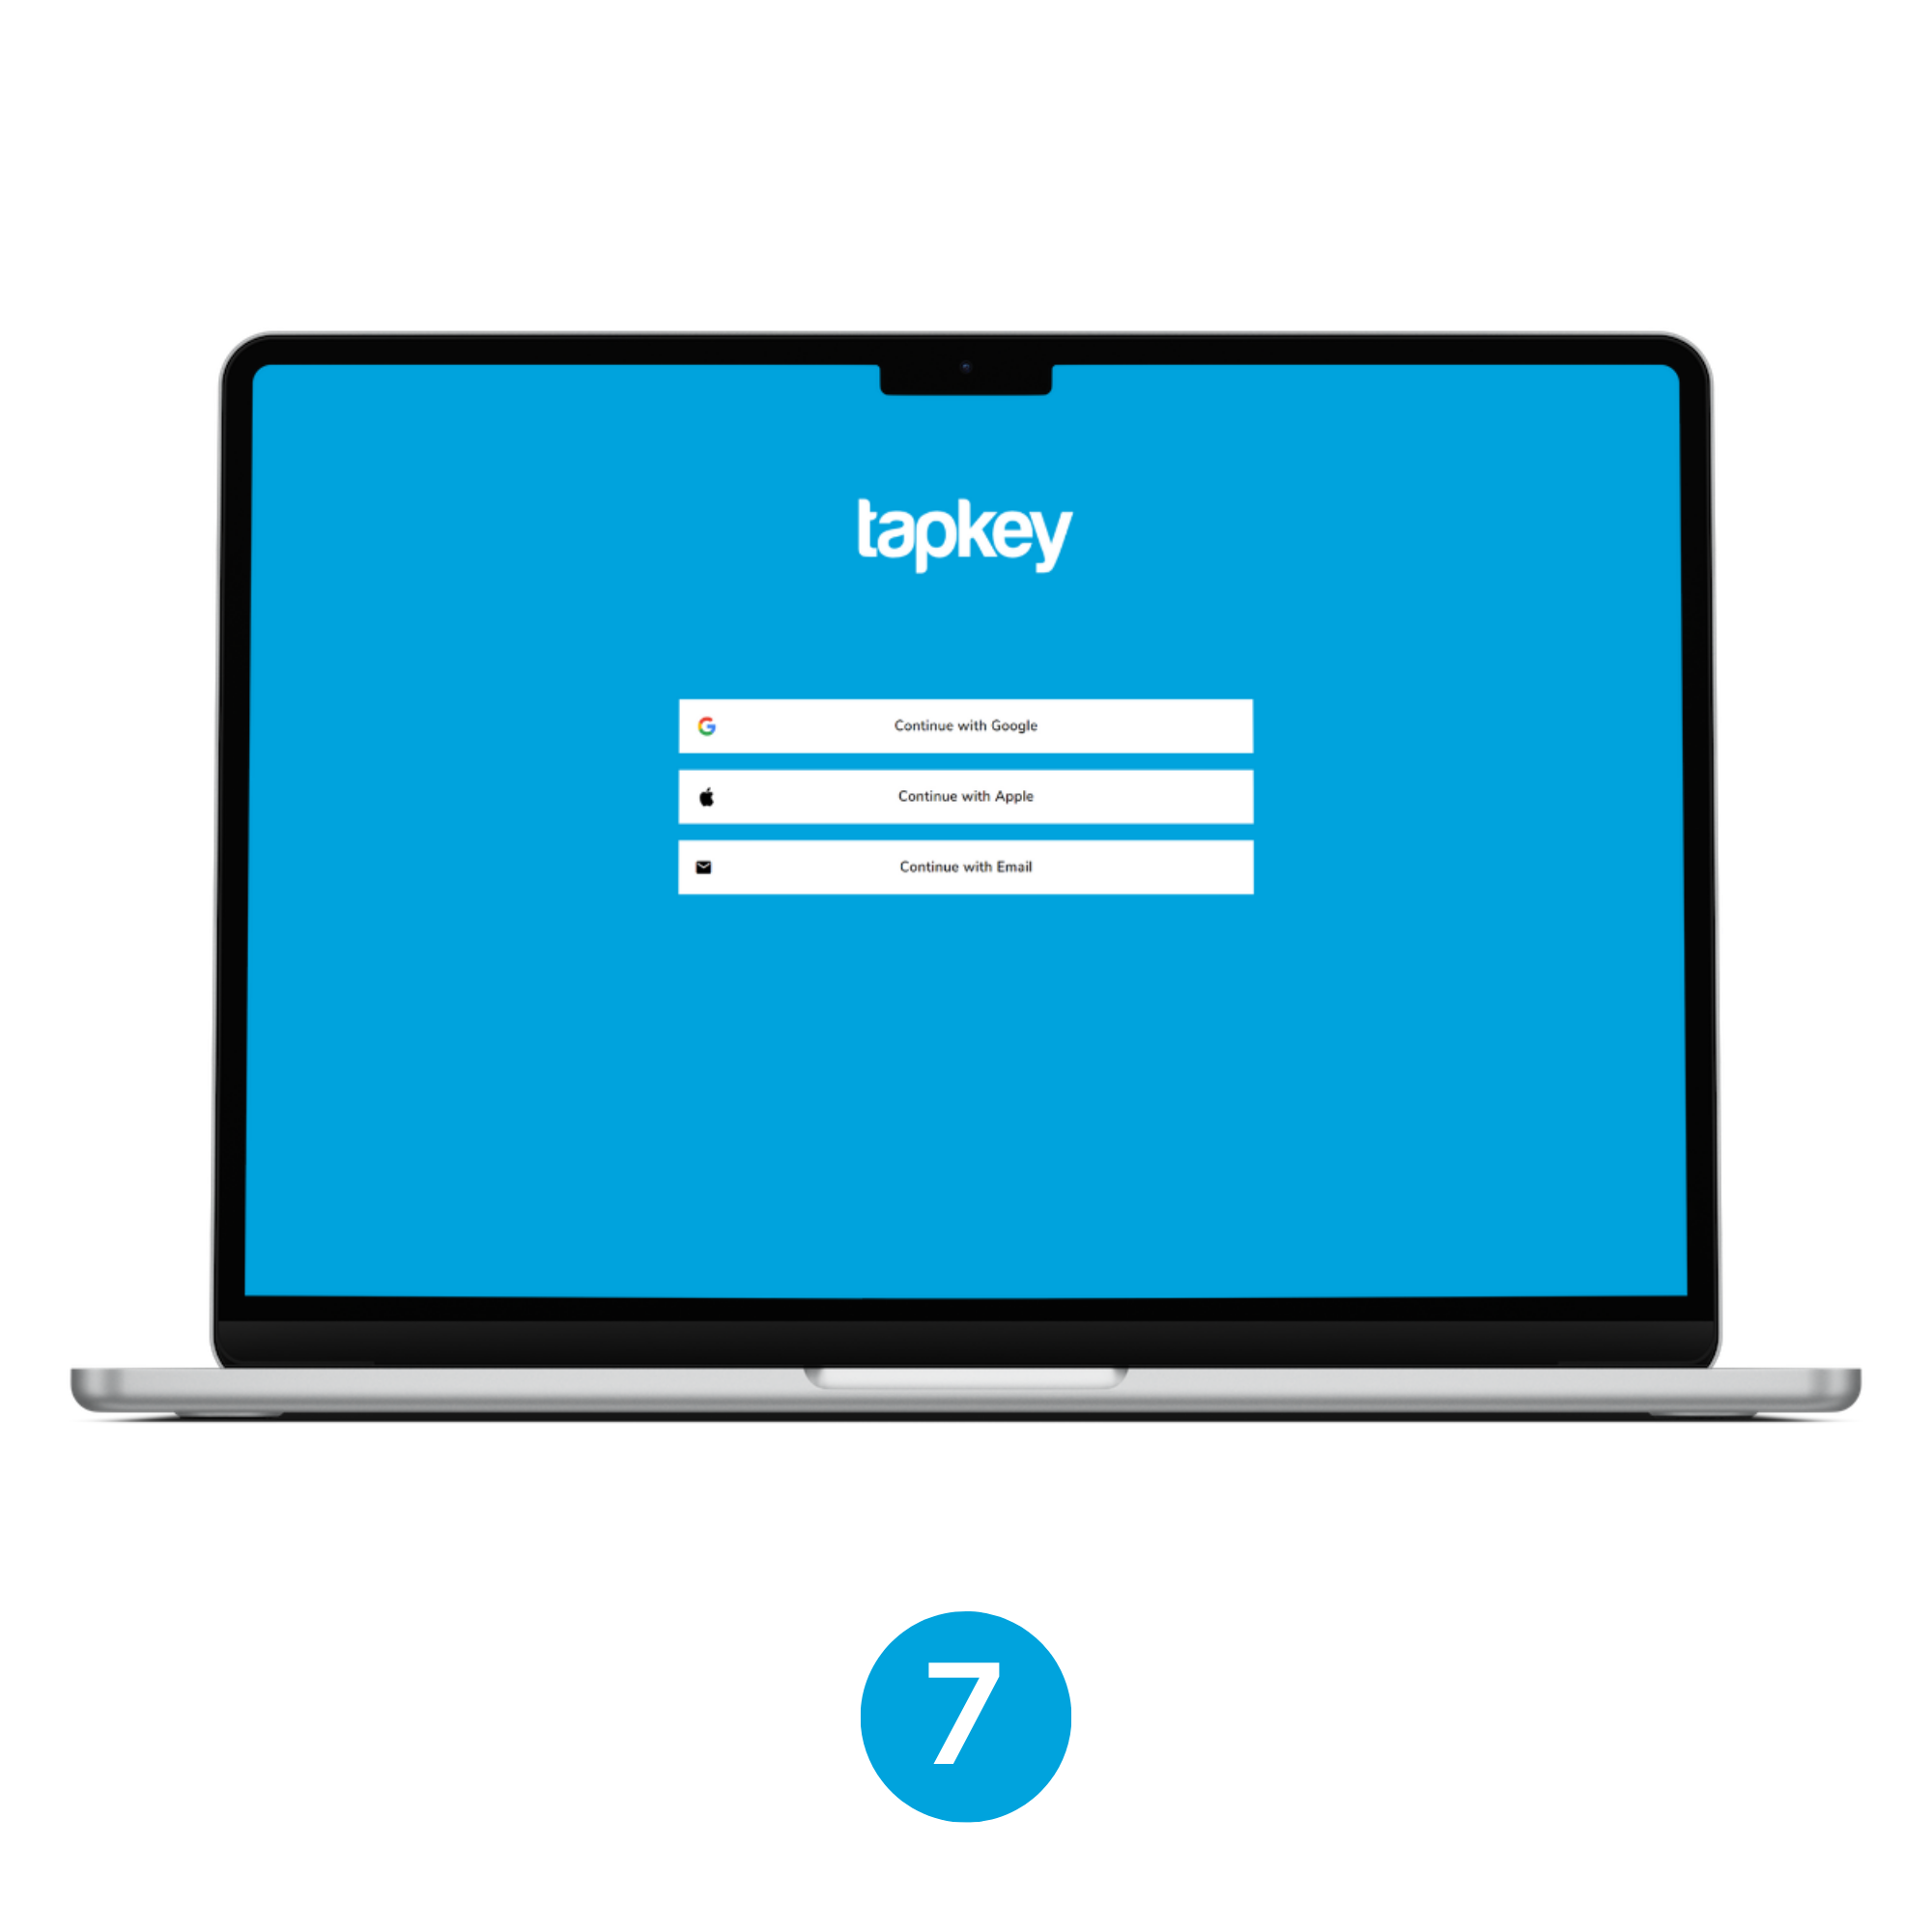
7. Tapkey Webportal
Tapkey is going to request you to log in if there is no previous session in the Tapkey webportal opened in your browser.
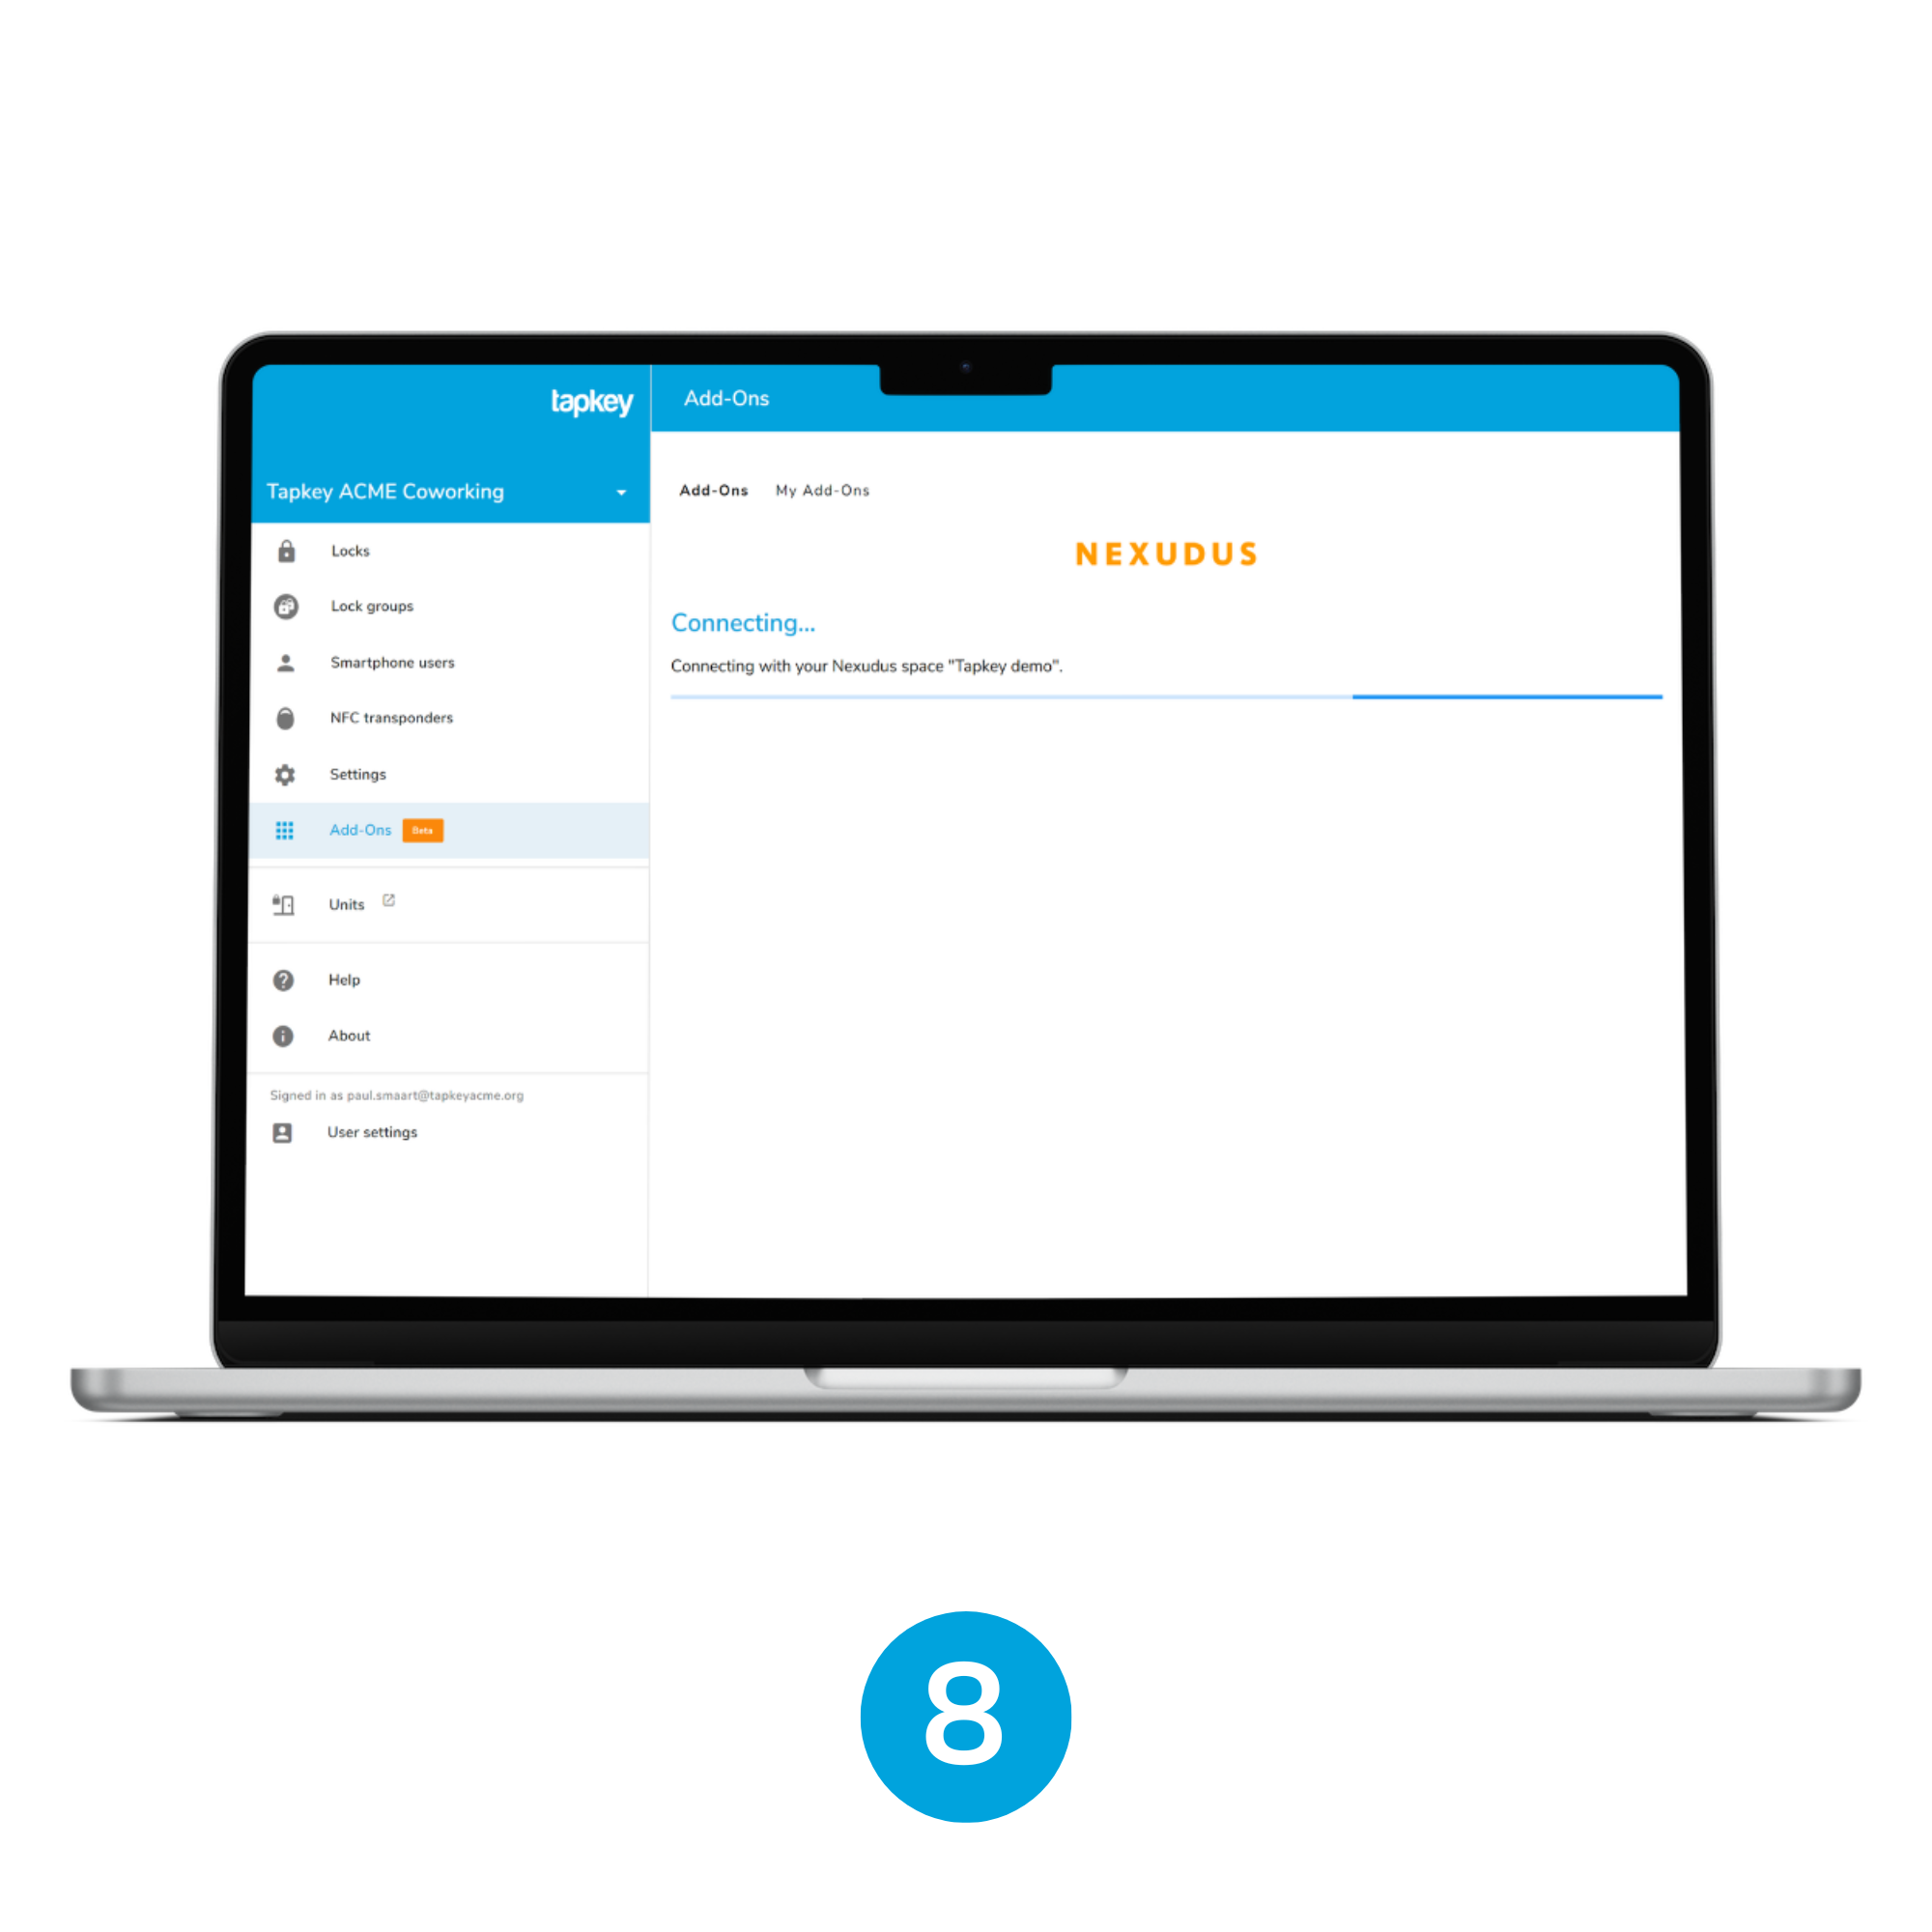
8. Connecting Nexudus and Tapkey
As soon as you have a Tapkey session in the web portal, Nexudus Add-On is going to continue with the installation.
9. Your resources displayed
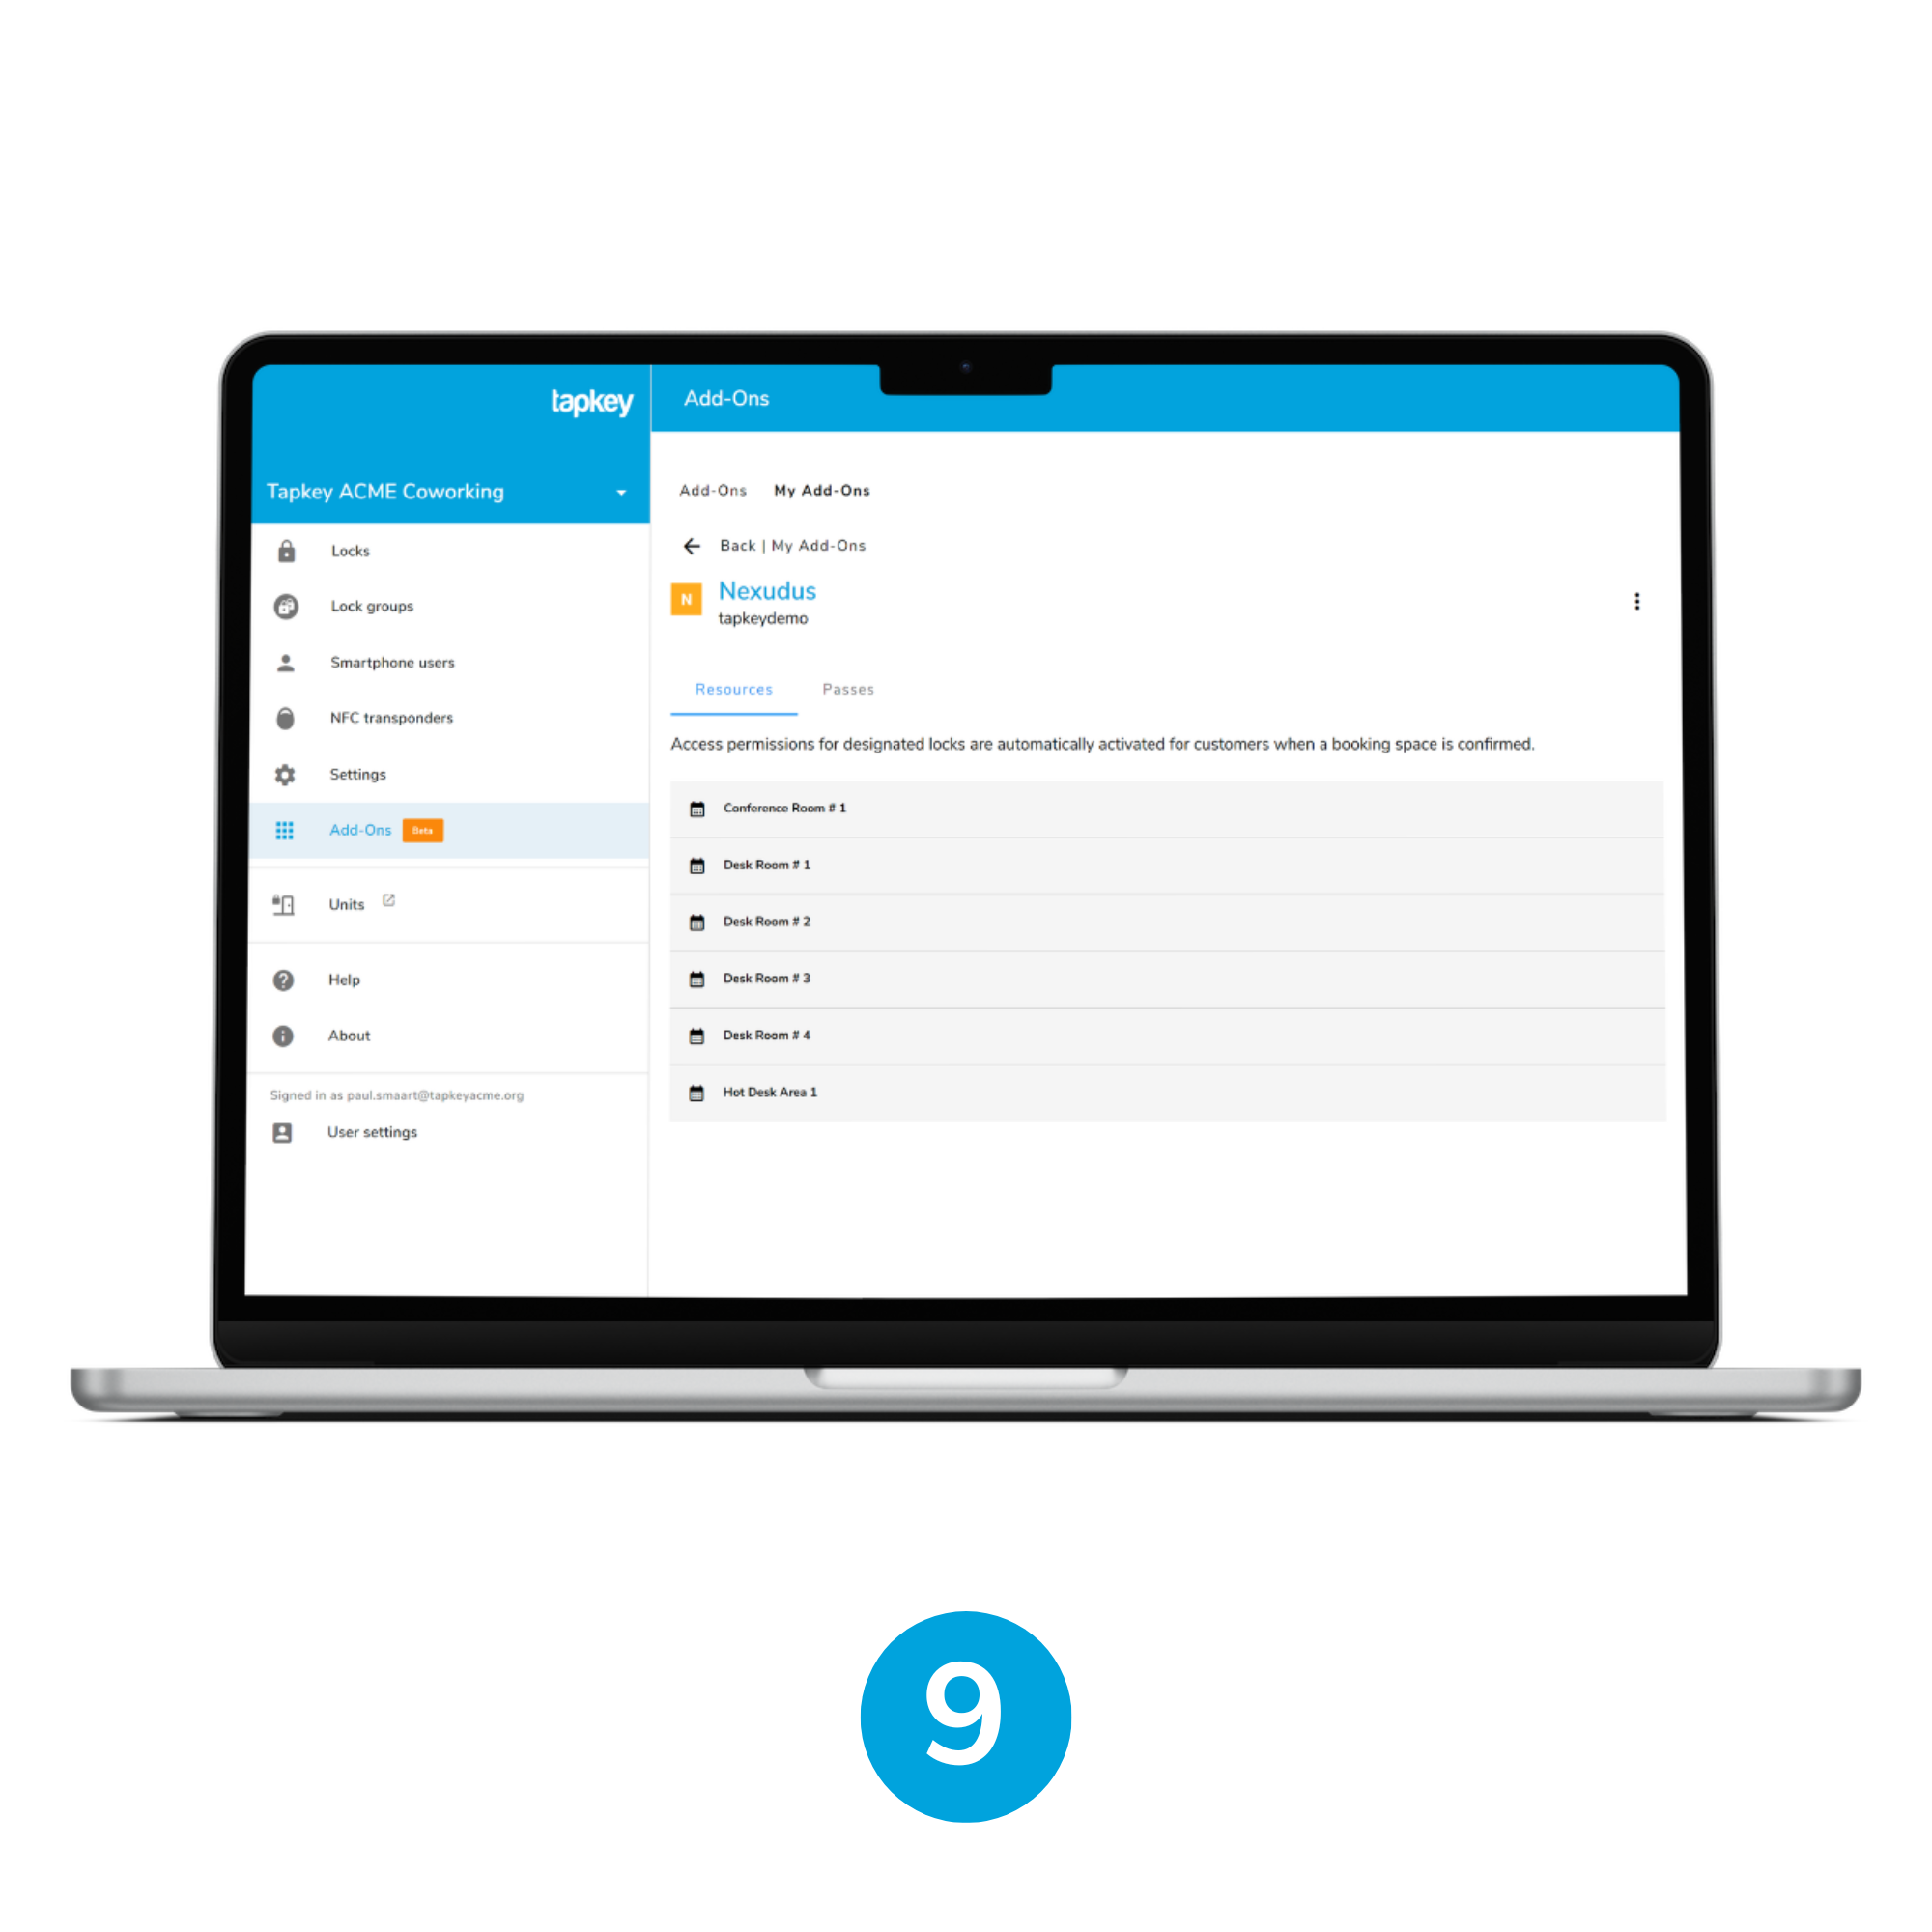
After finishing with the Nexudus connection, the Tapkey application is going to display the list of resources obtained from the coworking space.
Step 2: Setup Resource Sync with Tapkey Smart Locks
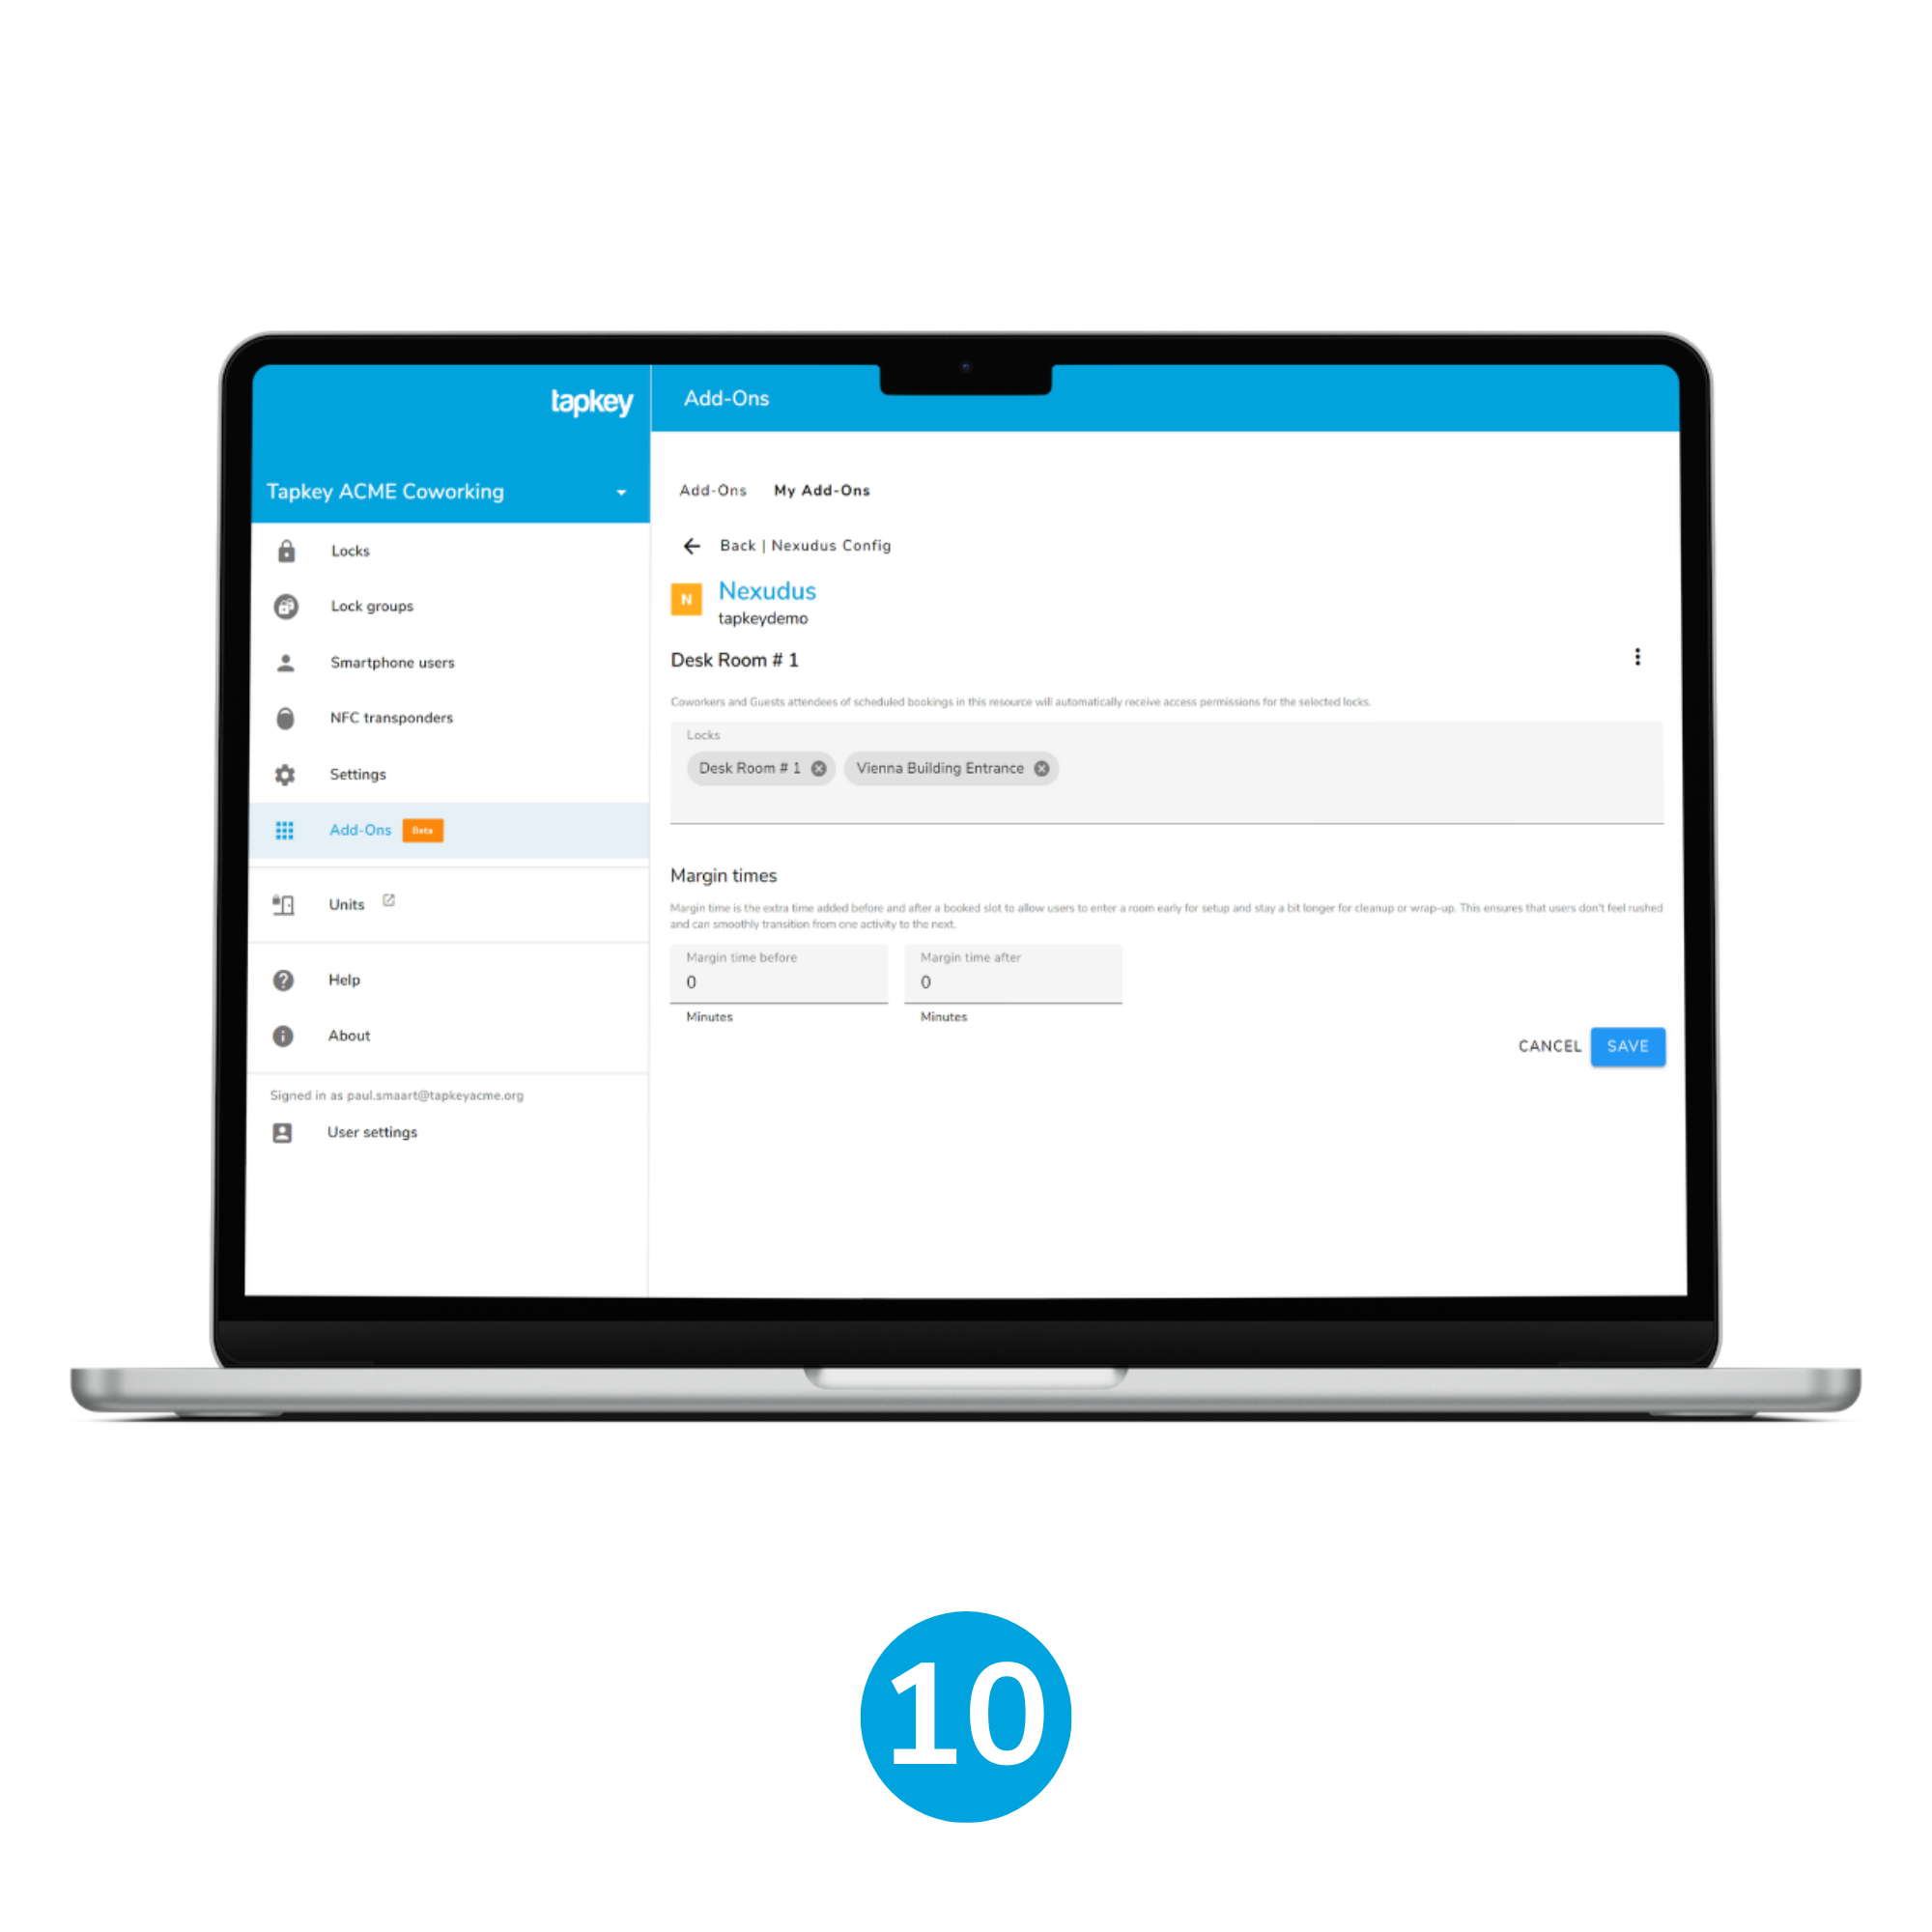
10. Select resources
Select the resource “Desk Room # 1” in the resources list and associate the locks intended to be in sync with the bookable resource. In this scenario, we are going to link it with “Desk Room # 1” and “Vienna Building Entrance” to allow users to access from the entrance door towards the desk resource. Once finished with the changes, click Save.
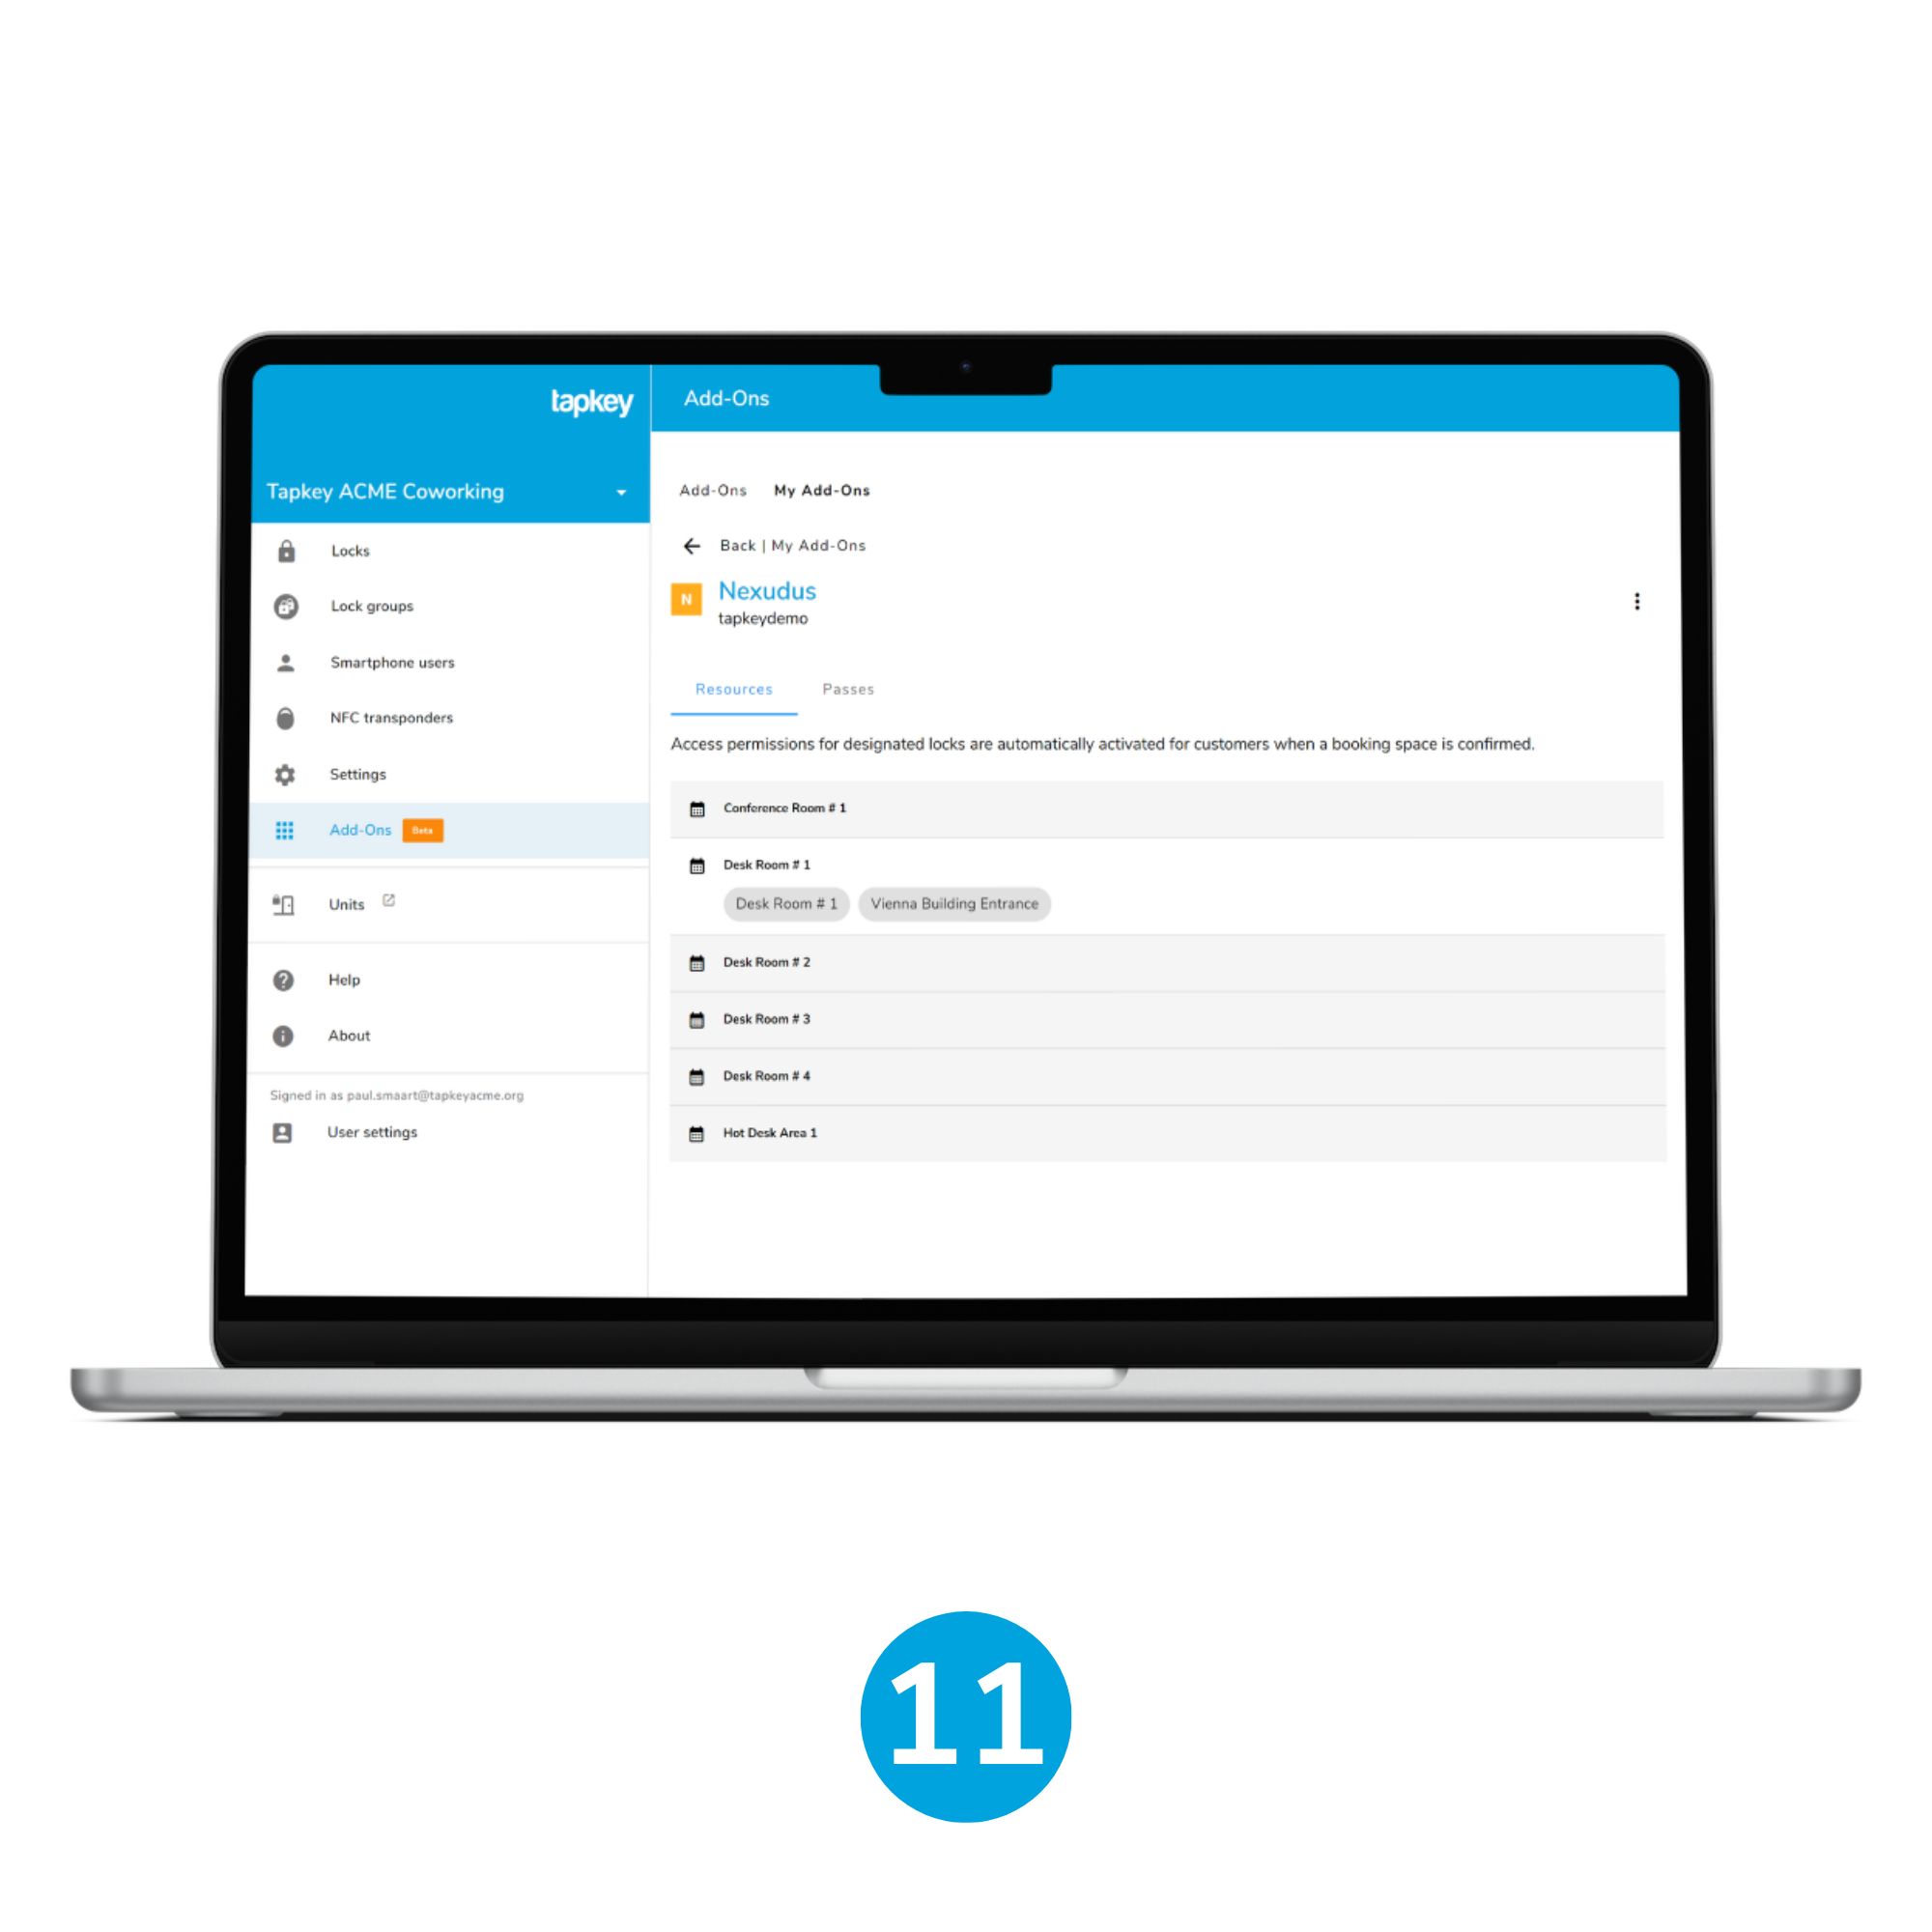
11. Resources displayed with associated locks
Step 3: Test resource booking reservation
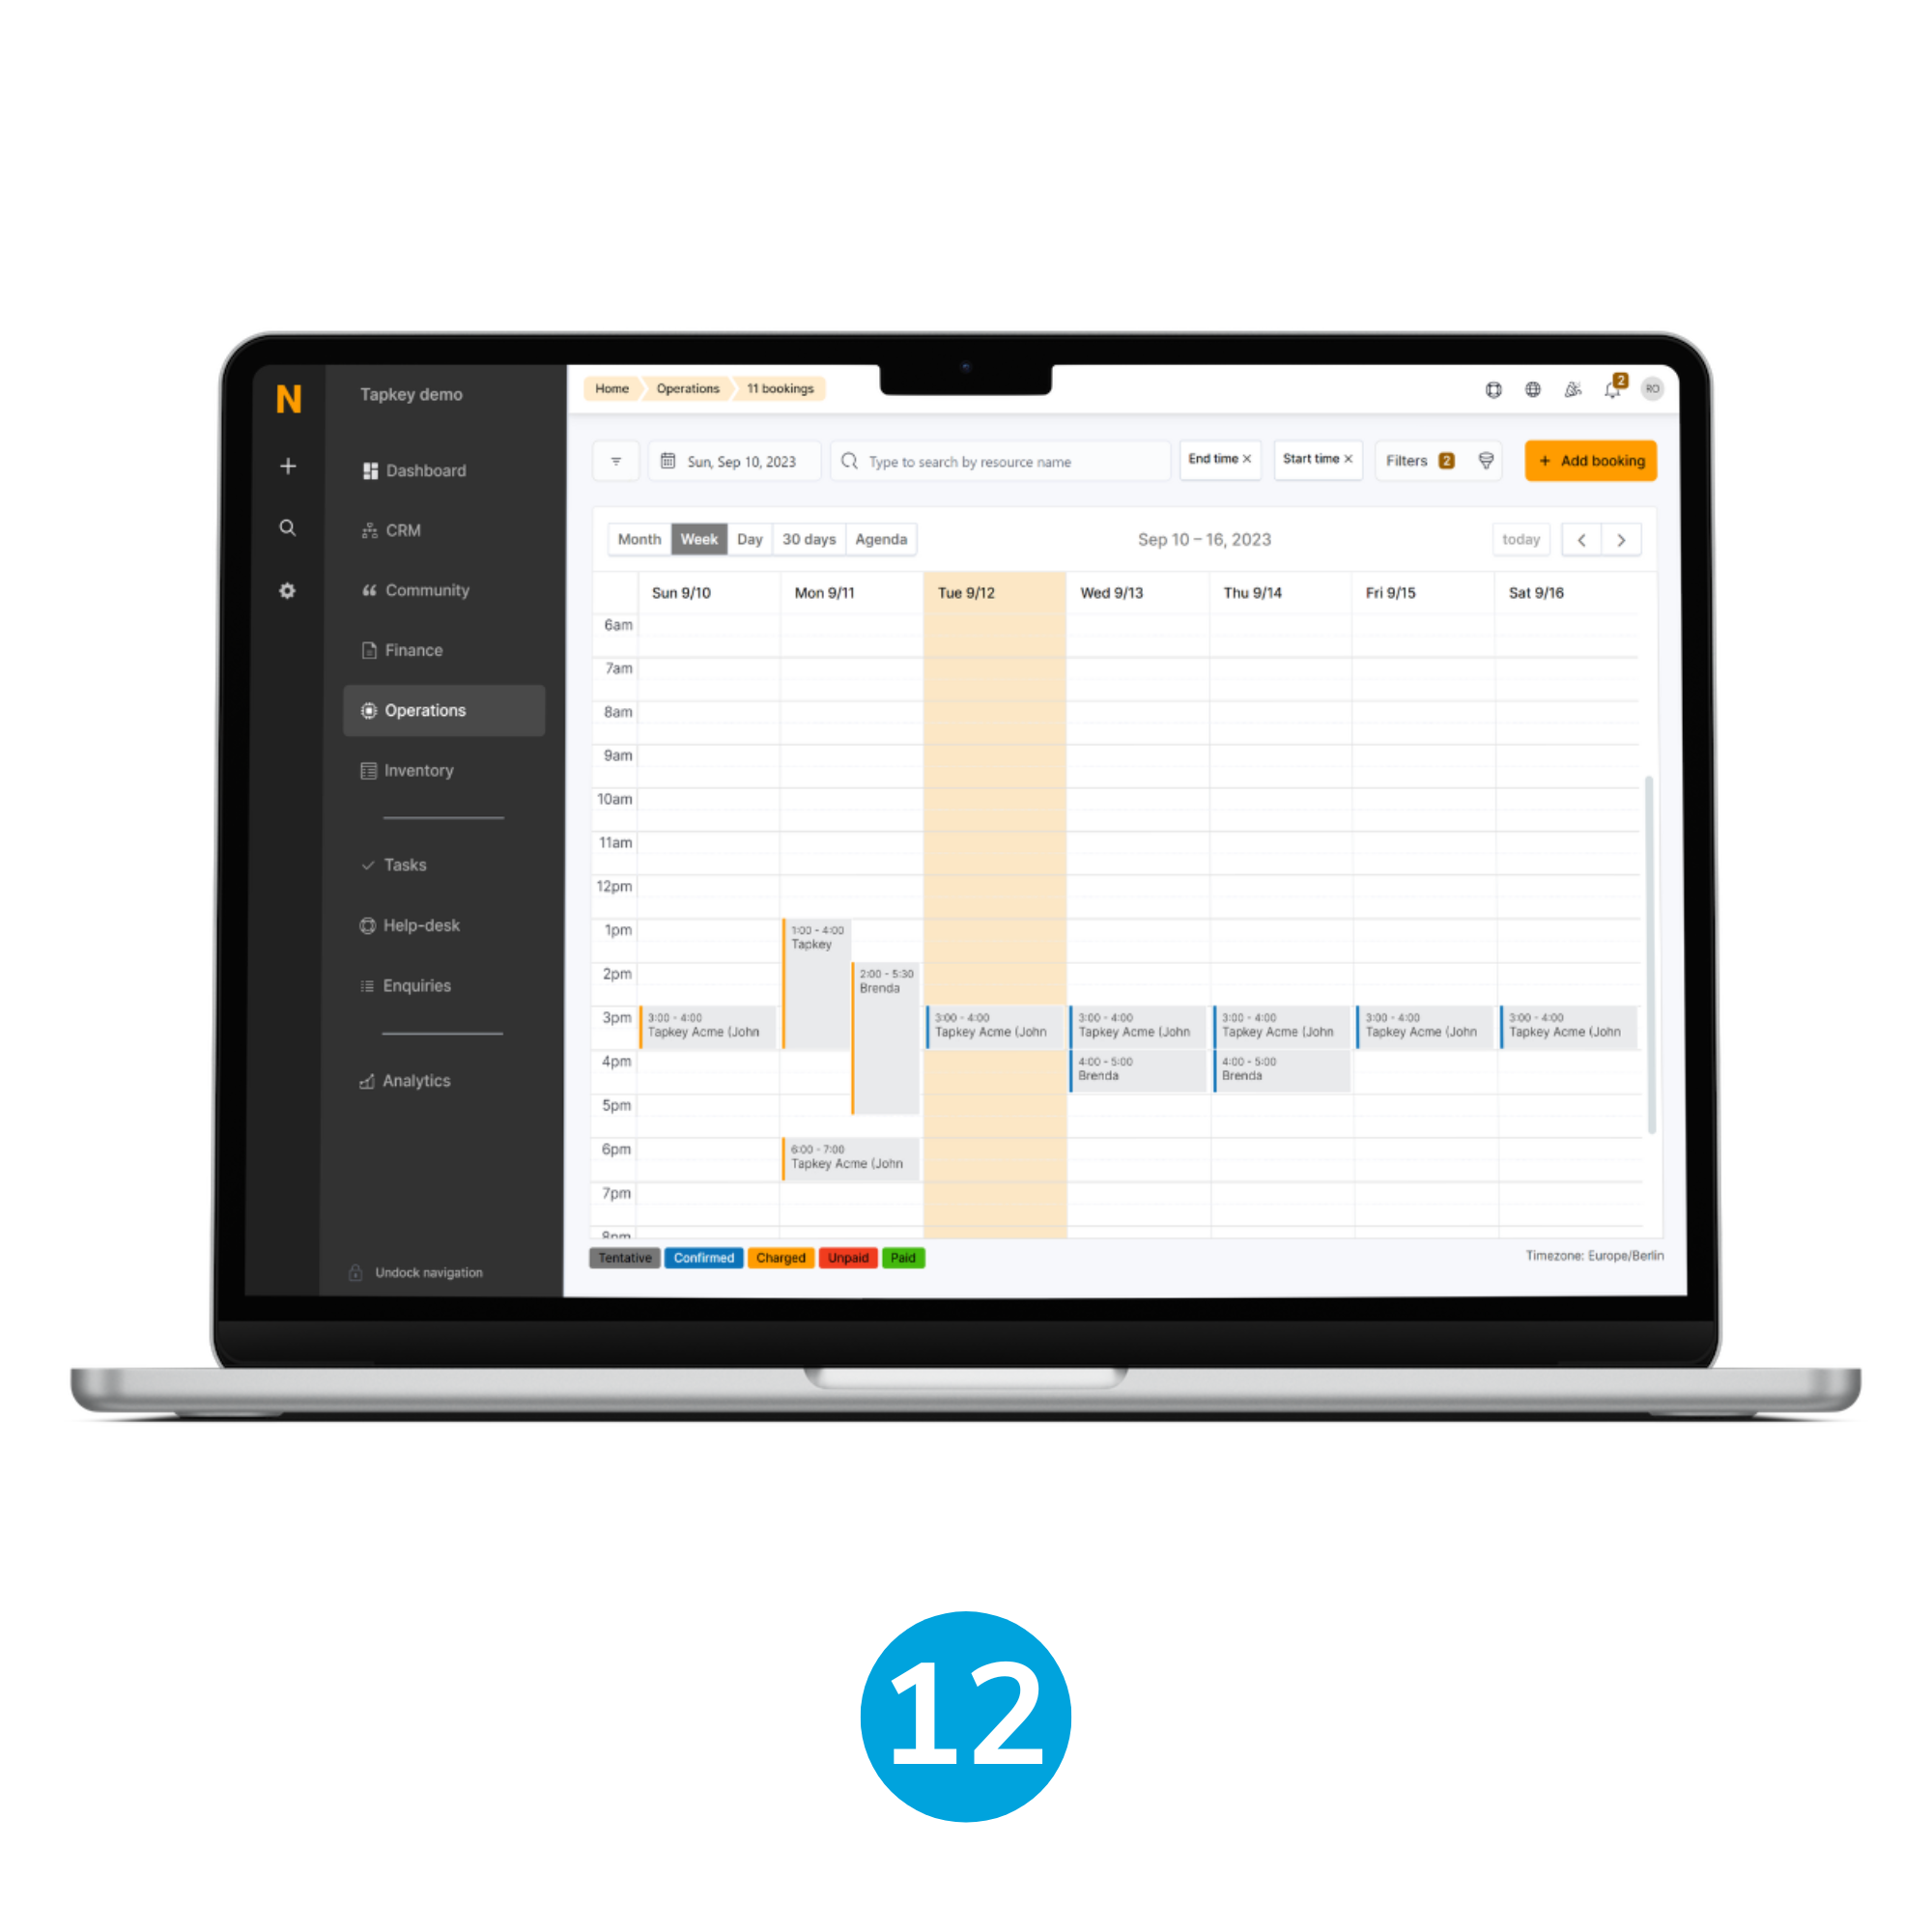
12. Navigate to the booking calendar
Login to Nexudus as Administrator, then navigate to Operations and tap in the Bookings Calendar.

13. Create a reservation
Select a time window within the same day and create a reservation for the resource Desk Room # 1, it is essential to associate an existing customer with email to test the integration.
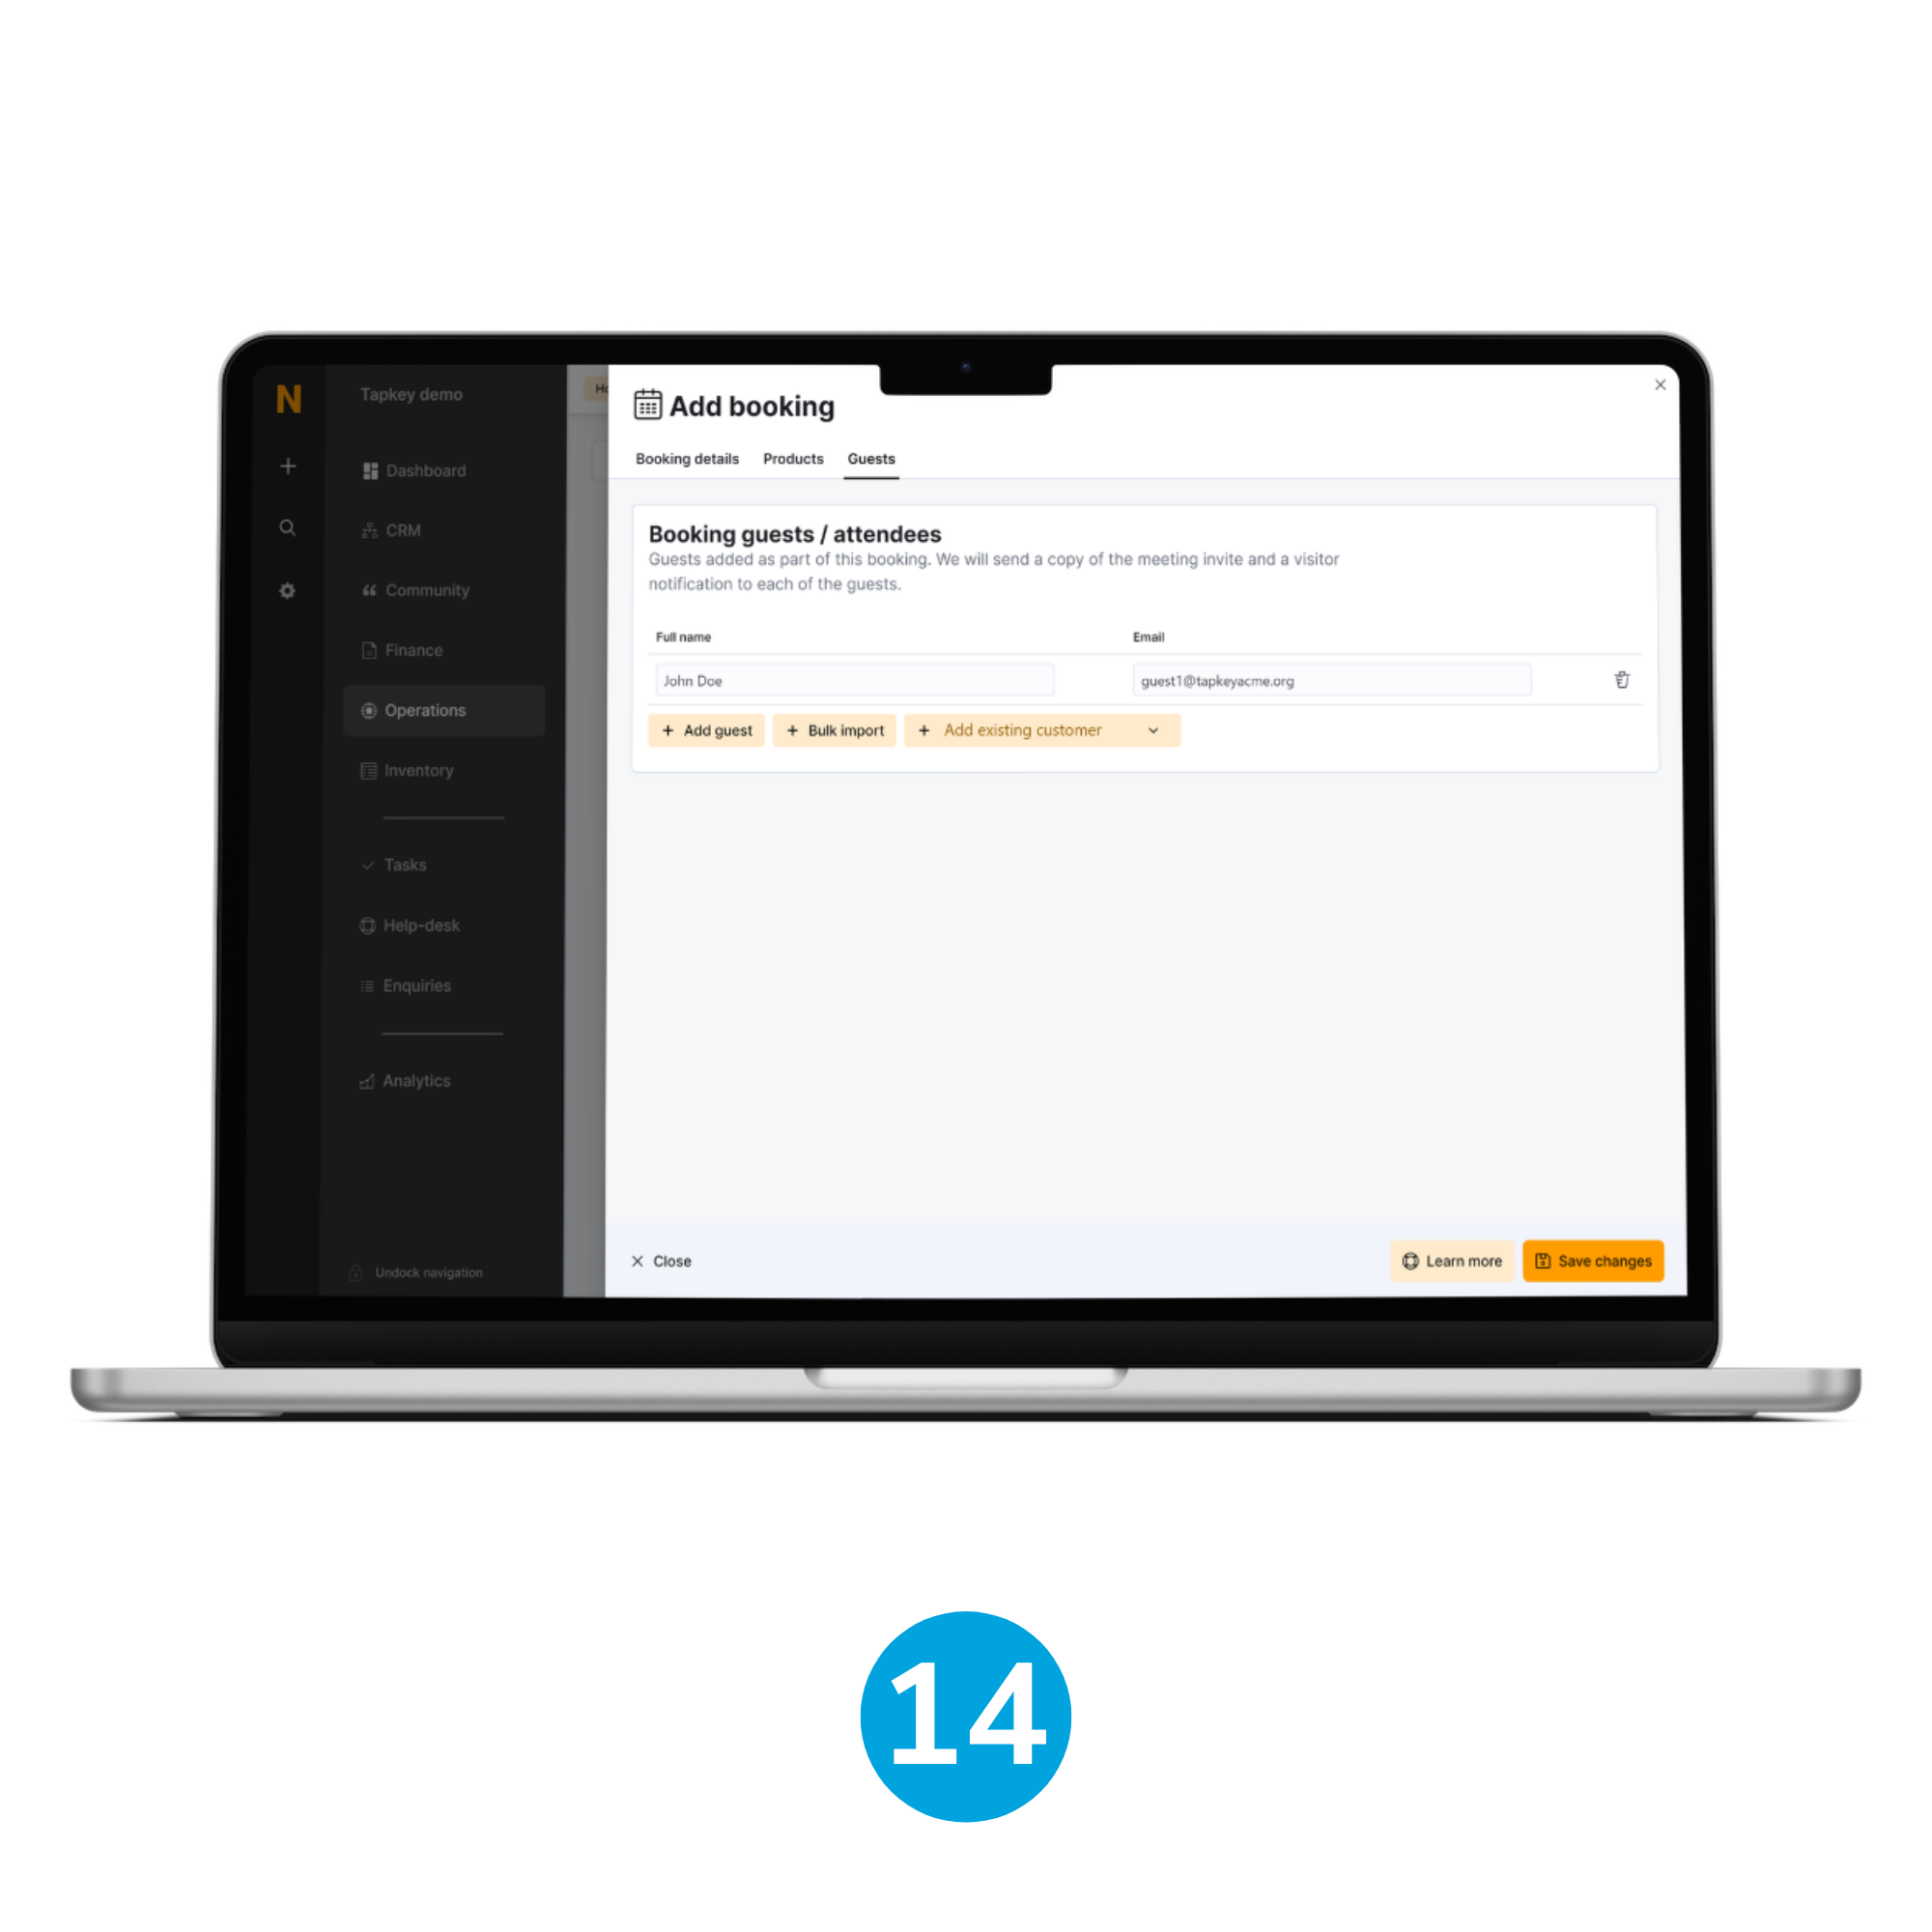
14. Save Changes
Tap the Save Changes button to make the reservation.
Note: The list of guests and attendees is going to be granted physical access permissions as well.
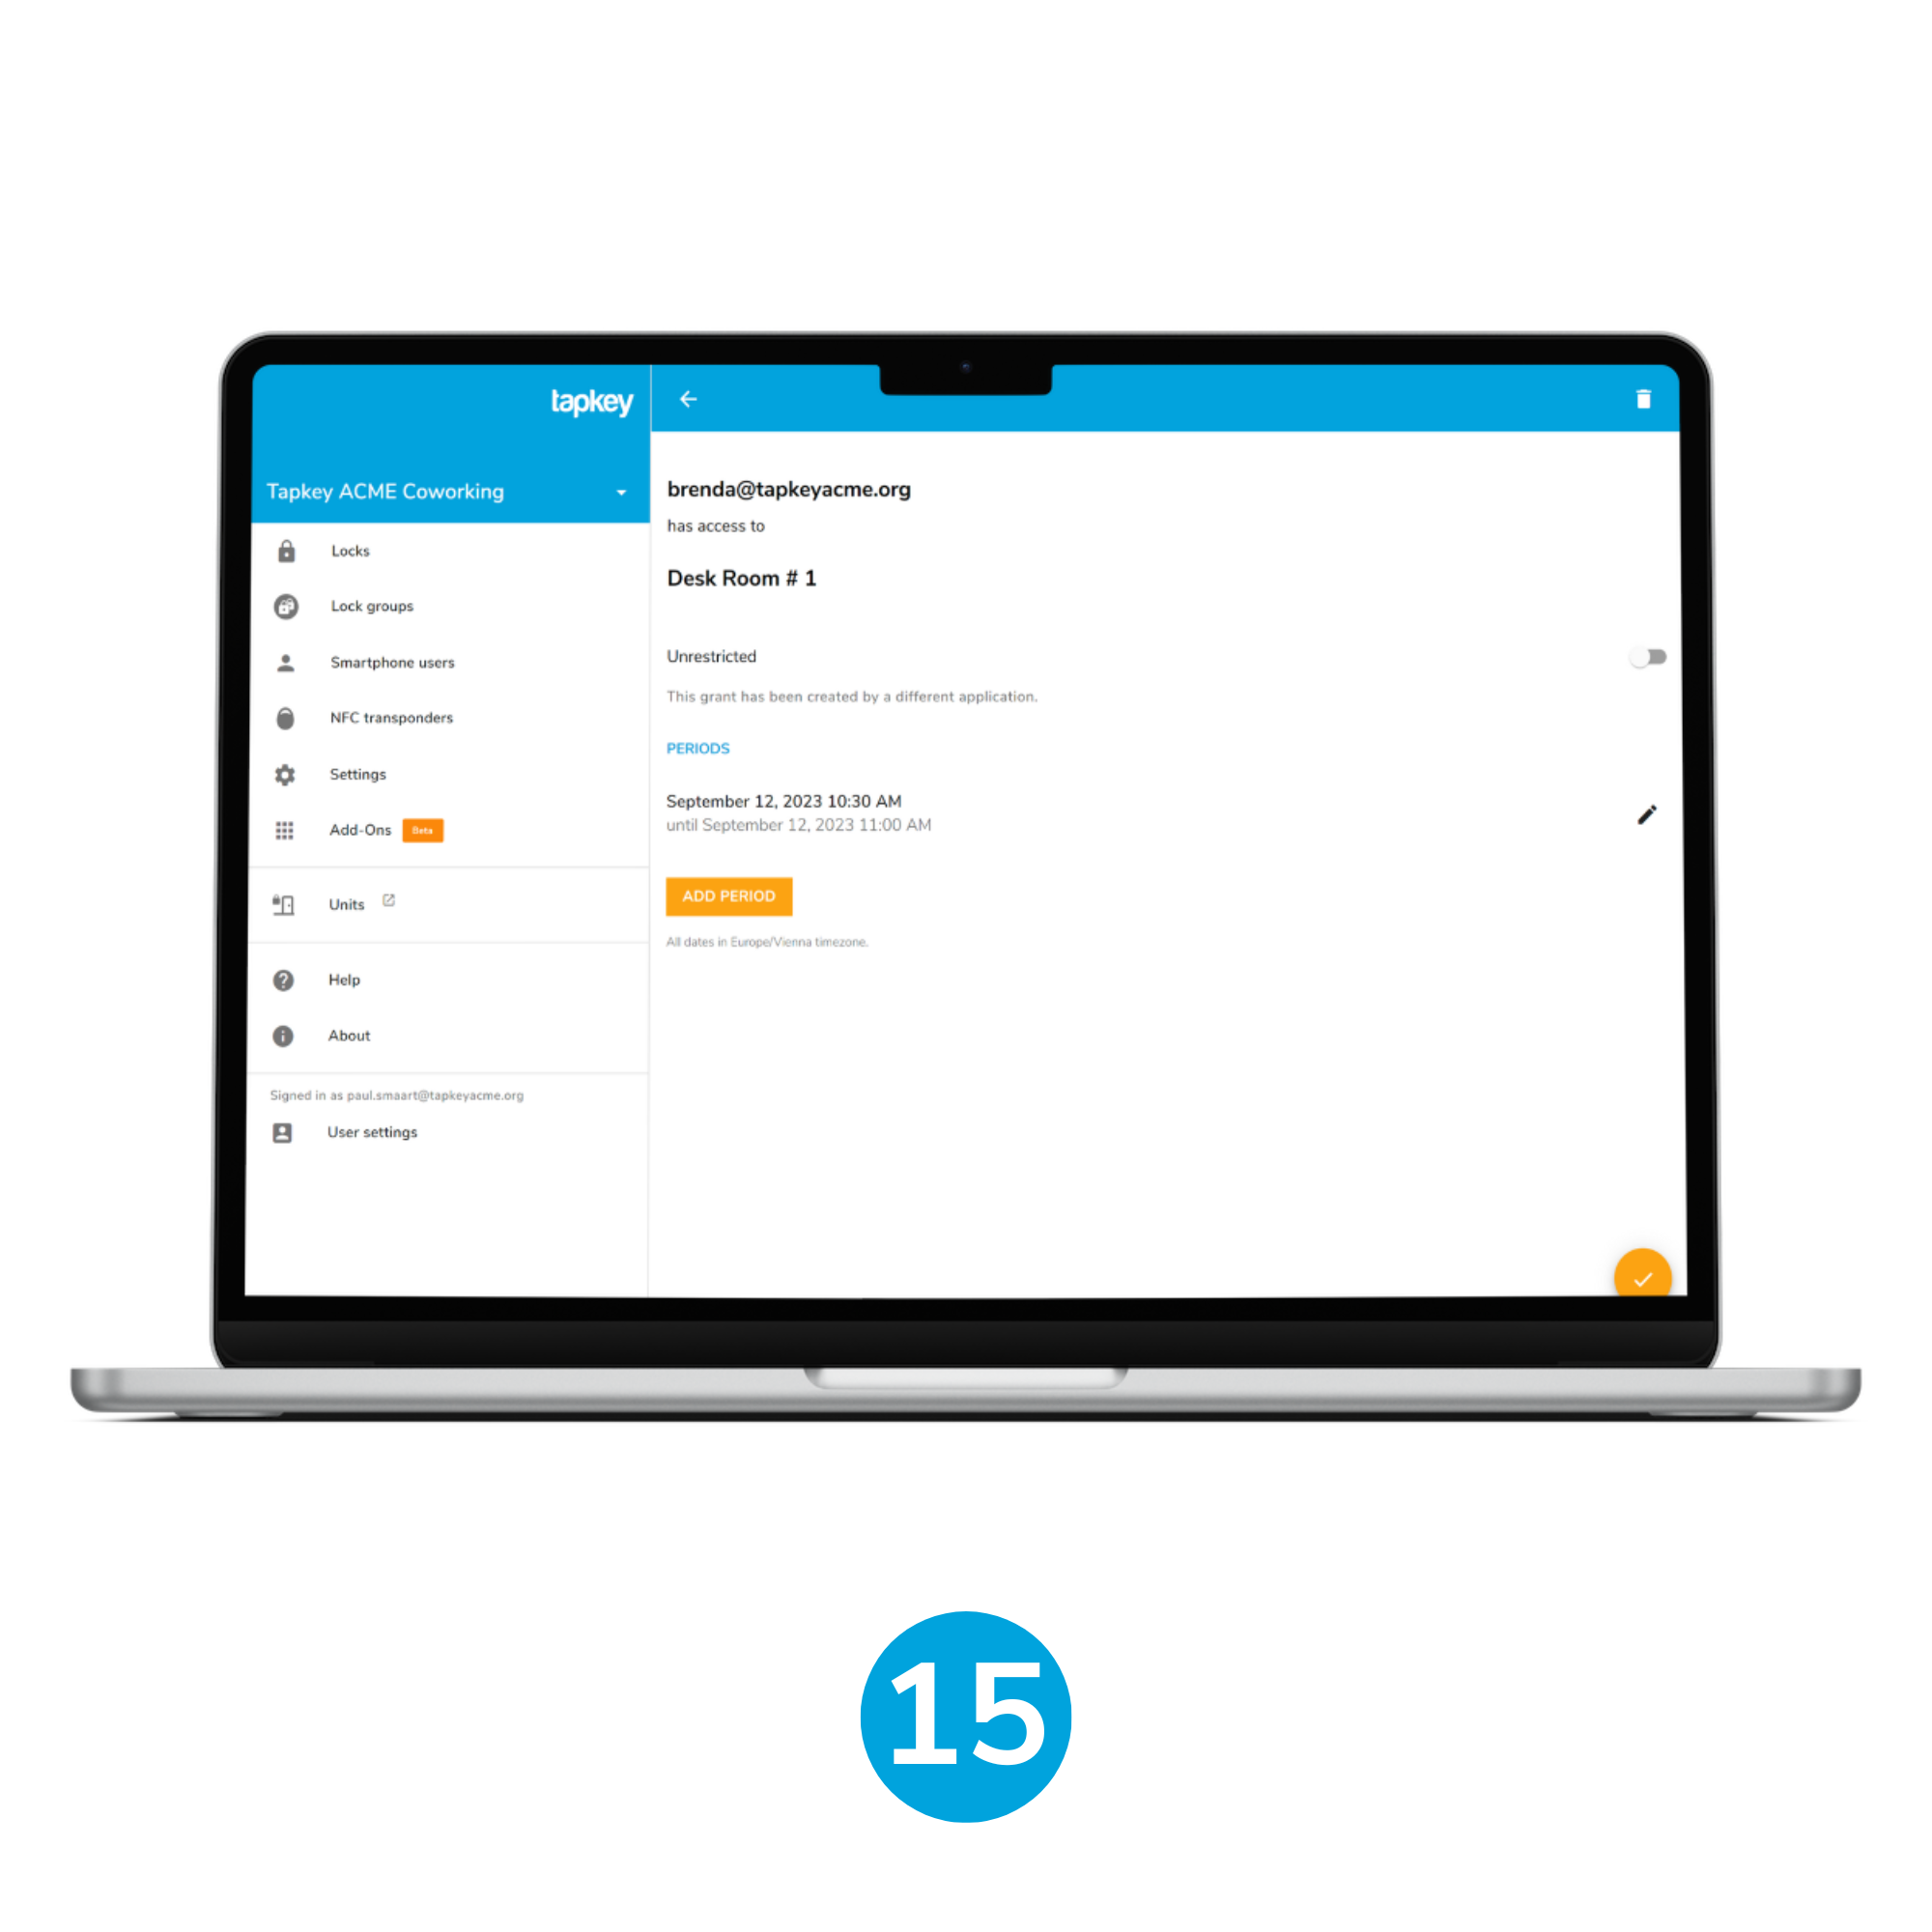
15. Verify access from the admin account
Log in to the Tapkey web portal application as administrator and verify the access to the “Desk Room # 1” lock, which should be granted to the resident brenda@tapkeyacme.org within the same time period reserved in the previous step.
Flexible Workspaces
Nexudus has available a white label application that allows companies to offer access to facilities and reservation of conference rooms in a unified platform:
Additional Reading
From this point, you can continue setting up additional elements about Nexudus integration, such as Margin Time.
Was this article helpful?
That’s Great!
Thank you for your feedback
Sorry! We couldn't be helpful
Thank you for your feedback
Feedback sent
We appreciate your effort and will try to fix the article