How to set up Nexudus Passes and connect with Tapkey
Passes in Nexudus are used to control additional access of users within the coworking space, in this scenario we are going to simulate a coworking space that has a Bike Storage area reserved for certain users, more information about Passes.
Installation
Prerequisites
Before starting with this tutorial, it is required:
- Read how the Add-On works with passes
- Tapkey Smart Locks are already installed in the facilities. Find out how to register locks here.
- If you want to edit the margin time, find a detailed description here.
The Scenario
This tutorial is going to use a hypothetical scenario to describe more in detail how to use the Add-On, we will consider ourselves owners and administrators of a small coworking space with Passes that can be used by coworker members.
Step-by-step guide
Step 1: Tapkey Add-On installation from Nexudus
The first step happens on the Nexudus side, where it is required to install the Tapkey Add-On within Nexudus. This process is going to be detailed below. If you have already connected the Add-On, you can skip to Step 2.
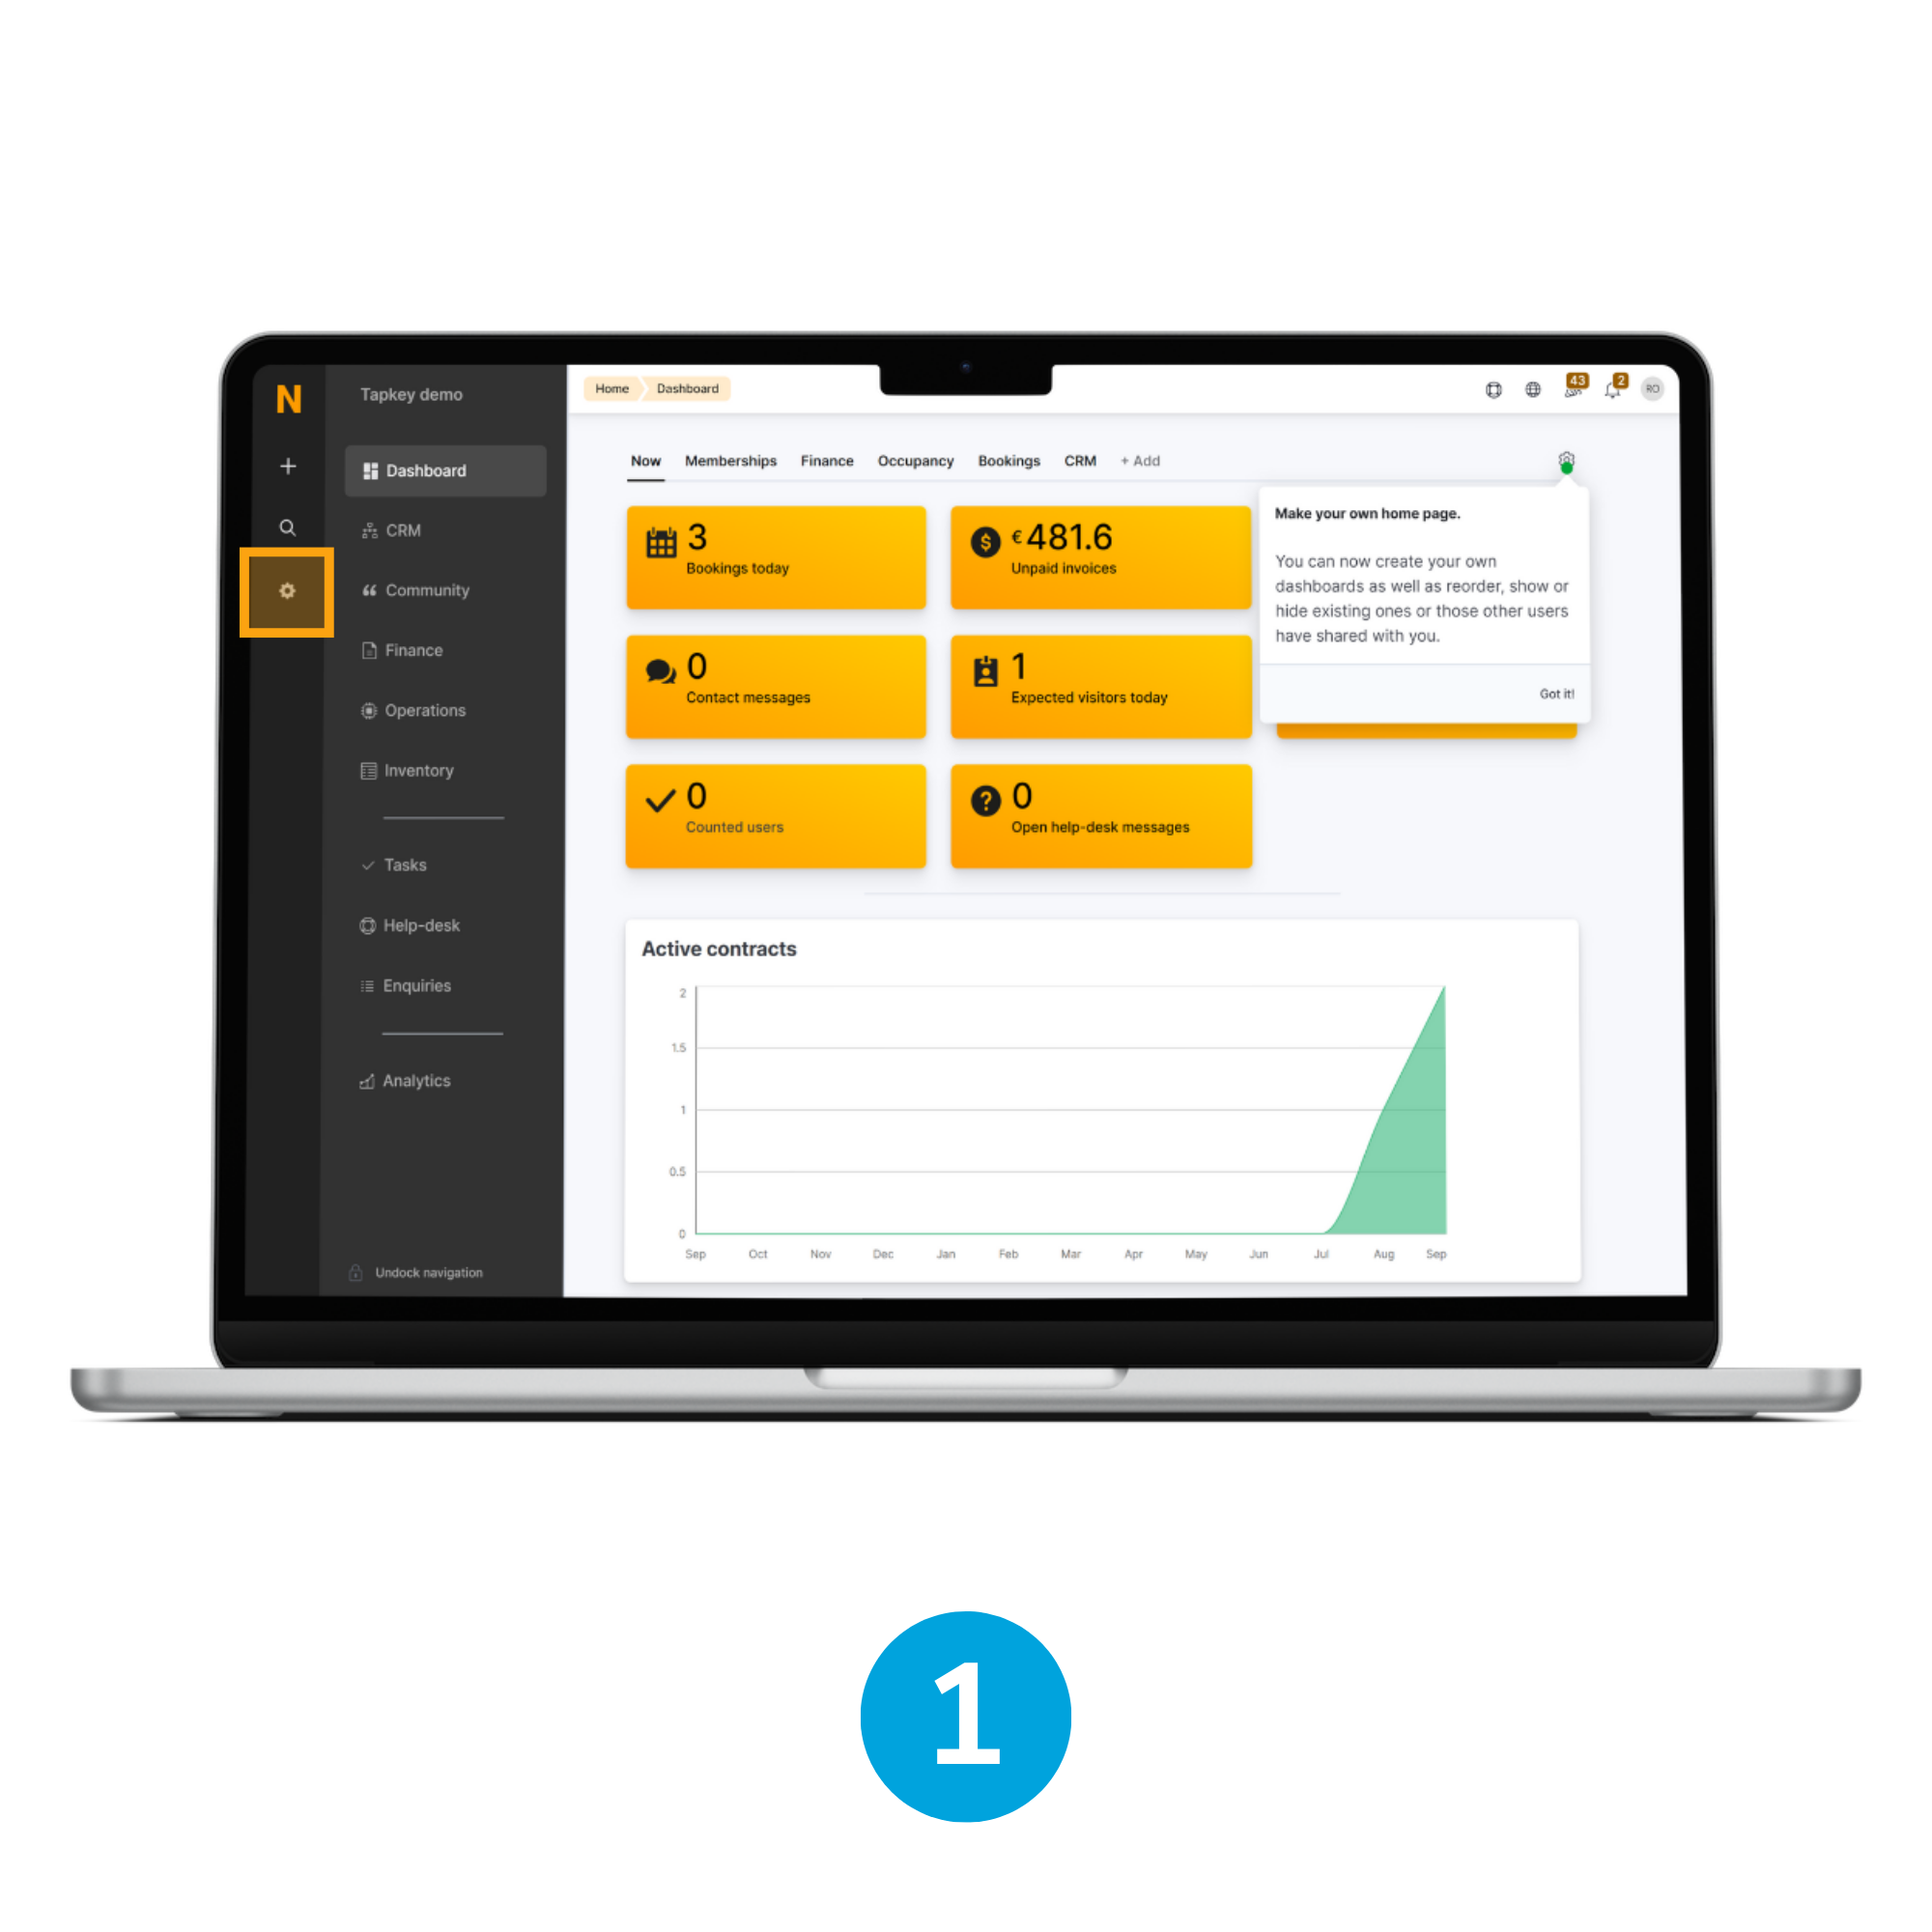
1. Open Settings
As administrator of the coworking space, as soon as you are in the Admin Panel, navigate to the Settings page.
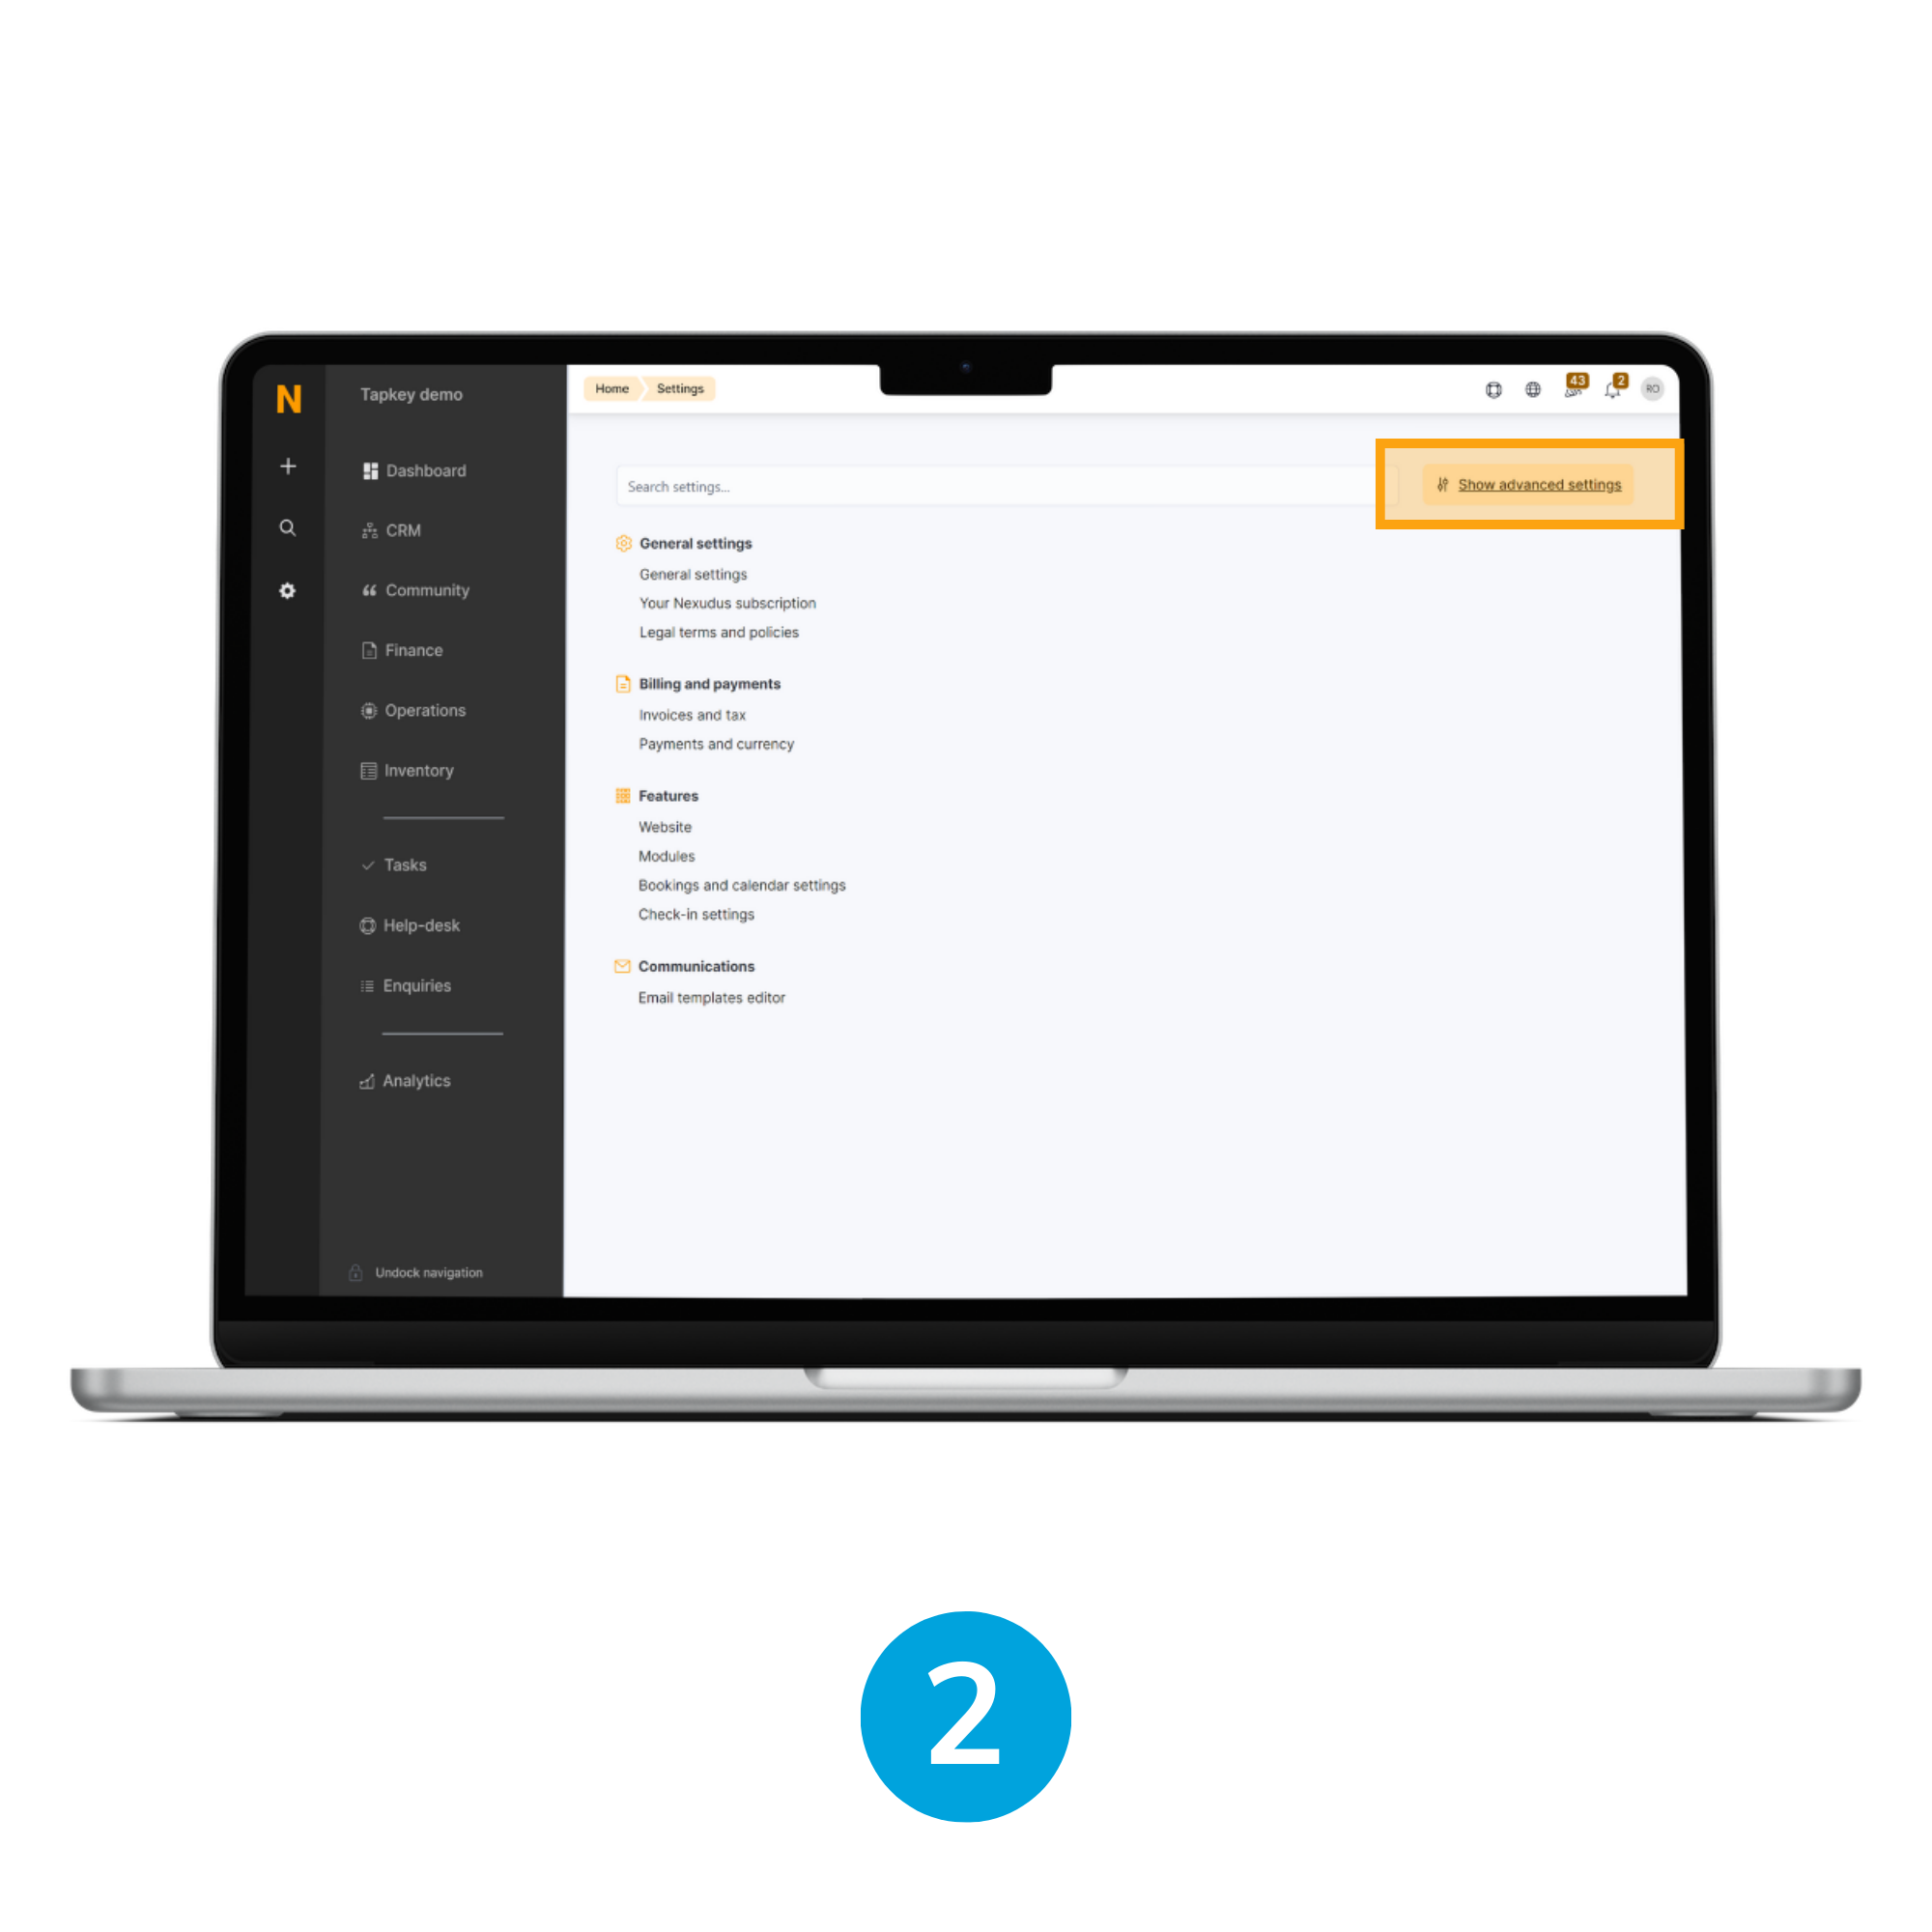
2. Show advanced settings
By default, the settings page does not display Add-ons and Advanced features, so it is required to click the button Show advanced settings next to the Search box.
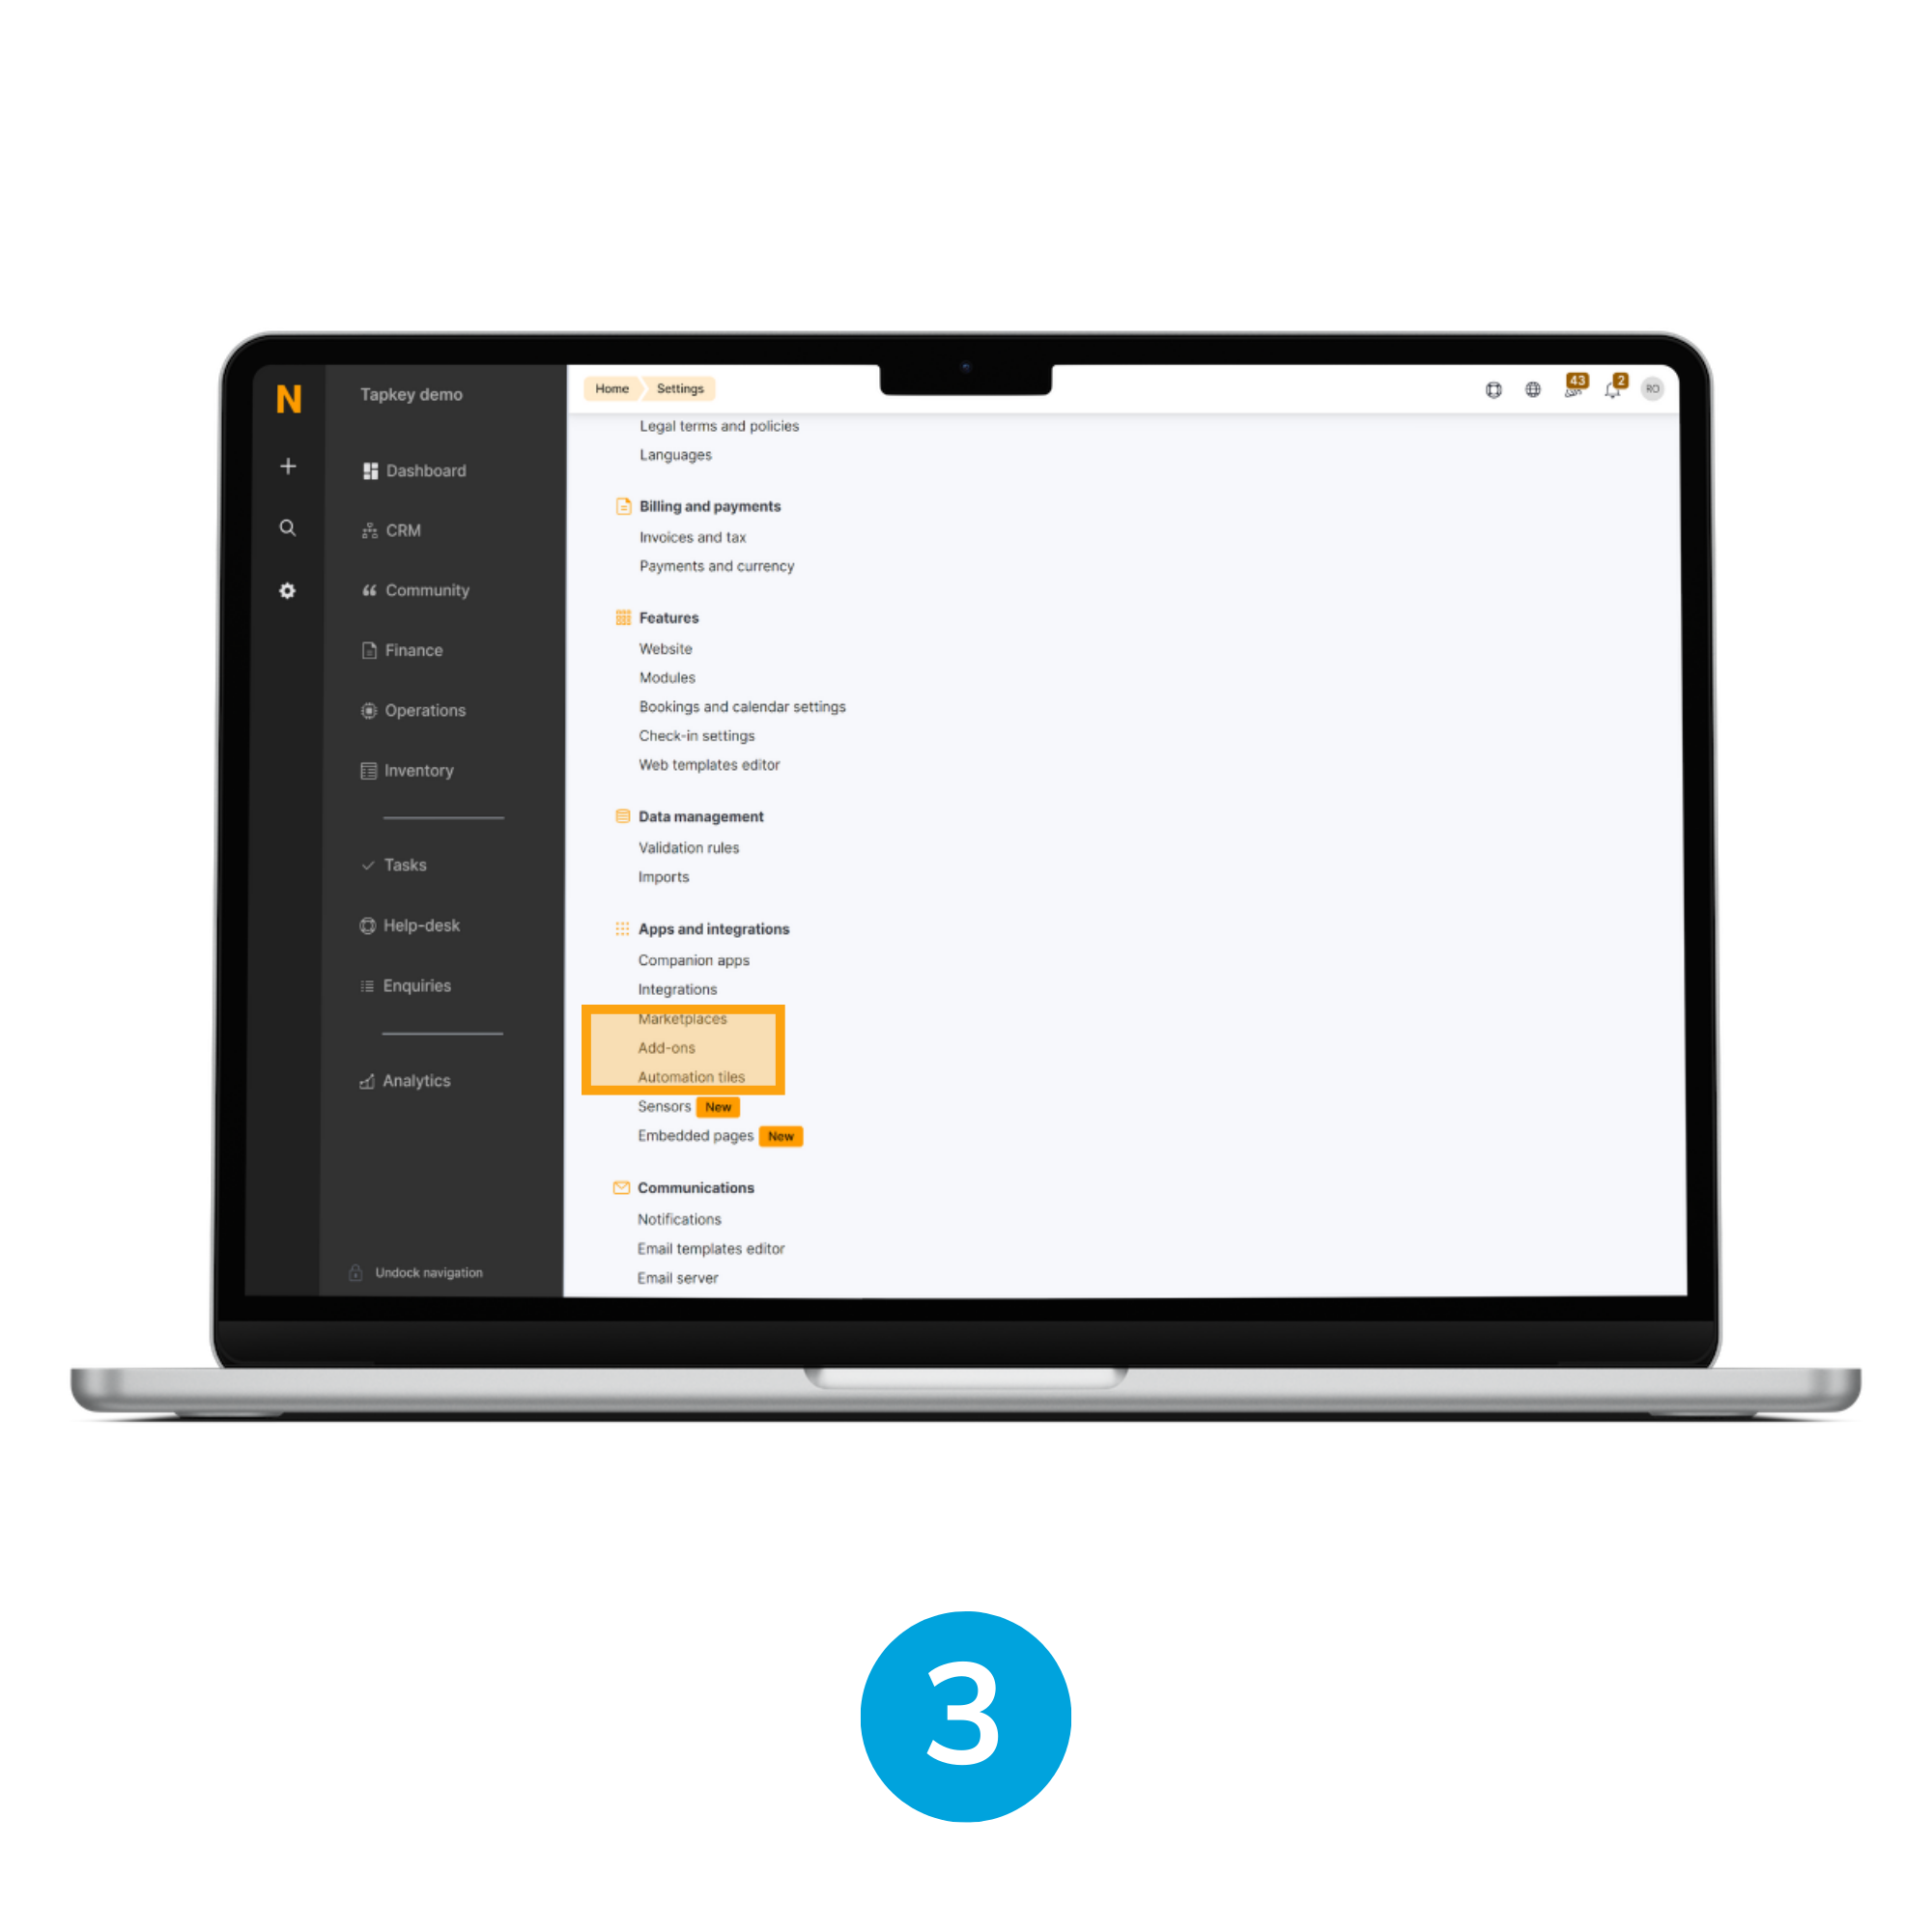
3. Open Add-Ons
Once Advanced Settings are expanded, inside the section “Apps and integrations” you will be able to see the Add-Ons option, tap that button to continue with the installation.
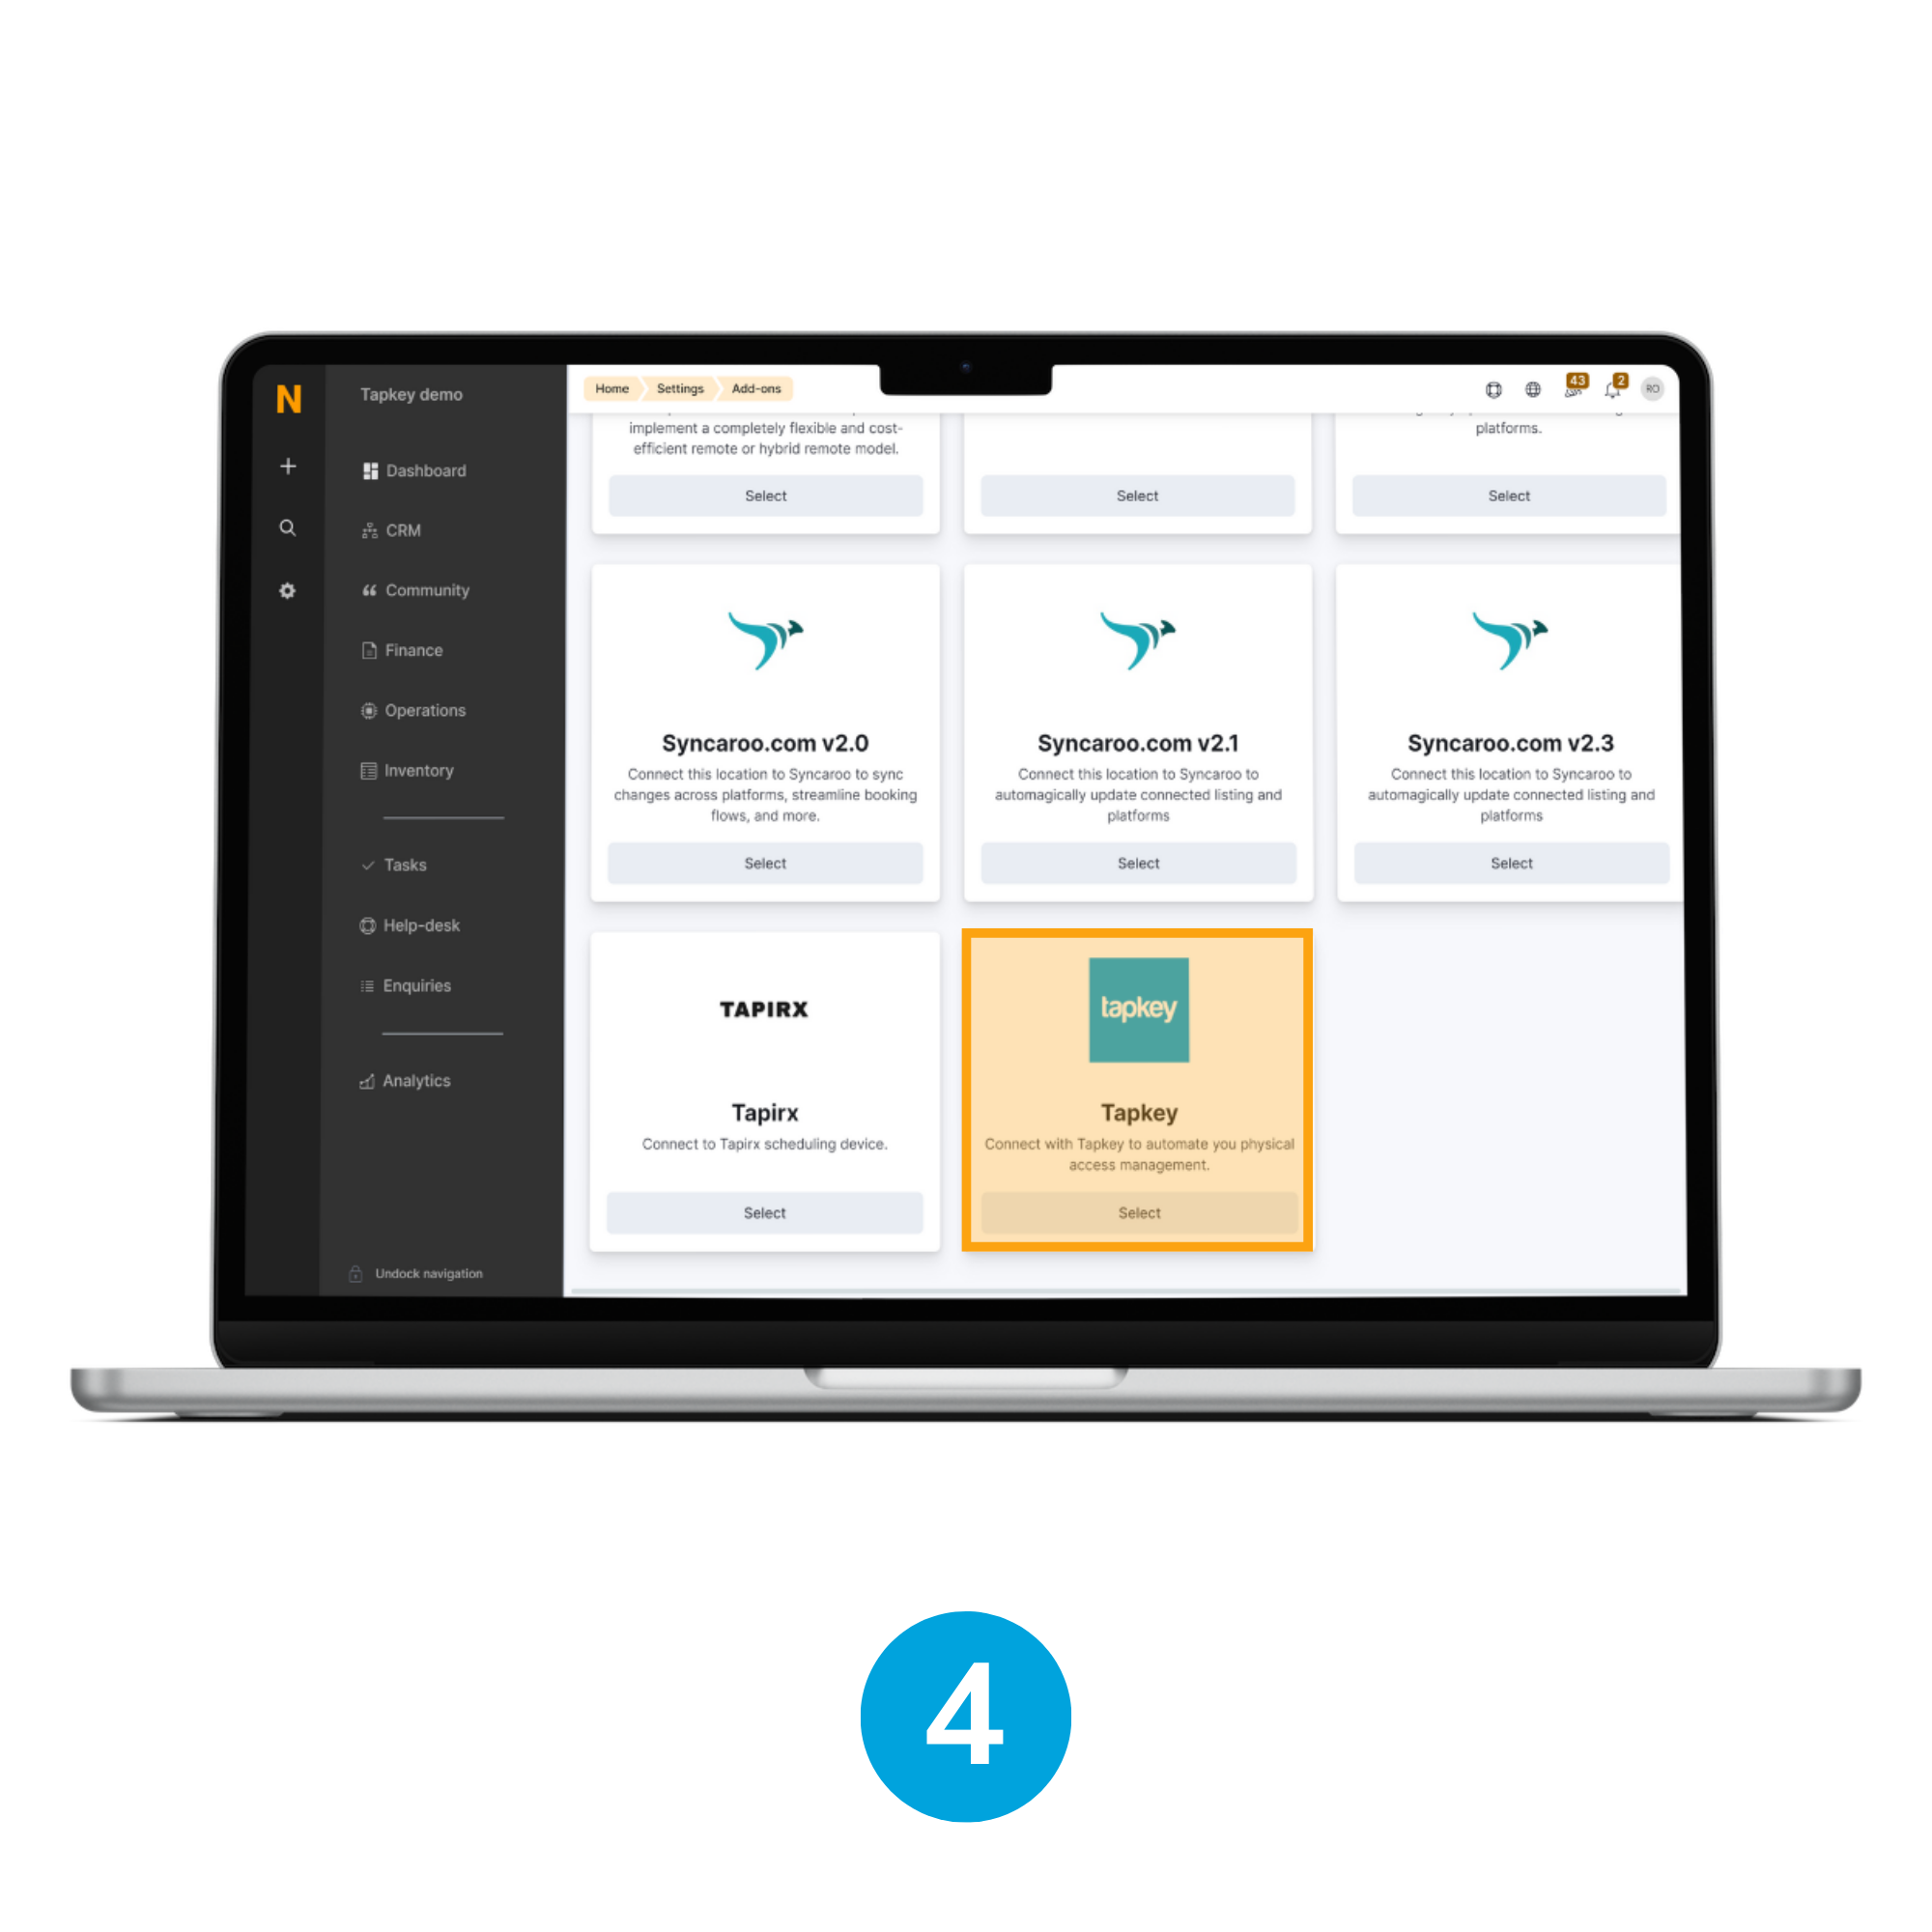
4. Choose Tapkey
In the Add-On section, look for the Tapkey integration and tap the Select button to proceed with the installation.
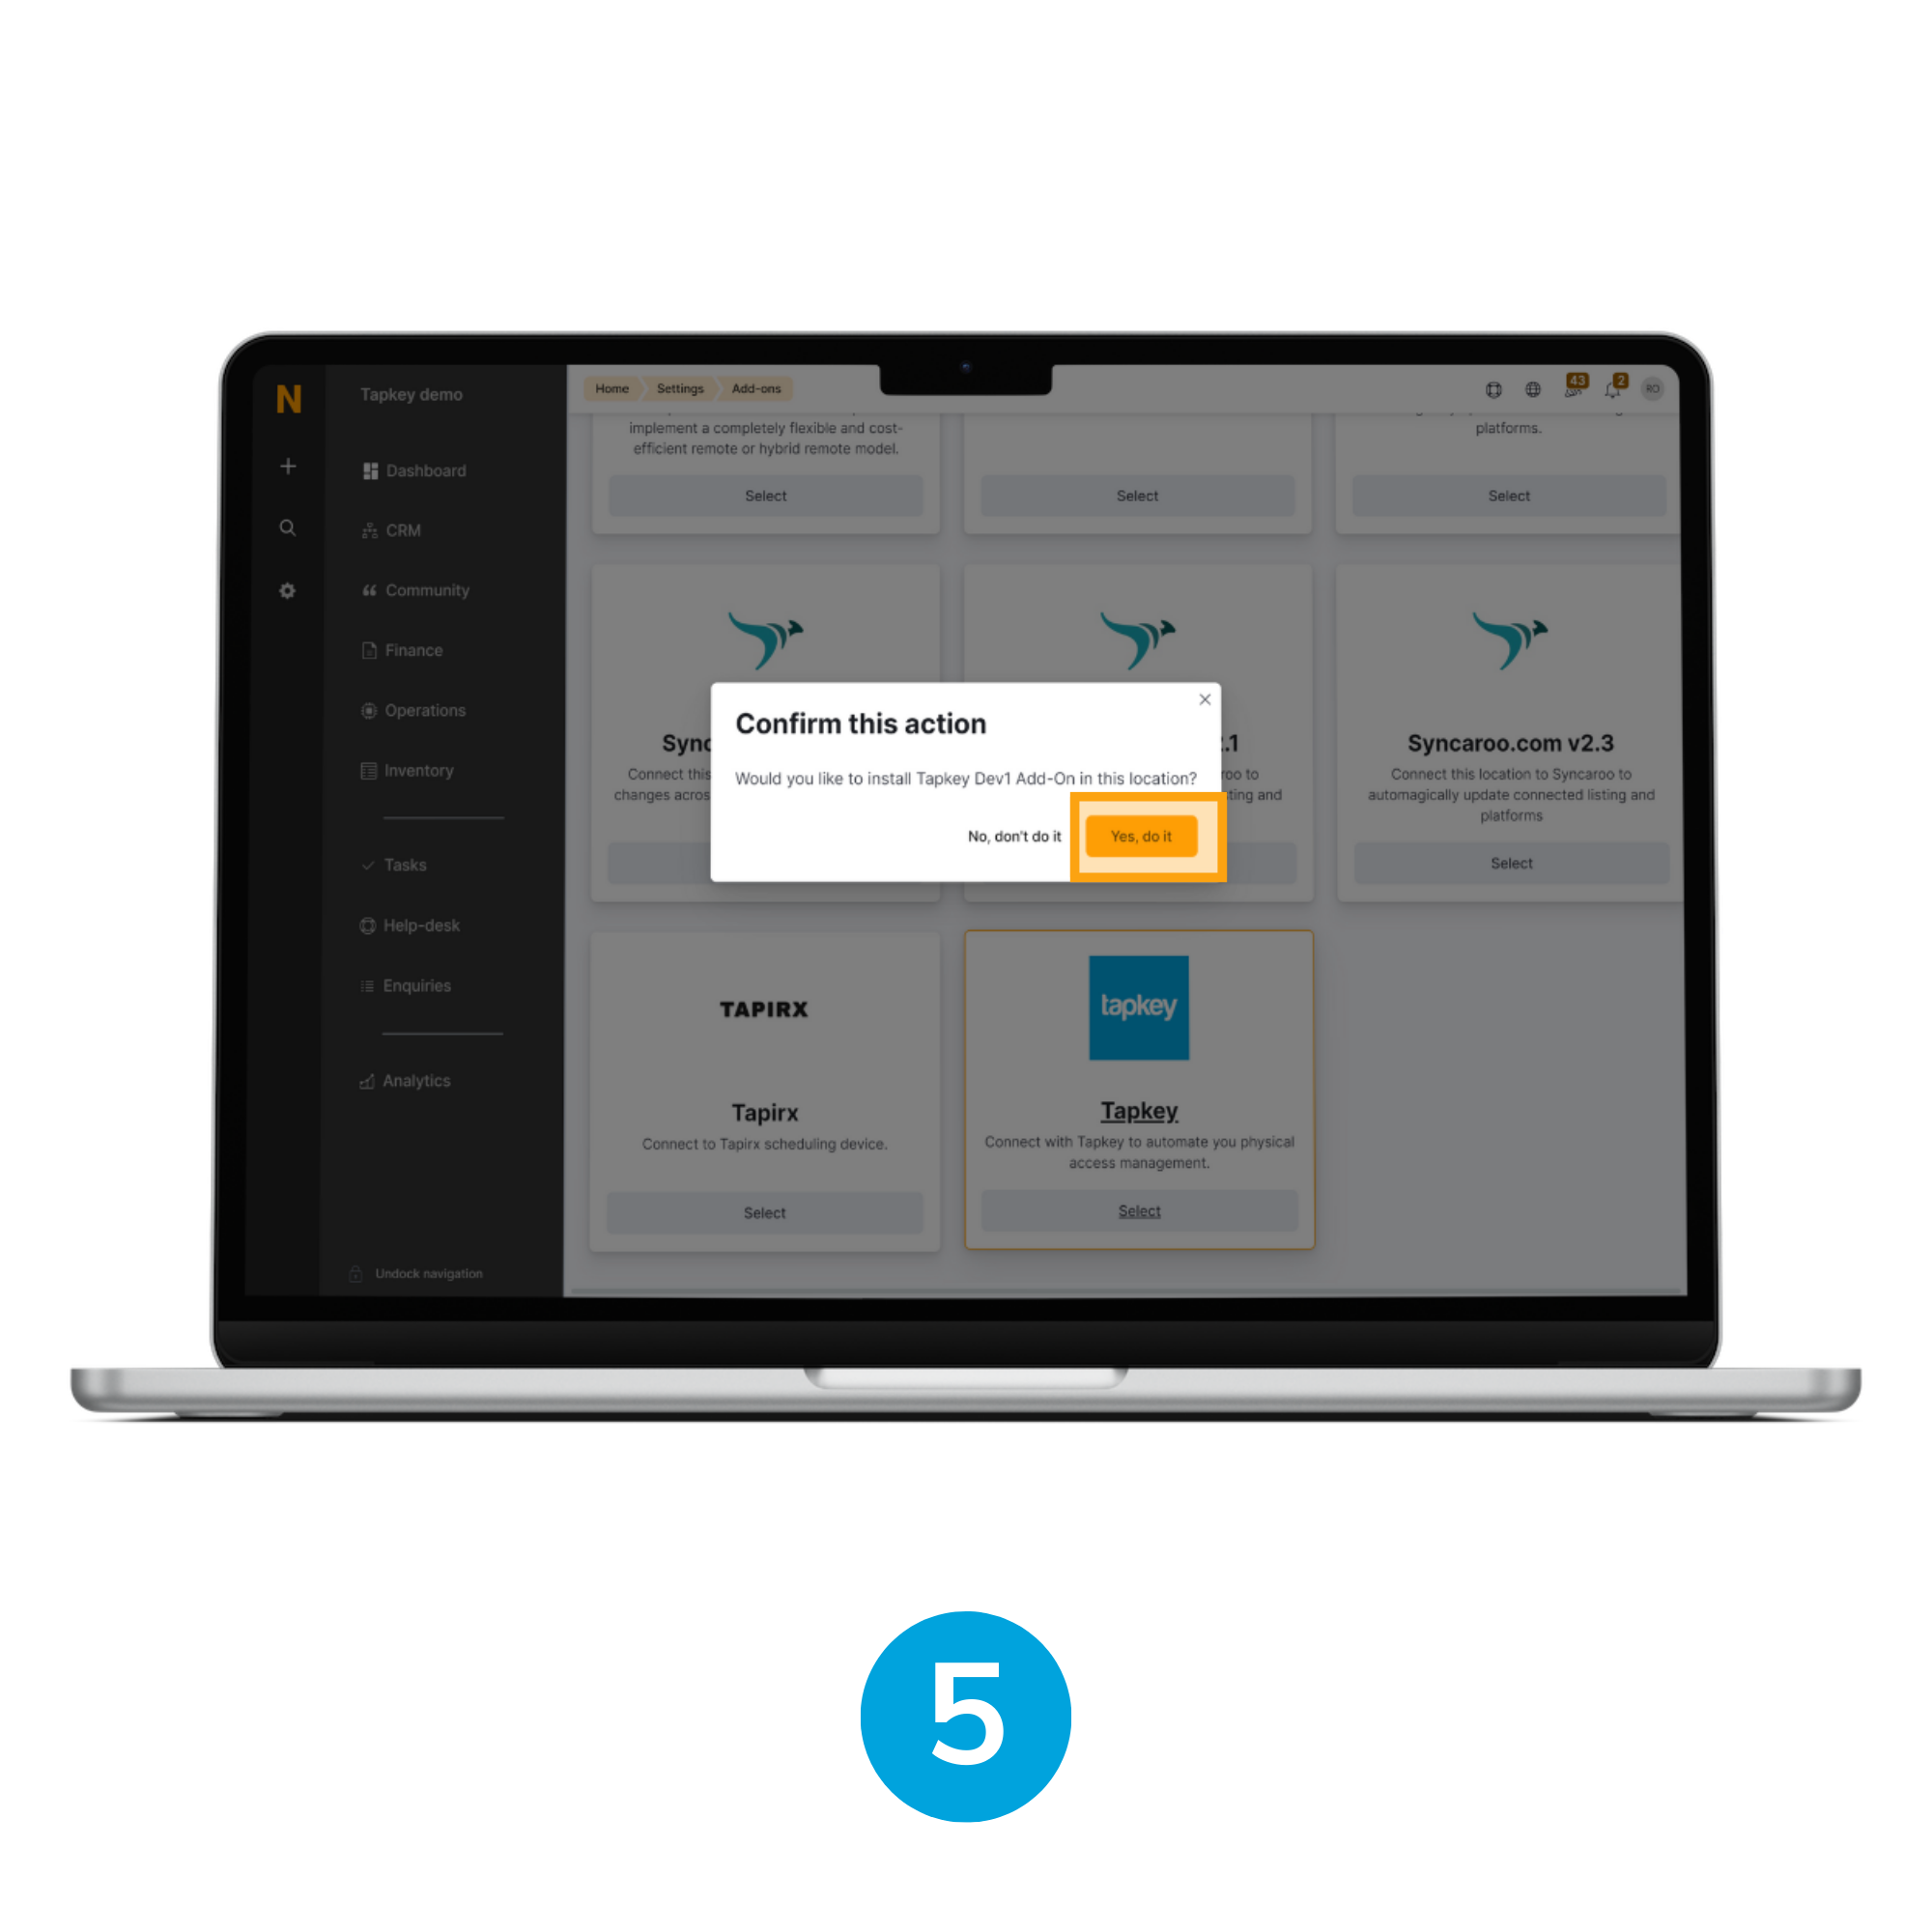
5. Confirm action
A dialogue window will appear asking for confirmation, in this stage it is required to tap Yes, do it.

6. Run Tapkey
When the action is confirmed, Nexudus is going to redirect to an access grant permissions page where all the permissions required by Tapkey to enable the sync-up are going to be displayed, some permissions are:
- Booking, Resource, Plans, Business, Coworker: Read and list operations required to perform sync up and extract all the required information about the events created.
- Webhook: Create, Delete, Edit, List, Read, this permission is required to enable real-time connection with Nexudus.
It is required to tap Yes, please run Tapkey.
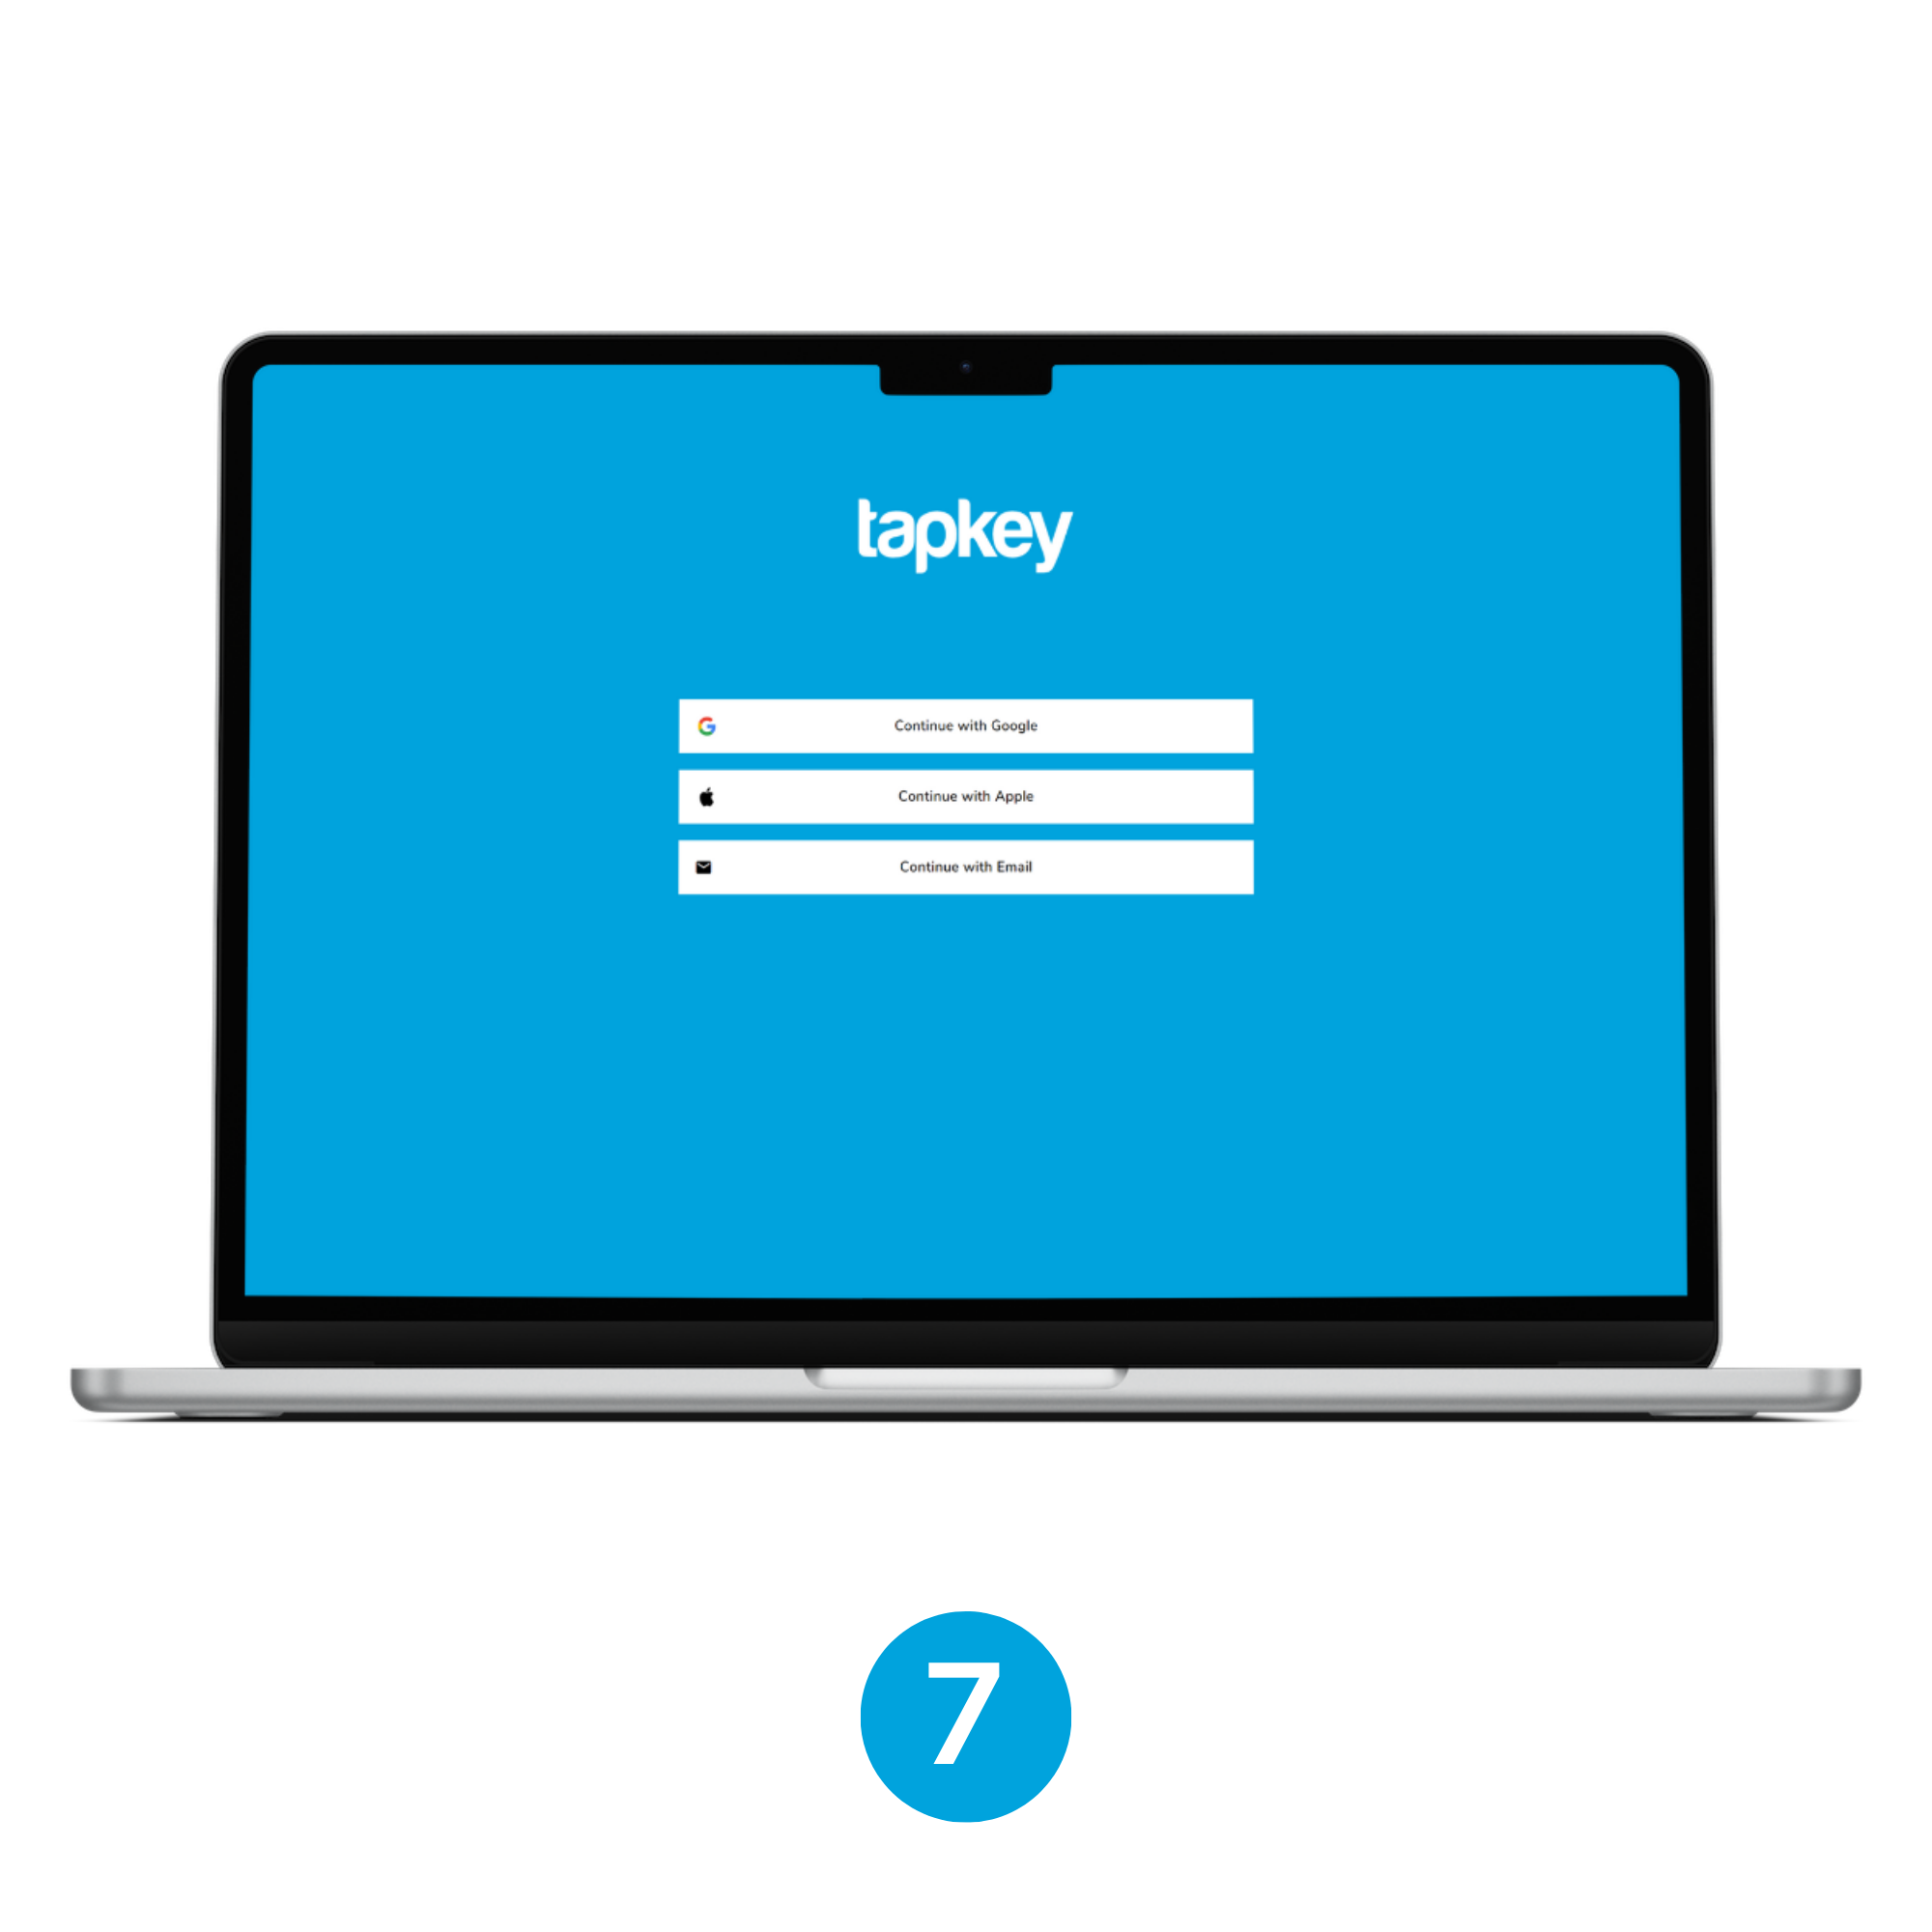
7. Tapkey Webportal
Tapkey is going to request you to log in if there is no previous session in the Tapkey webportal opened in your browser.

8. Connecting Nexudus and Tapkey
As soon as you have a Tapkey session in the web portal, Nexudus Add-On is going to continue with the installation.
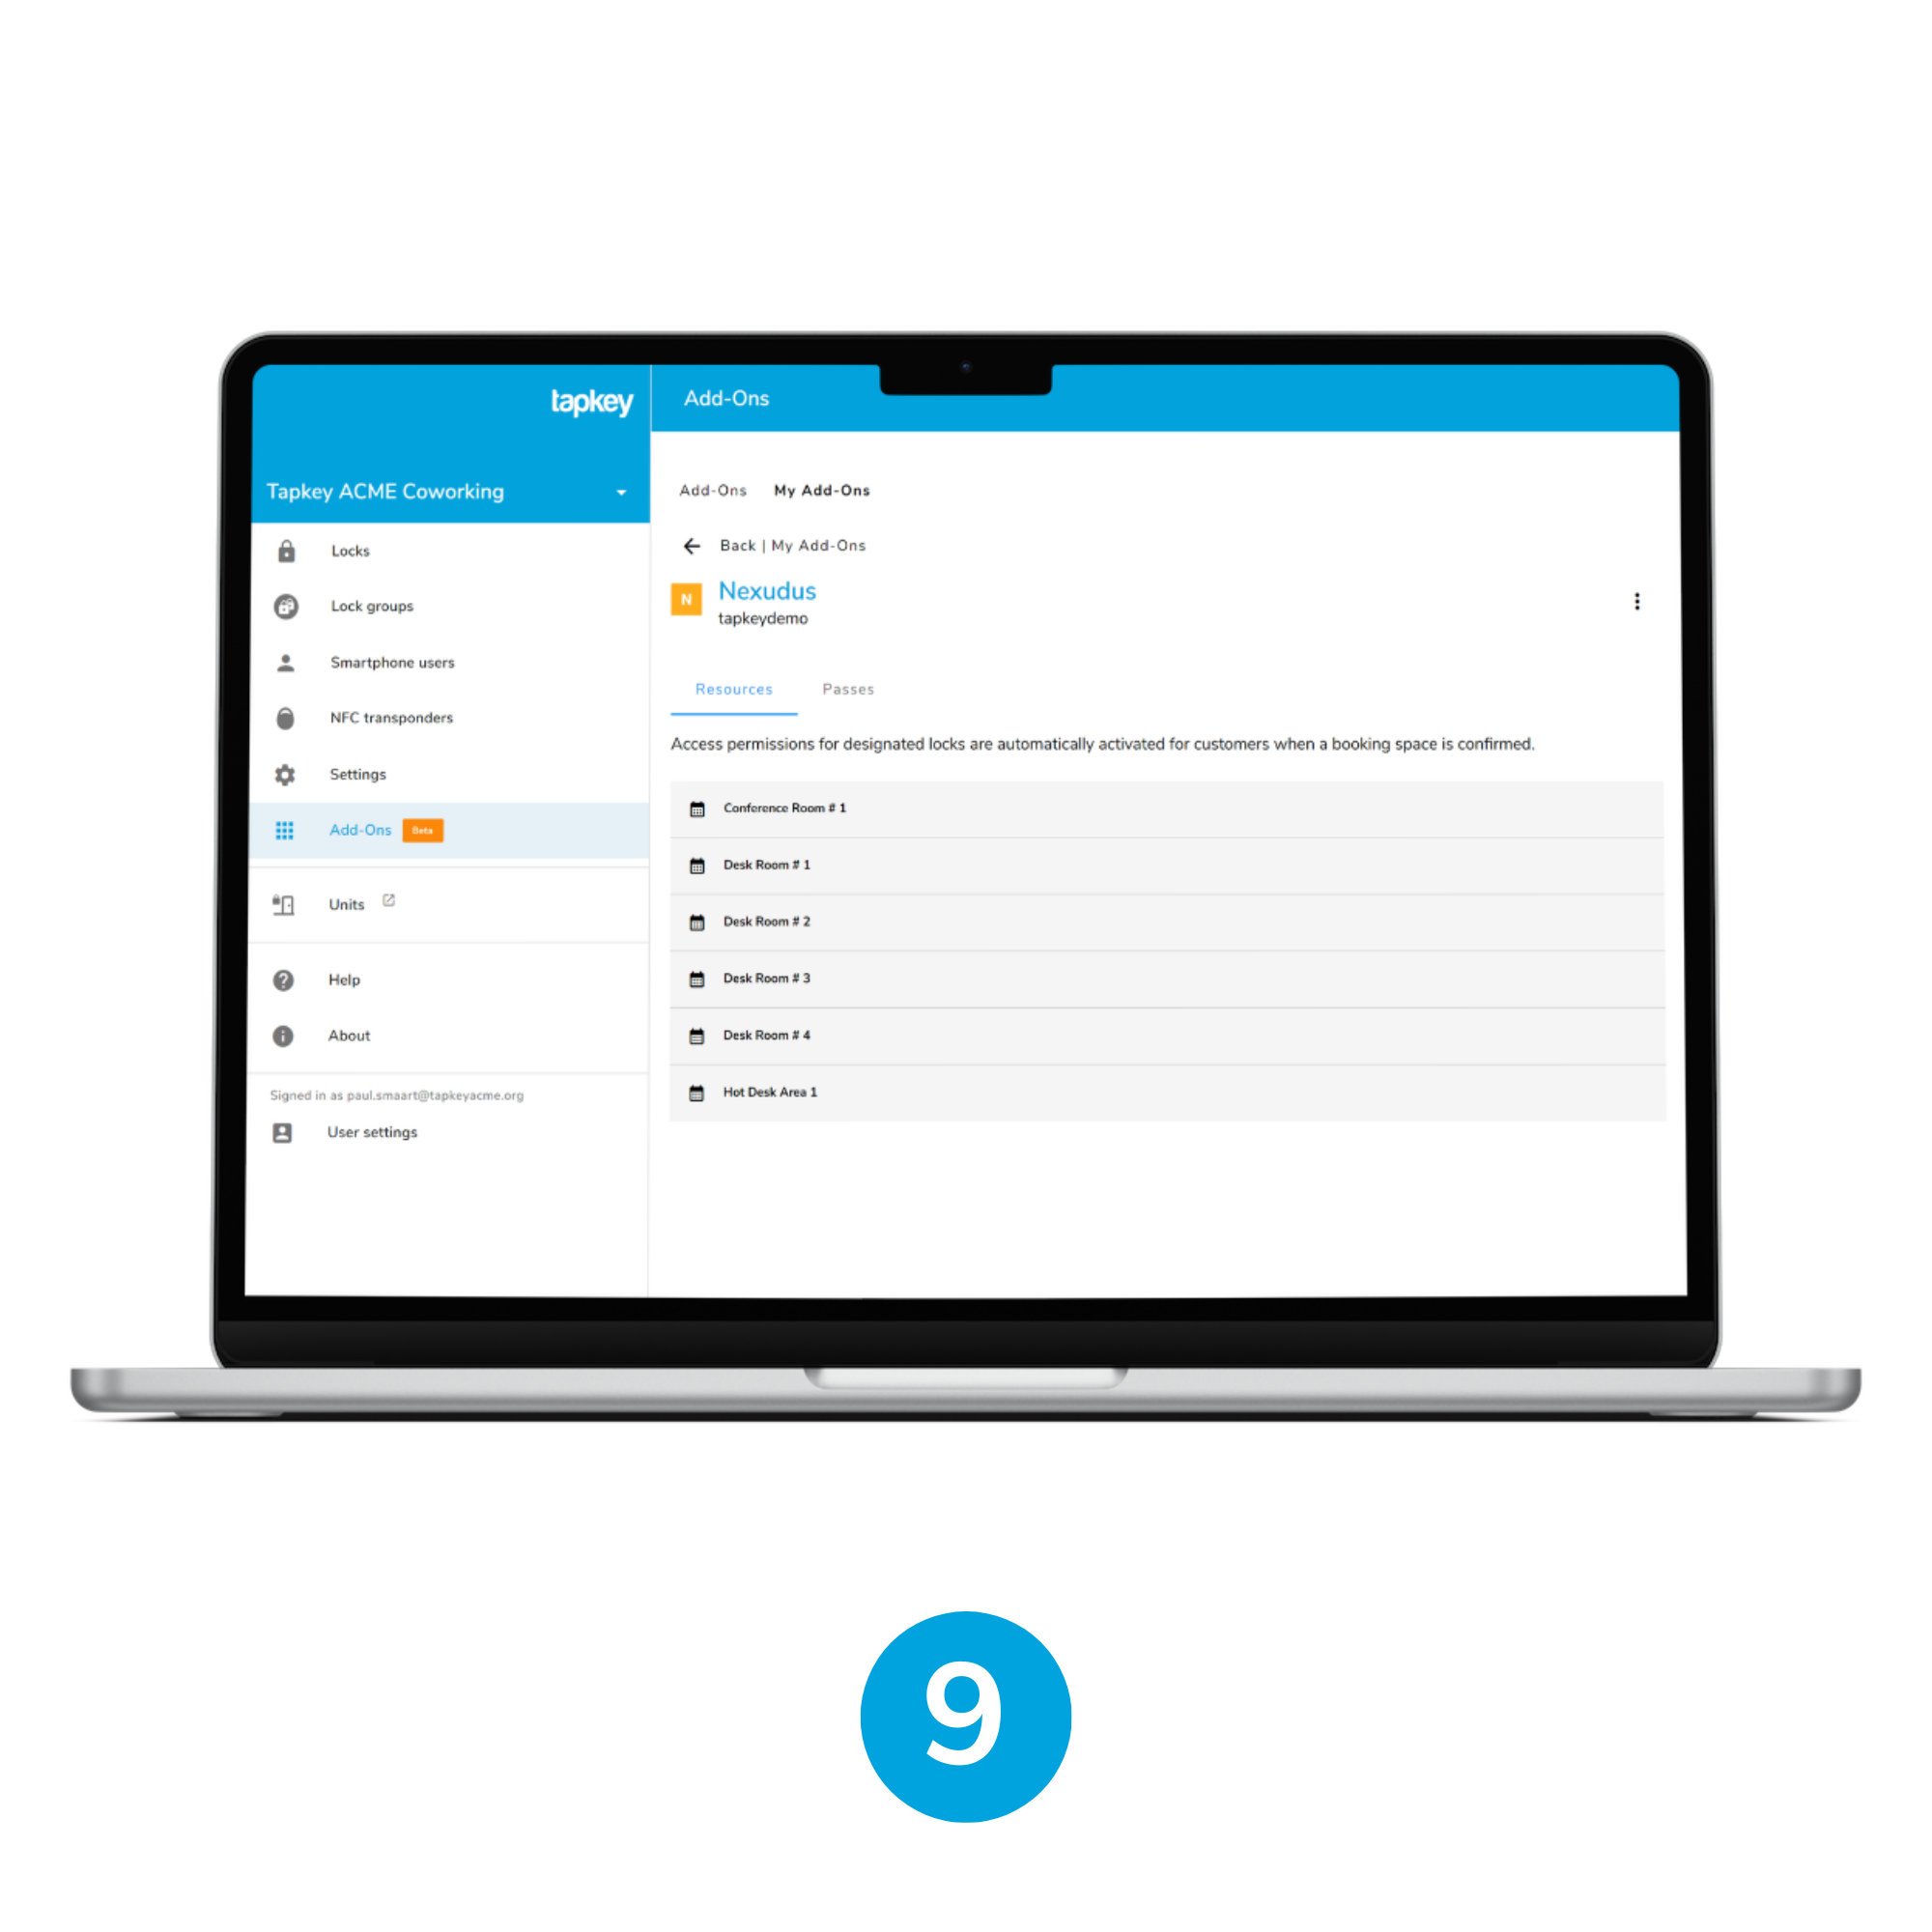
9. Your resources and passes displayed
After finishing with the Nexudus connection, the Tapkey application is going to display the list of resources and passes obtained from the coworking space.
Step 2: Setup Passes Sync with Tapkey Smart Locks
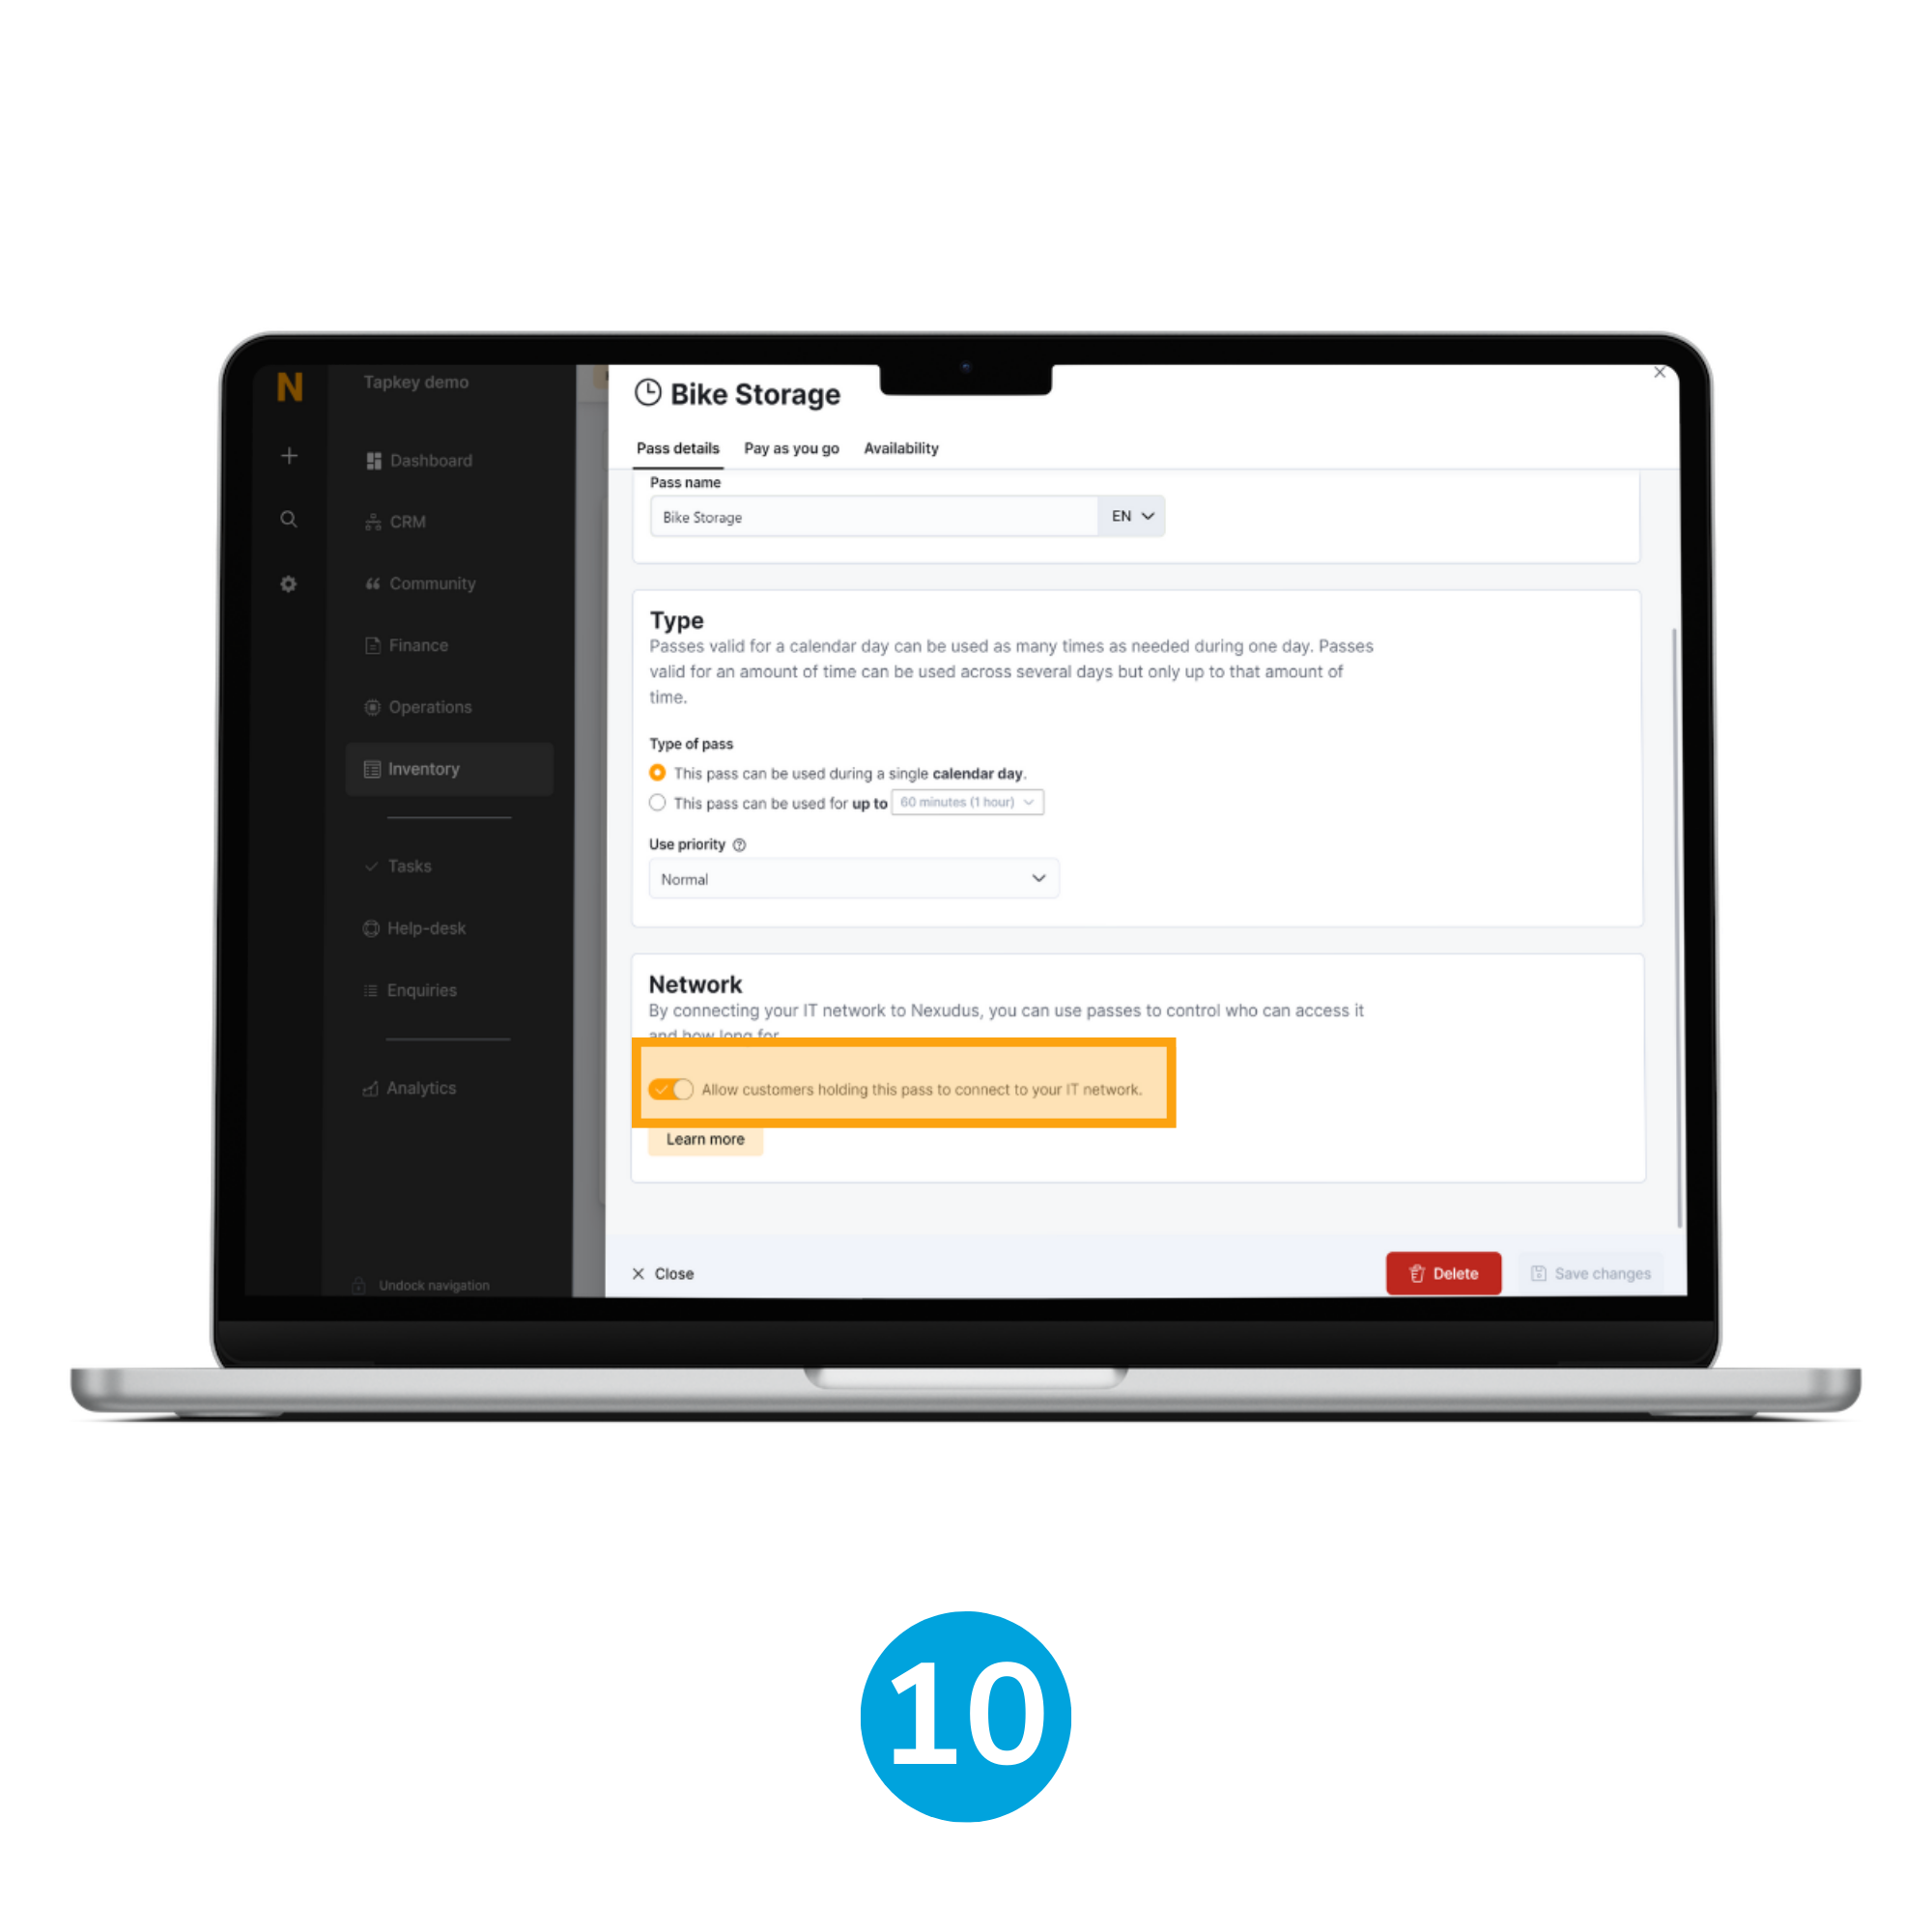
10. Connect your IT network
Important: It is important to notice that Passes required to be in Sync with Tapkey Smart Locks are required to have enabled Allow customers holding this pass to connect to your IT network, this will ensure better communication between Nexudus and Tapkey.
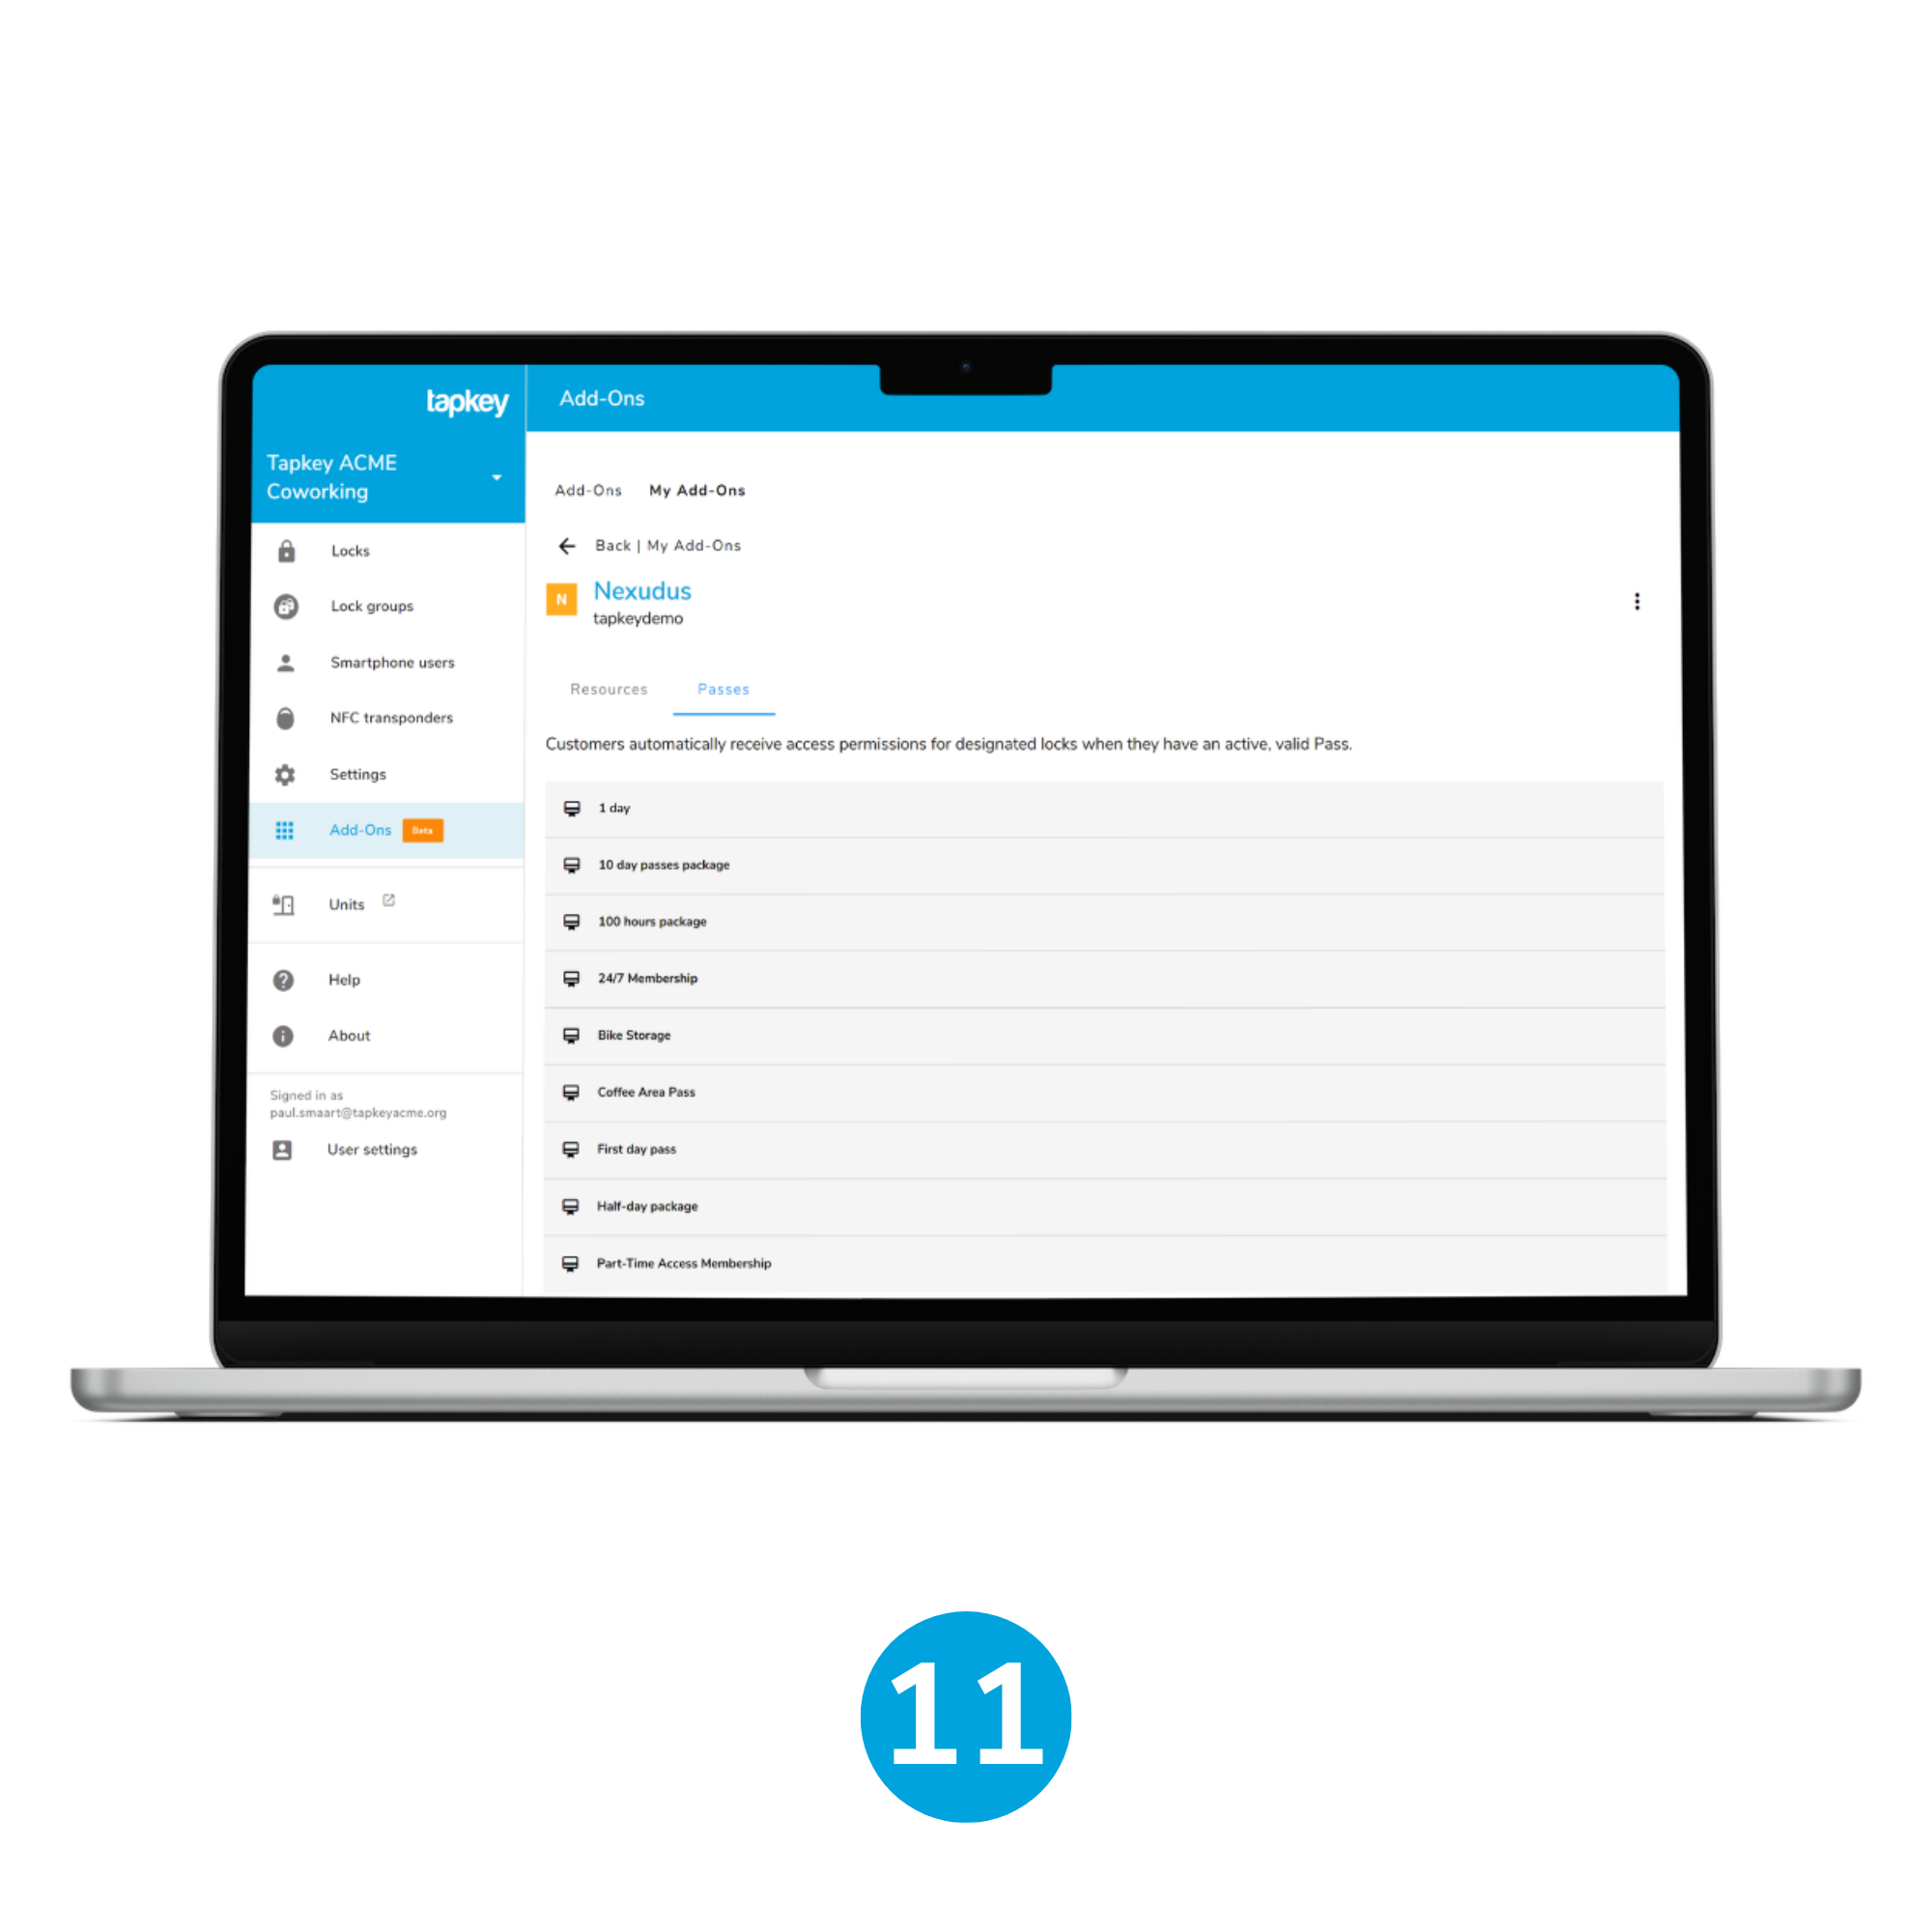
11. Navigate to Passes
After running the installation of Nexudus, navigate to the Passes tab in the Add-On Details.
12. Select pass and locks
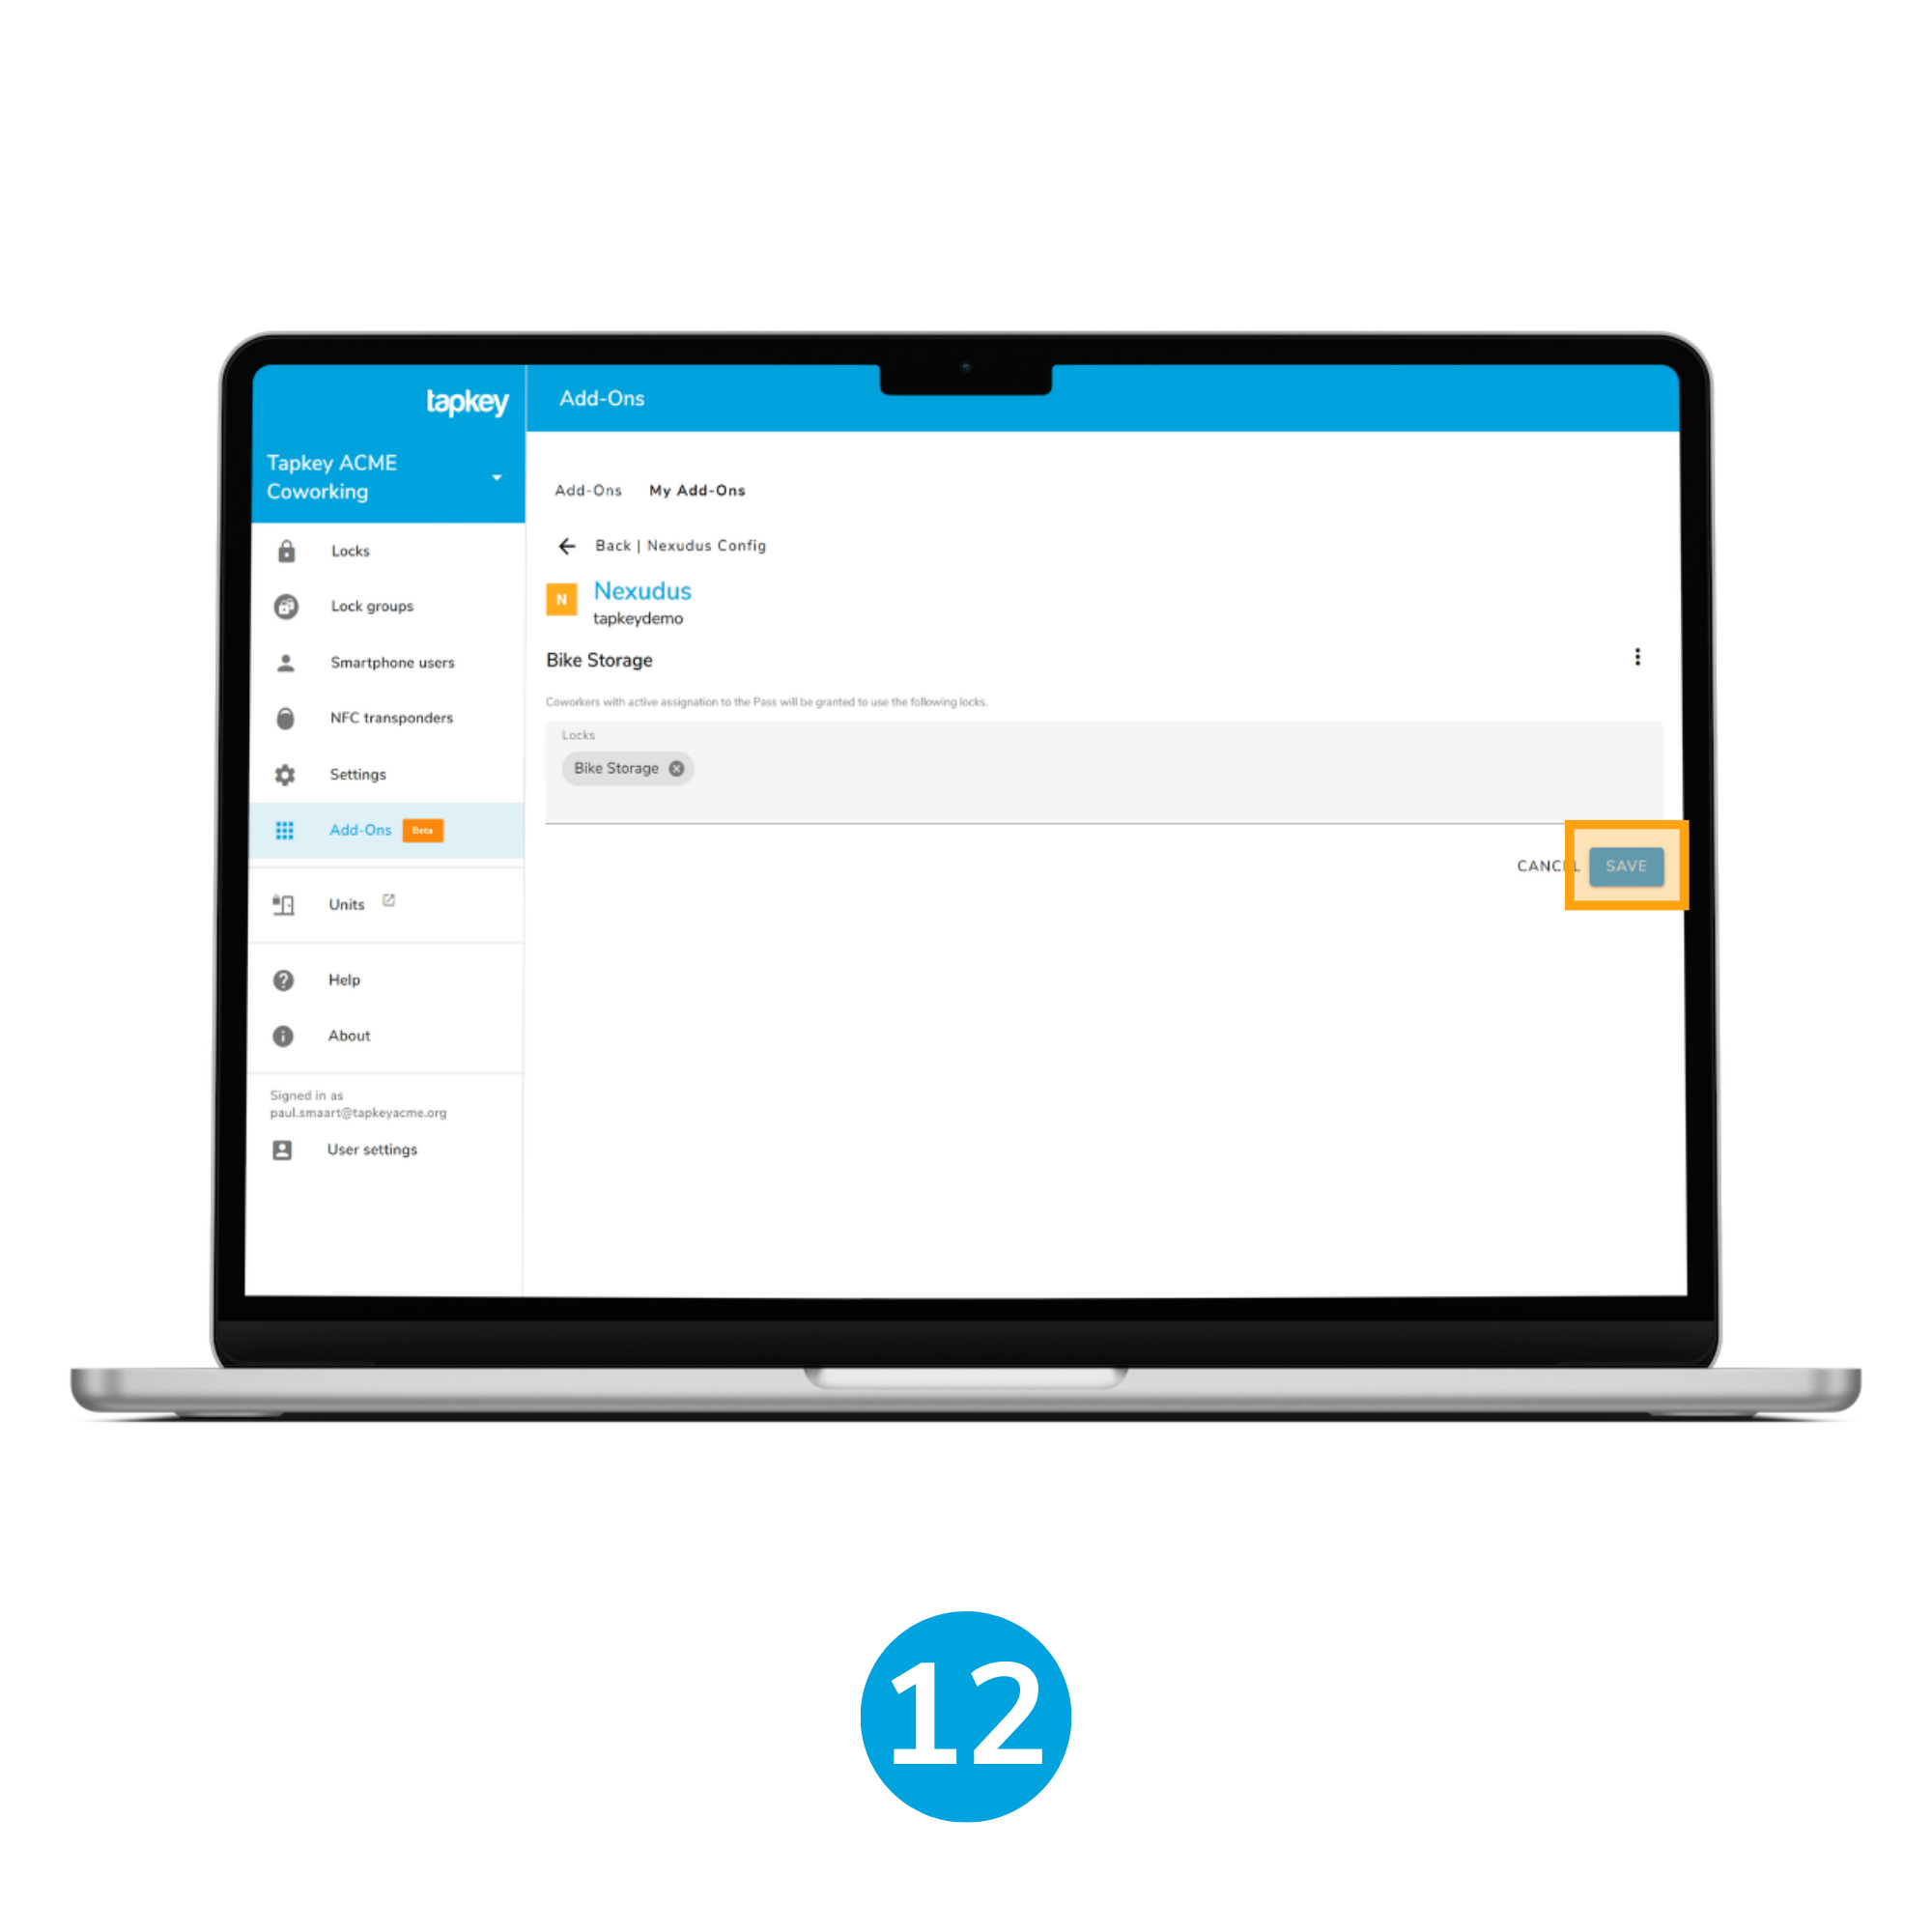
Select the Pass required to be in sync with locks, in this case, we are going to select Bike Storage. Once on the setup page, proceed to add the locks which are going to be in sync with the customer pass assignations. When Locks are selected, click save.
That's it - congrats!
Was this article helpful?
That’s Great!
Thank you for your feedback
Sorry! We couldn't be helpful
Thank you for your feedback
Feedback sent
We appreciate your effort and will try to fix the article